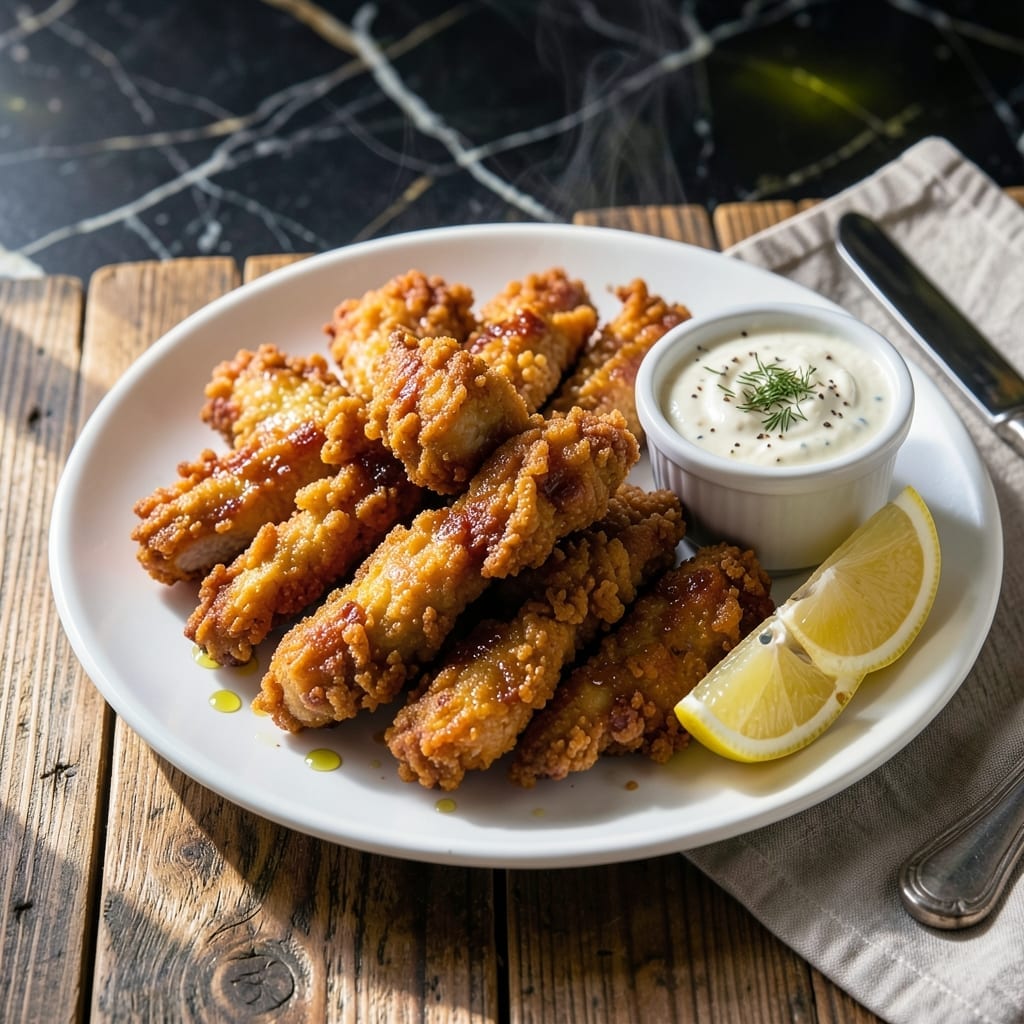
This deep fryer method delivers the tender chicken and shatteringly crisp coating you expect from professional kitchens. I developed this technique after years of testing to achieve consistent results at home.
The secret lies in a double-dredge process and maintaining the oil at 350°F. Each piece emerges golden and crunchy without absorbing excess oil, creating that perfect contrast between the juicy interior and crisp exterior.
Safety is paramount when working with hot oil. I always keep a thermometer handy and work in small batches to prevent overcrowding. The results justify the care—every bite offers that satisfying crunch.
These tenders pair beautifully with honey mustard or ranch dressing. The method works equally well for chicken strips or nuggets.
Ingredients for Fried Chicken Tenders Recipe Deep Fryer
Professional results require quality ingredients and precise technique for this dish.
| Ingredient | Amount | Notes |
|---|---|---|
| Chicken Breast Tenders 🍗 | 1 ½ lb | Boneless, skinless, uniform size |
| All-Purpose Flour 🌾 | 2 cups | Divided for double dredging |
| Cornstarch 🌾 | ½ cup | For extra crispiness |
| Large Eggs 🥚 | 2 whole | Beaten for wash |
| Buttermilk 🥛 | 1 cup | Full-fat for tenderness |
| Baking Powder 🧂 | 1 tsp | For lift in coating |
| Salt 🧂 | 2 tsp | Diamond Crystal kosher preferred |
| Garlic Powder 🧄 | 1 tsp | Freshly ground if possible |
| Onion Powder 🧅 | 1 tsp | Balances seasoning blend |
| Paprika 🌶️ | 1 tsp | Sweet or smoked variety |
| Black Pepper 🌶️ | 1 tsp | Freshly ground for best flavor |
| Cayenne Pepper 🔥 | ¼ tsp | Adjust to heat preference |
| Vegetable Oil 🫒 | 8 cups | For deep frying, high smoke point |
[recipe_ingredient_scaler]
The chicken quality is non-negotiable. Air-chilled breast tenders from Whole Foods or Costco yield the most consistent results—uniform size ensures even cooking. Avoid pre-marinated versions as they can interfere with the dredge adhesion. For the flour, King Arthur all-purpose provides the ideal protein content for crisp coating formation. The buttermilk must be full-fat; low-fat versions lack the acidity necessary for proper tenderization.
No buttermilk? Whole milk with 1 tbsp vinegar per cup works in a pinch (let sit 5 minutes). Cornstarch can be replaced with arrowroot powder at equal volume, though the texture will be slightly different. For gluten-free, rice flour plus cornstarch at a 3:1 ratio maintains crispness. The seasoning blend is deliberately balanced—do not omit the baking powder as it creates the micro-air pockets essential for shatter.
Freshly dredged tenders can rest 15 minutes before frying to enhance coating adhesion. Store raw tenders in the coldest part of the refrigerator for up to 24 hours. Cooked tenders maintain crispness for 20 minutes at room temperature—reheating is not recommended as it compromises texture integrity.
Why You’ll Love This Recipe
- I’ll be real: they’re so good cold the next day, but they never last that long.
- Deep Fry Simple: I just coat, dip, and fry—no fancy steps, and the cornstarch makes the crust extra crispy.
- Buttermilk Magic: That tangy buttermilk soak keeps the chicken juicy while the flour gives it the perfect crunch.
- Crowd Pleaser: Honestly, these disappear faster than I can make them, whether it’s game day or a random Tuesday.
Step-by-Step Instructions for Fried Chicken Tenders Deep Fryer
Achieve professional-grade crispiness with this proven method for perfectly cooked tenders.
Step 1: Prepare the Seasoned Flour Dredge
In a large shallow dish, combine the 2 cups all-purpose flour, 0.5 cup cornstarch, 1 tsp baking powder, 2 tsp salt, 1 tsp garlic powder, 1 tsp onion powder, 1 tsp paprika, 1 tsp black pepper, and 0.25 tsp cayenne pepper. Whisk thoroughly until all spices are evenly distributed throughout the mixture.
This double-starch blend creates an ultra-crispy coating that shatters with each bite. The cornstarch adds an extra layer of crunch, while the baking powder introduces tiny air pockets for a lighter texture. I always sift the flour first to prevent lumps in the coating.
Step 2: Create the Buttermilk Egg Wash
In a separate shallow dish, whisk together the 2 whole large eggs and 1 cup buttermilk until fully homogenous. The mixture should appear pale yellow and slightly frothy. Full-fat buttermilk is essential here—it tenderizes the chicken while adding richness to the coating.
This wash serves as the adhesive that helps the flour mixture cling to the chicken. For optimal results, I recommend using eggs at room temperature. The buttermilk’s acidity also helps break down proteins in the chicken, ensuring maximum tenderness in the finished product.
Step 3: Double-Dredge the Chicken Tenders
Pat the 1.5 lb chicken breast tenders completely dry with paper towels to ensure the coating adheres properly. Working with one piece at a time, dredge each tender in the seasoned flour mixture, pressing gently to ensure full coverage. Shake off any excess, then dip into the buttermilk-egg wash, allowing any excess to drip off.
Return the tender to the flour mixture for a second coating, pressing firmly this time to create a thick, even layer. This double-dredging technique is what produces that signature shatteringly crisp exterior. Place the coated tenders on a wire rack set over a baking sheet to allow air circulation on all sides.
Step 4: Deep-Fry to Golden Perfection
Heat the 8 cups vegetable oil in a deep fryer or heavy-bottomed pot to 350°F. Use a deep-fry thermometer to monitor the temperature precisely, as oil temperature is critical for both crispiness and even cooking. The oil should be deep enough to fully submerge the tenders without crowding the fryer.
Working in batches to avoid lowering the oil temperature, carefully lower 3-4 tenders into the hot oil. Fry for 6-8 minutes, turning occasionally, until the coating is deep golden brown and the internal temperature reaches 165°F. The tenders should float freely when done, and the coating should be crisp enough to make an audible crunch when removed from the oil.
Transfer the cooked tenders to a wire rack or paper towel-lined plate to drain excess oil. Maintain the oil temperature between batches by allowing it to return to 350°F before adding more tenders. This temperature control prevents greasy results and ensures consistent crispiness throughout the entire batch.
Pro Tips For Making Fried Chicken Tenders Recipe Deep Fryer
- Double Fry for Crisp: Fry once at 325°F for 4-5 minutes, rest 2 minutes, then fry again at 375°F for 1-2 minutes. I learned this the hard way—single frying leaves the crust limp by the time it hits the plate.
- Buttermilk Soak Overnight: Give those tenders a long bath in buttermilk, at least 4 hours but ideally overnight. Sounds weird, but it works: the acid tenderizes the meat and the coating clings better.
- Skip the Crowding: Resist the urge to dump all the tenders in at once—overcrowding drops the oil temp fast. I burned three batches before realizing 4-5 pieces at a time is the sweet spot for my deep fryer.
- Cornstarch Boost: Swap 1/4 of the flour for cornstarch in your dredge. My grandmother swore by this, and she was right: it makes the crust shatteringly crisp without turning greasy.
Wine and Beer Pairings for This fried chicken tenders recipe deep fryer
Crisp Beer Pairings
A cold IPA cuts through the richness beautifully—I love Deschutes Fresh Squeezed IPA from our local Portland brewery. The citrusy hop profile complements the seasoned coating. For a lighter option, try a pilsner like Stella Artois, its crispness refreshes your palate between bites. 🍺
White Wine Surprises
Don’t overlook whites! A chilled Riesling with its touch of sweetness balances the heat from the cayenne. I’ve had great luck with Chateau Ste. Michelle from Washington. The acidity in a Sauvignon Blanc also works wonders with the crispy texture.
For a bolder choice, Viognier offers floral notes that pair surprisingly well with the garlic and onion in the coating.
Dark Beer Lovers
If you prefer darker brews, a porter or stout can be delicious. The roasted malt in Guinness enhances the savory notes. I’d avoid heavy imperial stouts though—they can overpower the chicken’s delicate seasoning. 💫
Rosé or Sparkling
A dry rosé from Provence brings a refreshing contrast to the fried richness. For celebrations, Prosecco bubbles cleanse your palate between each crispy bite. Both options work wonderfully at summer picnics.
Nutrition Facts
Frequently Asked Questions
What’s the ideal oil temperature for frying?
Maintain oil at 350°F throughout cooking. This ensures crispness without burning. Use a thermometer to monitor closely.
How do I prevent soggy coating?
Fry in small batches to avoid dropping oil temperature. Drain on a wire rack, not paper towels, to preserve crispiness.
Can I use an air fryer instead?
Yes, but results differ. Air fry at 375°F for 12-15 minutes, flipping halfway. The texture won’t be as shatteringly crisp.
How long should I rest the chicken before frying?
Let double-dredged tenders rest 15 minutes before frying. This helps the coating adhere better for crisper results.

Trained in classic French technique but raised on slow-cooked ribs and spicy rubs, she blends culinary skill with smoke and soul.
- Recipe for Boneless Pork Chops in Cast Iron Skillet: Sear and Baste to Juicy Perfection - October 3, 2026
- Recipe for Boneless Cross Rib Roast: Slow-Roasted Beef with Herb Crust - October 3, 2026
- Hamburgers in Sauce Recipe Crock Pot: Slow-Cooked Savory Delight - October 3, 2026