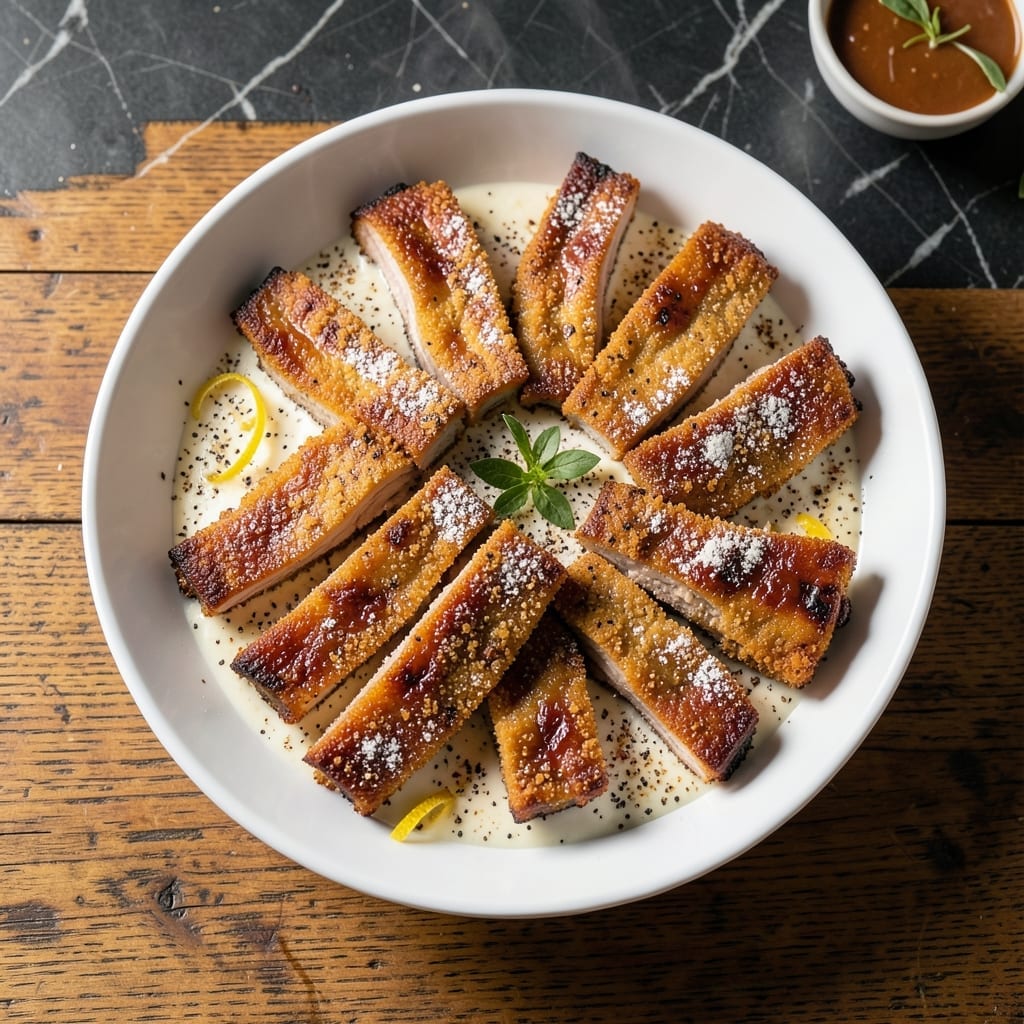
Helping Nana Mae in her Peachtree Street diner taught me the secret to crispy fried ribs with tender meat inside. This method delivers the perfect balance every time.
With a simple seasoning blend and careful frying temperature, you’ll achieve that golden crust while keeping the pork juicy. Serve with classic Southern sides for a meal that feels like home.
Ingredients for Fried Country Style Ribs
Simple ingredients deliver that perfect crispy and tender bite every time.
| Ingredient | Amount | Notes |
|---|---|---|
| Country Style Pork Ribs 🥩 | 2 lb | Boneless, cut into strips |
| All-Purpose Flour 🌾 | 1 ½ cups | For dredging ribs |
| Cornstarch 🌾 | ½ cup | For extra crispiness |
| Salt 🧂 | 2 tsp | Kosher or sea salt |
| Black Pepper 🌶️ | 1 tsp | Freshly ground preferred |
| Garlic Powder 🧄 | 1 ½ tsp | Not garlic salt |
| Onion Powder 🧅 | 1 ½ tsp | Adds depth to seasoning |
| Paprika 🌶️ | 1 tsp | Sweet or smoked variety |
| Cayenne Pepper 🔥 | ¼ tsp | Adjust for heat preference |
| Buttermilk 🥛 | 1 cup | For soaking ribs |
| Vegetable Oil 🫒 | 4 cups | For deep frying |
| Large Eggs 🥚 | 2 whole | Beaten for binding |
[recipe_ingredient_scaler]
The ribs are everything here. Country style pork ribs (boneless, usually from the shoulder) give you that melt-in-your-mouth texture. Look for strips with good marbling at Publix or Kroger—they’re often pre-cut for convenience. If you’re at a butcher, ask for the rib end of the pork loin. Buttermilk from Whole Foods or any local dairy works, but avoid the low-fat kind (it won’t cling as well to the ribs).
No buttermilk? Mix 1 cup milk with 1 tbsp vinegar or lemon juice and let it sit for 5 minutes. Swap cornstarch for potato starch if needed. The flour can be all-purpose or self-rising (just skip the salt in the seasoning). For heat lovers, add extra cayenne or a pinch of red pepper flakes. Freshly ground black pepper makes a difference, but pre-ground works in a pinch.
Leftovers keep 3-4 days in the fridge, though they’re best fresh. Reheat in the oven at 350°F to keep them crispy—microwaving makes them soggy. Freeze cooked ribs for up to 3 months (thaw in the fridge before reheating).
Why You’ll Love This Recipe
- One Pan Magic: I just toss the ribs in flour, cornstarch, salt, and pepper—no fancy prep, no fuss.
- Crispy Perfection: That cornstarch in the coating gives them this insane crunch you just can’t resist.
- Feeds the Crew: I make a big batch for Sunday dinner, and everyone—even the picky eaters—cleans their plates.
- Budget Hero: Country style ribs are cheaper than baby backs, and this recipe makes them taste like a million bucks.
Step-by-Step Instructions for Fried Country Style Ribs
Here’s how to get that perfect crunch on the outside with fall-off-the-bone meat inside.
Step 1: Soak the Ribs in Buttermilk and Egg
Cut the 2 lb Country Style Pork Ribs into even strips if not already pre-cut. In a large bowl, whisk together the 1 cup Buttermilk and 2 whole Large Eggs until fully combined.
Submerge the ribs in the mixture, ensuring they’re fully coated. Let them soak for at least 30 minutes—this tenderizes the meat and helps the coating stick. I’ve found this step is non-negotiable for that juicy bite.
Step 2: Prepare the Seasoned Dredge
In a shallow dish, combine the 1.5 cups All-Purpose Flour, 0.5 cup Cornstarch, 2 tsp Salt, 1 tsp Black Pepper, 1.5 tsp Garlic Powder, 1.5 tsp Onion Powder, 1 tsp Paprika, and 0.25 tsp Cayenne Pepper.
Whisk until evenly mixed—the cornstarch is what gives that extra crispiness. The spices should be fully distributed so every bite is packed with flavor. Don’t skip sifting if your flour is lumpy; smooth dredge means even coating.
Step 3: Coat the Ribs Thoroughly
Remove the ribs from the buttermilk mixture, letting any excess drip off. Dredge each piece in the flour mixture, pressing gently to ensure the coating adheres completely. Shake off any loose bits—you want a thick, even layer that’ll fry up golden.
Place the coated ribs on a wire rack or plate and let them rest for 10 minutes. This helps the coating set, so it doesn’t slide off during frying. Here’s the thing—this rest makes all the difference in keeping the crust intact.
Step 4: Fry to Golden Perfection
Heat 4 cups Vegetable Oil in a deep skillet or Dutch oven over medium-high heat to 350°F. Use a thermometer for accuracy—oil that’s too cool will make the ribs greasy, and oil that’s too hot will burn the outside before the inside cooks.
Fry the ribs in batches to avoid overcrowding, which lowers the oil temperature. Cook for 6-8 minutes until deep golden brown and crispy. Turn them halfway through for even browning. Drain on a wire rack or paper towels, not stacked—this keeps them crispy.
Let them rest for 5 minutes before serving. The meat will stay tender while the crust stays shatteringly crisp. Serve hot for the best experience.
Pro Tips For Making Fried Country Style Ribs
- Dry the Ribs First: Pat the country style ribs completely dry with paper towels before dredging—I learned this the hard way after ending up with a gummy coating instead of a crispy crust.
- Double Dredge: Toss the ribs in flour first, then dip in a cornstarch-salt-pepper mix for extra crunch. Sounds weird, but it works: the cornstarch makes a real difference in the final texture.
- Hot Oil, Low Crowd: Use oil at 350°F and fry in small batches—overcrowding drops the temperature and gives you soggy ribs instead of golden, crispy ones.
- Rest Before Serving: Let the fried ribs sit on a wire rack for 5 minutes after cooking. My grandmother swore by this, and she was right: it keeps them crispy instead of steaming in their own juices.
Pro Cooking Tips for Perfect Results
Oil Temperature Control
Maintaining 350°F oil temperature is everything. I use a deep-fry thermometer from Taylor—it clips to the pot and gives instant readings. If the oil drops below 325°F, the ribs absorb grease instead of crisping. 🌡️
Batch Frying Strategy
Never crowd the pot—fry in small batches with space between pieces. I can fit about 4-5 rib strips in my 5-quart Dutch oven at a time. Overcrowding lowers oil temp and creates soggy results. David always reminds me patience pays off here.
Resting the Coating
After dredging, let the ribs rest for 10 minutes on a wire rack. This sets the coating so it doesn’t slide off during frying. I learned this trick at Nana Mae’s diner—it’s the difference between good and great fried ribs.
Double-Fry Technique
For extra crispiness, try a two-stage fry: 325°F for 4 minutes, rest 2 minutes, then 375°F for 2 minutes. This method, popular in Southern kitchens, creates a shatteringly crisp crust while cooking the meat through perfectly.
Draining Properly
Drain on a wire rack, not paper towels. Stacking on towels traps steam, making the crust soggy. I place mine on a cooling rack set over a baking sheet. The airflow keeps them crisp while excess oil drips away.
Oil Reuse Tips
Let used oil cool completely before straining through a fine-mesh sieve. Store in a cool, dark place for up to 1 month. I reuse mine 2-3 times for frying ribs—just top up with fresh oil as needed.
Nutrition Facts
Frequently Asked Questions
What oil works best for frying?
Vegetable or peanut oil is ideal because of their high smoke points. Avoid olive oil—it burns at frying temps. Maintain 350°F for perfect crispiness.
Can I bake instead of fry?
Yes, but results differ. Bake at 400°F for 20-25 minutes, flipping halfway. The crust won’t be as crisp, but it’s a healthier option.
Why did my coating fall off?
Likely skipped the 10-minute rest after dredging or didn’t pat ribs dry before coating. Ensure the buttermilk soak is at least 30 minutes.
How do I keep them crispy longer?
Drain on a wire rack, not paper towels. Store in a single layer in a 200°F oven for up to 30 minutes before serving.

Trained in classic French technique but raised on slow-cooked ribs and spicy rubs, she blends culinary skill with smoke and soul.
- Recipe for Boneless Pork Chops in Cast Iron Skillet: Sear and Baste to Juicy Perfection - October 3, 2026
- Recipe for Boneless Cross Rib Roast: Slow-Roasted Beef with Herb Crust - October 3, 2026
- Hamburgers in Sauce Recipe Crock Pot: Slow-Cooked Savory Delight - October 3, 2026