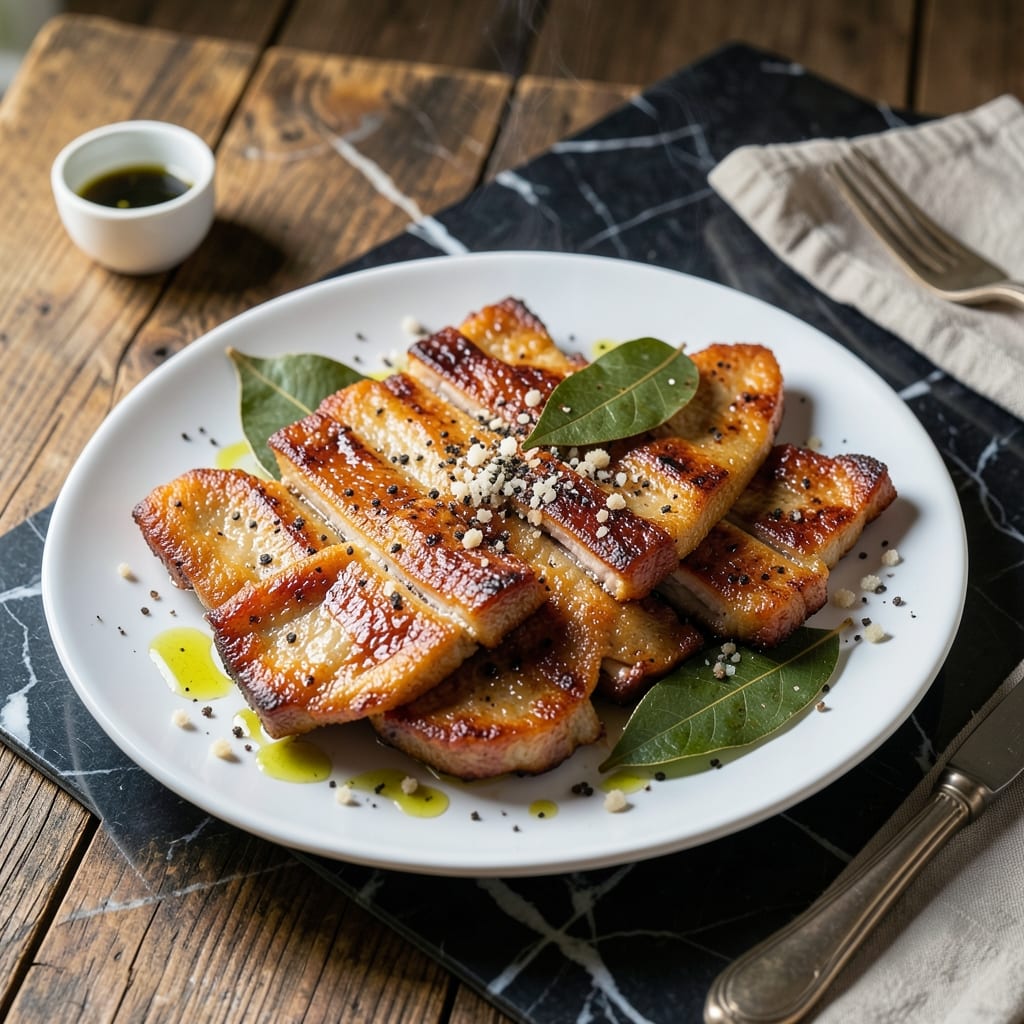
This Filipino-style fried pork belly delivers crispy skin and tender meat with minimal effort. I’ve tested this method repeatedly to ensure the perfect balance of texture and flavor in a home kitchen.
The secret lies in boiling the pork first to render fat and soften the meat before frying. This step guarantees a crispy exterior while keeping the inside juicy and succulent.
A garlicky soy glaze adds depth, elevating the dish beyond simple fried pork. The aroma alone will draw everyone to the table before the first bite.
Serve with steamed rice and a side of vinegar dipping sauce for the full experience. This is comfort food at its finest.
Ingredients for Fried Liempo Recipe Panlasang Pinoy
Pantry staples and pork belly create this Filipino comfort dish with ease.
| Ingredient | Amount | Notes |
|---|---|---|
| Pork Belly 🥓 | 2 lb | Skin-on, cut into 1-inch strips |
| Water 💧 | 6 cups | For boiling pork belly |
| Bay Leaves 🍃 | 2 whole | For boiling liquid |
| Salt 🧂 | 1 tbsp | For boiling water seasoning |
| Black Peppercorns 🌶️ | 1 tsp | Whole, for boiling |
| Vegetable Oil 🫒 | 2 cups | For deep frying |
| Soy Sauce 🥫 | ½ cup | Regular or all-purpose |
| Garlic Cloves 🧄 | 6 cloves | Minced for glaze |
| Brown Sugar 🍚 | 2 tbsp | For caramelizing glaze |
| White Vinegar 🍶 | ¼ cup | For dipping sauce |
| Red Onion 🧅 | 1 whole | Sliced for dipping sauce |
| Ground Black Pepper 🌶️ | ½ tsp | Freshly ground preferred |
[recipe_ingredient_scaler]
The pork belly is non-negotiable here. Asian markets or Costco have the best selection with thick skin—essential for that shatteringly crispy texture. Look for pieces with even fat-to-meat ratio. The bay leaves add subtle depth to the boiling liquid, so don’t skip them. If you can only find dried, use one-third the amount.
No bay leaves? A few sprigs of fresh thyme work in a pinch. Swap brown sugar for honey or coconut sugar in the glaze if that’s what’s in your pantry. The vinegar for dipping can be cane vinegar (traditional) or apple cider vinegar. If you’re out of soy sauce, tamari or coconut aminos are solid substitutes for the glaze.
The cooked pork belly keeps 3-4 days in the fridge, but it’s best fried fresh. Reheat leftovers in the air fryer to revive the crispiness. The glaze can be made ahead and reheated gently—it thickens as it cools, so a splash of water helps loosen it.
Why You’ll Love This Recipe
- One Pan Wonder: I just toss pork belly, bay leaves, and peppercorns in a pot, simmer, then crisp it up—no fancy steps.
- Crispy & Juicy: That skin gets shatteringly crisp while the meat stays tender, with just salt and pepper to let the pork shine.
- Weeknight Hero: Honestly, it’s my go-to for busy evenings when I need something hearty with zero fuss.
- Stretches Far: Leftovers? They’re even better the next day, and a slab of pork belly feeds my whole family without breaking the bank.
Step-by-Step Instructions for Crispy Pork Belly With Garlicky Soy Glaze
This method ensures perfectly crispy pork belly with a rich, savory glaze every time.
Step 1: Boil the Pork Belly with Aromatics
In a large pot, combine the 6 cups Water, 2 whole Bay Leaves, 1 tbsp Salt, and 1 tsp Black Peppercorns. Bring to a boil over high heat, then add the 2 lb Pork Belly strips.
Reduce heat to medium-low and simmer for 40-45 minutes until the pork is tender but not falling apart. The pork should be soft enough to pierce easily with a fork but still hold its shape. This step removes impurities and pre-cooks the meat for even frying later.
Step 2: Deep-Fry to Crispy Perfection
Drain the pork belly and pat it completely dry with paper towels—this is critical for achieving maximum crispiness. In a deep skillet or pot, heat the 2 cups Vegetable Oil to 350°F over medium-high heat.
Fry the pork belly in batches to avoid overcrowding. Cook for 8-10 minutes until deeply golden brown and crispy all over. The skin should blister and puff slightly, and the pork should have a hollow sound when tapped. Drain on a wire rack or paper towels to maintain crispiness.
Step 3: Prepare the Garlicky Soy Glaze
In a small saucepan, combine the 0.5 cup Soy Sauce, minced 6 cloves Garlic Cloves, 2 tbsp Brown Sugar, and 0.5 tsp Ground Black Pepper. Bring to a simmer over medium heat and cook for 3-4 minutes, stirring frequently.
The glaze should thicken slightly and become glossy, with the sugar fully dissolved and the garlic fragrant. Watch carefully to prevent burning—the sugar can caramelize quickly. Once thickened, remove from heat and set aside.
Step 4: Toss and Serve with Dipping Sauce
In a large bowl, toss the crispy pork belly with the prepared soy glaze until evenly coated. The glaze should cling to the pork, creating a sticky, savory layer. Serve immediately while hot and crispy.
For the dipping sauce, combine the 0.25 cup White Vinegar with thinly sliced 1 whole Red Onion. Let it sit for 10 minutes to allow the flavors to meld. The acidity of the vinegar cuts through the richness of the pork beautifully.
Pro Tips For Making Fried Liempo Recipe Panlasang Pinoy
- Boil First, Fry Later: Start by simmering the pork belly in water with bay leaves, salt, and peppercorns for 30-40 minutes—this renders fat and keeps the meat juicy before frying.
- Pat It Dry: After boiling, dry the pork belly thoroughly with paper towels so the skin crisps up properly when frying—wet meat just steams instead of browning.
- Medium Heat Only: I learned this the hard way—frying liempo on high heat burns the outside before the inside cooks, so keep it at medium and turn it often for even crisping.
- Rest Before Serving: Give the fried liempo 5 minutes to rest on a rack or paper towels to keep it crispy, not soggy from trapped steam.
Make-Ahead Tips for This Dish
Pre-Boil Prep
I always parboil the 2 lb Pork Belly the morning of serving. This step can be done 8-12 hours ahead and stored in the fridge. The meat actually absorbs more flavor as it sits in the cooled broth. 💡
Glaze Ahead
The garlicky soy glaze keeps beautifully for 3-4 days in an airtight container. Make it first—it thickens as it cools, so reheat with 2 tbsp water to restore the perfect consistency before tossing with pork.
Frying Strategy
For make-ahead frying, cook the pork belly until just golden (about 6 minutes), then drain and cool. Refrigerate uncoated. Finish frying for 2-3 minutes right before serving to restore crispiness.
Dipping Sauce
Combine the ¼ cup White Vinegar and sliced Red Onion the night before. The flavors deepen overnight, and the onions mellow beautifully. Store in a jar in the fridge.
Storage Tips
Uncoated fried pork keeps 2 days in the fridge. Store in a single layer between paper towels to maintain texture. Re-crisp in a 400°F oven for 5-7 minutes before glazing. ❄️
Reheating Leftovers
Leftover glazed pork is best reheated in an air fryer at 375°F for 4-5 minutes. The circulating air revives the crispness better than a microwave, which can make the skin soggy.
Nutrition Facts
Frequently Asked Questions
Why do we boil the pork belly first?
Boiling removes impurities and renders excess fat, ensuring the meat stays tender during frying. This step also helps achieve an even crispy texture without drying the pork out.
Can I use a different cut of pork?
Pork belly is ideal for its fat-to-meat ratio and skin thickness. For a leaner option, pork shoulder works but won’t have the same crispy skin or rich flavor. Stick with belly for best results.
How do I keep the pork crispy after cooking?
Drain on a wire rack, not paper towels, to prevent steam buildup. Serve immediately, or re-crisp in a 400°F oven for 5-7 minutes if storing.
Can I make this without deep frying?
Yes! Use an air fryer at 375°F for 12-15 minutes, flipping halfway. The texture won’t be identical, but it’s a great alternative.

Trained in classic French technique but raised on slow-cooked ribs and spicy rubs, she blends culinary skill with smoke and soul.
- Recipe for Boneless Pork Chops in Cast Iron Skillet: Sear and Baste to Juicy Perfection - October 3, 2026
- Recipe for Boneless Cross Rib Roast: Slow-Roasted Beef with Herb Crust - October 3, 2026
- Hamburgers in Sauce Recipe Crock Pot: Slow-Cooked Savory Delight - October 3, 2026