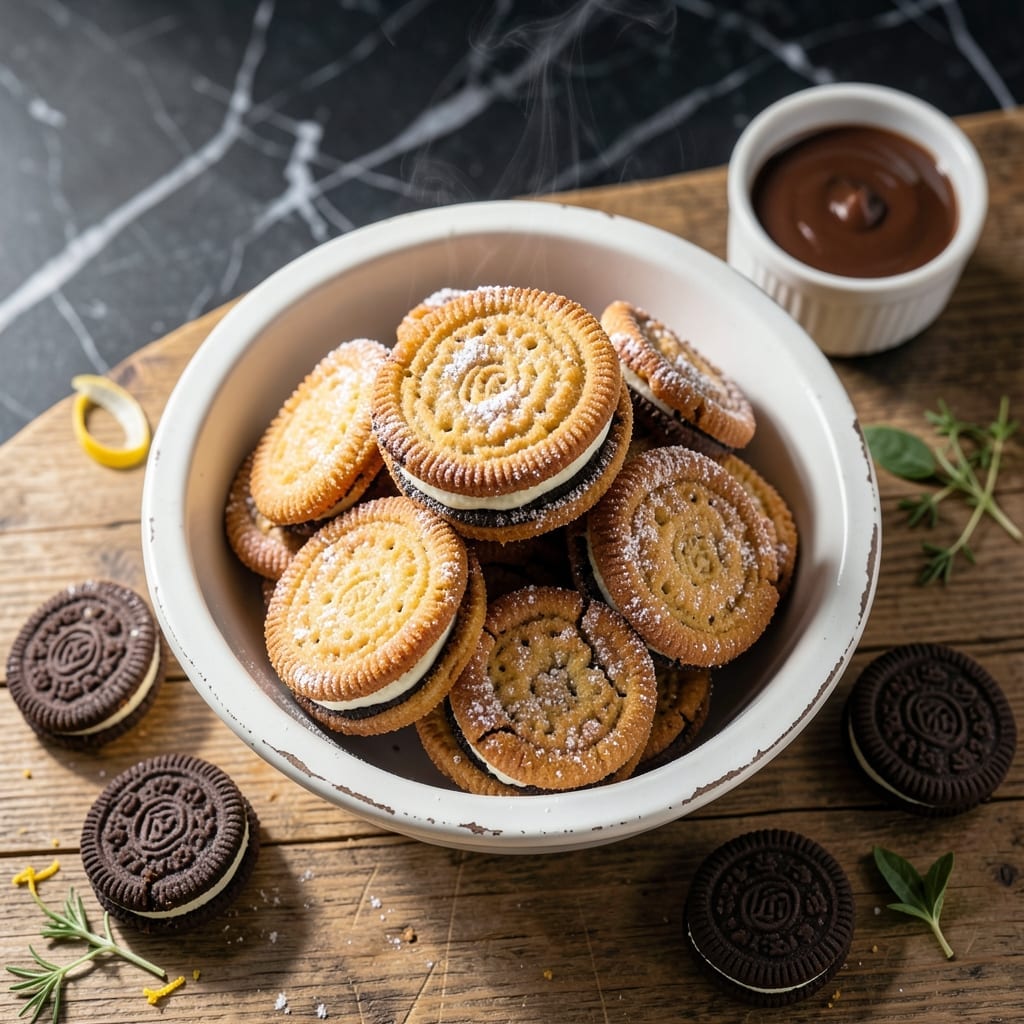
I perfected this method after testing multiple batter ratios in my small Boston kitchen. The flour-based coating creates a crispy shell that gives way to the signature creamy center we all love.
This approach uses simple pantry staples and a precise frying temperature to ensure consistent results. The key is maintaining hot oil throughout the process for even browning.
You’ll achieve that ideal contrast between the golden exterior and the soft, melty cookie inside. The flour in the batter provides structure that holds up to the heat.
Serve warm for the best texture experience. The technique works with any Oreo flavor variation.
Ingredients for Fried Oreo Recipe with Flour
Simple pantry staples transform into golden, crispy perfection with melty centers.
| Ingredient | Amount | Notes |
|---|---|---|
| Oreo Cookies 🍪 | 12 whole | Any flavor variation works |
| All-Purpose Flour 🌾 | 1 ½ cups | For crispy batter coating |
| Granulated Sugar 🍚 | ¼ cup | Balances batter sweetness |
| Baking Powder 🧂 | 1 tsp | For light, airy batter |
| Salt 🧂 | ¼ tsp | Enhances flavor contrast |
| Large Eggs 🥚 | 2 whole | Beaten, for batter binding |
| Whole Milk 🥛 | 1 cup | Creates smooth, thick batter |
| Vanilla Extract 🌿 | 1 tsp | Pure extract preferred |
| Vegetable Oil 🫒 | 4 cups | For deep frying |
| Powdered Sugar ✨ | ½ cup | For dusting finished cookies |
[recipe_ingredient_scaler]
The flour is doing heavy lifting here—King Arthur or Gold Medal give that perfect crisp structure. I always sift mine (worth the extra minute) to avoid lumps in the batter. The baking powder? Fresh is non-negotiable—old stuff won’t give you that lift. For the oil, peanut or canola works too if you prefer, but vegetable’s neutral flavor lets the cookie shine.
No milk on hand? Buttermilk at the same amount adds a nice tang. Egg-free? Flax eggs (1 tbsp ground flax + 3 tbsp water per egg) work surprisingly well. For the Oreos, Double Stuf or Mega Stuf give you more creamy center per bite. Out of vanilla? Almond extract at half the amount is a solid swap.
Batter keeps in the fridge for 24 hours if you prep ahead. Fry in batches and keep warm on a rack—paper towels make them soggy. Leftovers (ha!) stay fresh for 2 days in an airtight container at room temp.
Why You’ll Love This Recipe
- Under 20 Minutes: I can mix the flour, sugar, and baking powder while the oil heats—no fancy prep, just quick frying.
- Crispy Meets Creamy: That hot, golden crust around the still-soft Oreo center? Ridiculously good.
- Fair Favorite: I make a batch for birthdays, game nights, or just because it’s Tuesday and we need joy.
- Budget Dessert: A bag of Oreos and pantry staples feed a crowd for less than takeout.
Step-by-Step Instructions for Fried Oreos
Here’s how to achieve that perfect crunch outside with a gooey center every time.
Step 1: Prepare the Batter Base
In a mixing bowl, whisk together the 1.5 cups All-Purpose Flour, 0.25 cup Granulated Sugar, 1 tsp Baking Powder, and 0.25 tsp Salt until fully combined. This dry mixture forms the backbone of your crispy coating.
I always sift my flour first to prevent lumps in the batter, which ensures a smooth, even texture when fried. The baking powder creates tiny air pockets that contribute to that light, airy crunch we’re after.
Step 2: Create the Wet Mixture
In a separate bowl, beat the 2 whole Large Eggs lightly, then whisk in the 1 cup Whole Milk and 1 tsp Vanilla Extract until smooth. The vanilla adds a subtle depth that complements the Oreo cookies beautifully.
Slowly pour the wet ingredients into the dry mixture while whisking continuously. The batter should be thick enough to coat the back of a spoon but not so thick that it’s gloopy. If it seems too stiff, add a splash more milk.
Step 3: Heat the Oil to Perfect Temperature
Pour the 4 cups Vegetable Oil into a deep, heavy-bottomed pot or Dutch oven, leaving at least 2 inches of space at the top. Heat over medium-high heat until it reaches 350°F on a deep-fry thermometer.
Here’s the thing—if your oil isn’t hot enough, the Oreos will absorb too much oil and become greasy instead of crispy. If it’s too hot, they’ll brown too quickly without cooking through. I always test with a drop of batter: it should sizzle immediately and float to the surface.
Step 4: Coat and Fry the Oreo Cookies
Dip each of the 12 whole Oreo Cookies into the batter, ensuring they’re completely coated on all sides. Let any excess drip off for a moment—this prevents thick, doughy spots that won’t cook through.
Carefully lower the coated cookies into the hot oil, working in batches to avoid crowding the pot. Fry for 2-3 minutes per side until golden brown and crispy. Use a slotted spoon to turn them gently—don’t pierce the coating or the filling might leak out.
Step 5: Drain and Dust with Powdered Sugar
Transfer the fried Oreos to a paper towel-lined plate to drain excess oil. While they’re still warm, dust generously with the 0.5 cup Powdered Sugar using a fine-mesh sieve. The sugar melts slightly from the heat, creating a beautiful, snowy coating.
Let them cool for 5 minutes before serving—the filling stays creamy but becomes safer to bite into. Each one should have a shatteringly crisp exterior giving way to that familiar Oreo cream center, now slightly warm and extra gooey.
Pro Tips For Making Fried Oreo Recipe With Flour
- Chill the Oreos: Freeze the Oreos for at least 30 minutes before dipping in batter—it keeps the filling from oozing out and makes them easier to coat evenly.
- Thin the Batter: If your flour-sugar batter seems too thick, add a splash of milk or water until it’s pancake-like; it clings better to the cookies and fries up lighter.
- Skip Overcrowding: Fry only 1-2 Oreos at a time in hot oil, or the temperature drops and you’ll end up with greasy, soggy results instead of crispy ones.
- Drain Upside Down: After frying, place them on a wire rack or paper towels with the seam side up so excess oil drips off without pooling on the top.
Flavor Customization for This Dish
Spiced Chocolate Twist
Add 1 tsp cinnamon and ½ tsp cayenne to your dry mix for a Mexican chocolate kick. The warmth complements the cookie’s chocolate base beautifully. I tested this in my tiny Boston kitchen—it’s a crowd favorite. 🌶️
Citrus Zing Variation
Stir 1 tbsp orange zest into the batter for bright contrast against the rich filling. Use freshly grated zest—the bottled stuff doesn’t deliver the same punch. Pairs especially well with original Oreos.
Nutty Crunch Addition
Press crushed pecans or almonds into the batter before frying for extra texture. Lightly toast the nuts first for deeper flavor. I prefer pecans—they add a buttery note that works with the creamy center.
Double Chocolate Indulgence
Replace ¼ cup flour with unsweetened cocoa powder for intense chocolate flavor. This works best with Double Stuf Oreos. The result is a darker, richer batter that chocolate lovers adore. ✨
Boozy Adult Upgrade
Add 1 tbsp bourbon or Kahlúa to the wet mix for a sophisticated twist. The alcohol cooks off, leaving a subtle depth. Perfect for dinner parties—my Italian Nonna would approve of this indulgence.
Seasonal Pumpkin Spice
Mix in 1 tsp pumpkin pie spice for a fall-inspired treat. Use Golden Oreos to lean into the seasonal vibe. I make these every October in my Boston triple-decker—they smell like autumn.
Nutrition Facts
Frequently Asked Questions
What oil works best for frying?
Vegetable or canola oil are ideal due to their high smoke point and neutral flavor. Peanut oil works too but adds a slight taste. Always maintain 350°F for crispy results.
Can I use a different type of flour?
All-purpose flour gives the best texture, but cake flour works for a lighter coating. Avoid whole wheat—it makes the batter too dense. Always sift first for smooth results.
How do I keep them crispy after frying?
Drain on a wire rack, not paper towels, to prevent sogginess. Dust with powdered sugar just before serving. They’re best eaten within 2 hours for maximum crunch.
Can I bake instead of fry?
Yes, but the texture differs. Bake at 375°F for 10-12 minutes on a wire rack for air circulation. They’ll be less crispy but still delicious.

Trained in classic French technique but raised on slow-cooked ribs and spicy rubs, she blends culinary skill with smoke and soul.
- Recipe for Boneless Pork Chops in Cast Iron Skillet: Sear and Baste to Juicy Perfection - October 3, 2026
- Recipe for Boneless Cross Rib Roast: Slow-Roasted Beef with Herb Crust - October 3, 2026
- Hamburgers in Sauce Recipe Crock Pot: Slow-Cooked Savory Delight - October 3, 2026