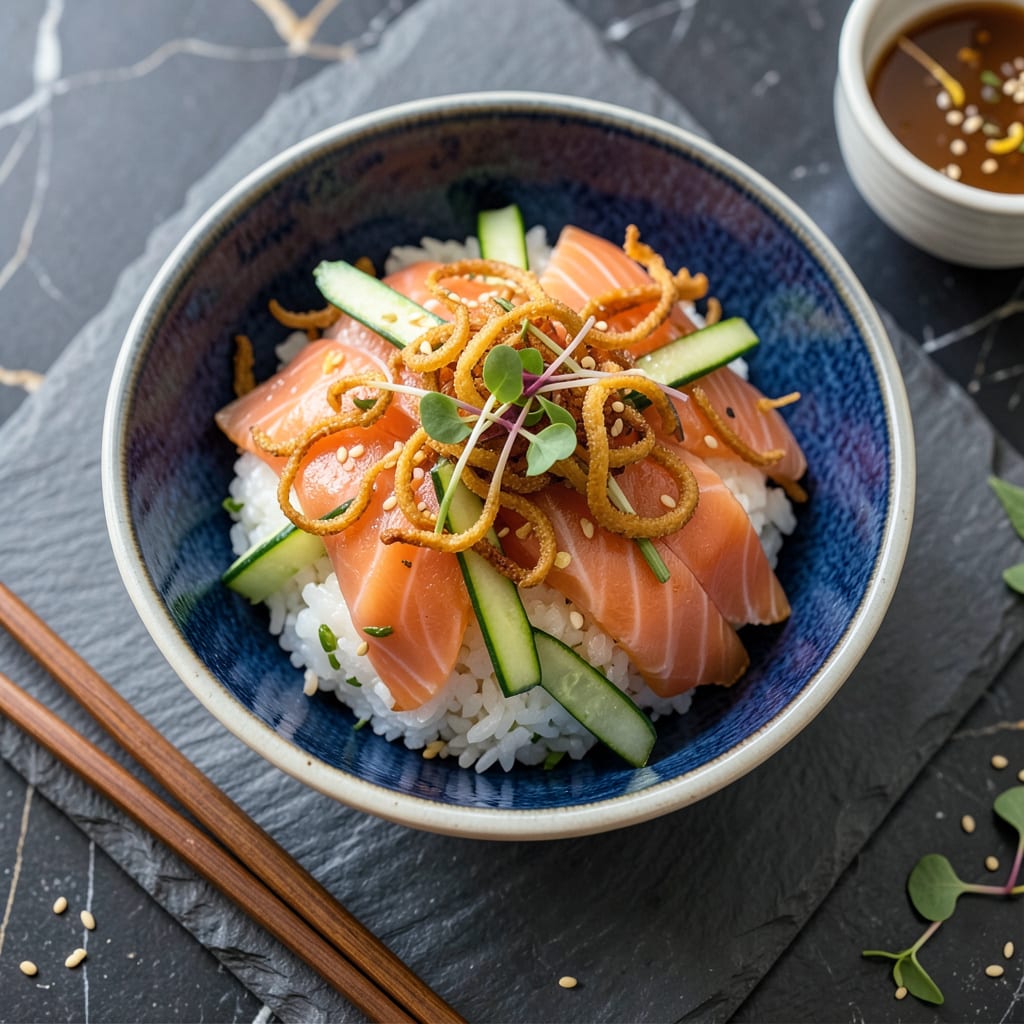
I’ll be real with you—when I first heard about putting fried onions on sushi, I thought it sounded weird. But after that first bite of crispy golden strands on top of fresh fish and vinegared rice? Game changer. Seriously. The crunch against the tender sushi, that sweet-onion flavor mingling with umami—it’s the kind of contrast that makes you question why you haven’t been doing this forever.
Here’s the thing—this isn’t just throwing some onions on rice. We’re talking perfectly seasoned sushi rice with that signature sticky texture, your choice of protein (I’m partial to buttery salmon or spicy tuna), and onions fried to that ideal golden crispiness. The kind that stays crunchy even after sitting on the sushi for a few minutes. No soggy toppings here.
The magic happens when you layer these elements together. You get the clean, fresh flavors of traditional sushi, then that hit of crispy, caramelized onion on top. It’s like the best parts of Japanese and Southern cooking had a delicious baby. And don’t even get me started on how the fried onions soak up just enough soy sauce to become even more addictive.
Fair warning: once you try this, you’ll want to put fried onions on everything. But let’s start with getting this sushi right—crispy toppings, perfect rice, and all. The kind of dish that’ll have people asking for your secret.
📚 In This Guide
- What You’ll Need
- Instructions
- Tips and Common Mistakes
What Youll Need
- ● Sushi rice: 2 cups (short-grain, rinsed until water runs clear) 🍚
- ● Rice vinegar: ¼ cup (for seasoning the rice)
- ● Sugar: 2 tbsp (for balancing rice flavor)
- ● Salt: 1 tsp (for seasoning rice)
- ● Yellow or white onions: 2 large (thinly sliced for frying)
- ● All-purpose flour: ½ cup (for coating onions)
- ● Vegetable oil: 2 cups (for deep-frying, like canola or sunflower oil)
- ● Nori sheets: 4-6 (full-size, for rolling sushi)
- ● Sushi fillings: Your choice! Try avocado, cucumber, crab sticks, or cream cheese.
- ○ Bamboo sushi mat: 1 (for rolling, optional but highly recommended) 🎋
- ● Sesame seeds: 1 tbsp (toasted, for garnish)
- ● Sriracha mayo: ¼ cup (for a spicy kick)
- ● Eel sauce: 2 tbsp (for a sweet-savory drizzle)
- ● Pickled ginger: ¼ cup (for palate cleansing)
- ● Soy sauce: For dipping (low-sodium if preferred)
- ● Deep-fry thermometer: 1 (to monitor oil temp—game-changer! 🌡️)
Instructions
Here’s how to create those irresistible crispy onions that’ll take your sushi to the next level.
Slice the Onions Uniformly
Start by selecting fresh, firm yellow onions for the best texture and flavor. I like to cut them in half from root to stem, then peel away the outer skin. This makes them easier to handle while slicing.
Using a sharp chef’s knife, make thin, even slices about 1/16-inch thick. You want them paper-thin but not translucent. The key here is consistency—uniform slices will fry evenly and crisp up at the same rate.
As you slice, separate the onion layers into individual rings. Discard the very center pieces as they tend to burn quickly. You should end up with about 4 cups of loosely packed onion rings for a standard batch.
Prepare the Onions for Frying
Place your sliced onions in a large bowl and cover them with ice water. Let them soak for 10 minutes—this removes excess starch and helps create extra crispiness. You’ll notice the water becomes slightly cloudy as the starch dissolves.
While the onions soak, prepare your frying station. Line a baking sheet with paper towels and set a wire rack over it. This setup will help drain excess oil from the fried onions while keeping them crispy.
After soaking, drain the onions in a colander and pat them completely dry with clean kitchen towels. Any remaining moisture will cause the oil to splatter when frying, so take your time with this step.
Fry the Onions to Golden Perfection
Heat 2 inches of neutral oil (like vegetable or canola) in a heavy pot over medium-high heat until it reaches 350°F on a deep-fry thermometer. The right temperature is crucial—too cool and the onions will absorb oil and become soggy; too hot and they’ll burn before crisping.
Add the onions in small batches, being careful not to overcrowd the pot. They should sizzle immediately upon hitting the oil. Stir gently with a slotted spoon to separate the rings and ensure even cooking.
Fry for 2-3 minutes until the onions turn a rich golden brown. You’ll know they’re done when they stop bubbling vigorously and float to the surface. Remove them promptly with your slotted spoon and transfer to the prepared wire rack.
Drain and Season the Fried Onions
Let the fried onions drain on the wire rack for 5 minutes. This allows excess oil to drip away while maintaining their crisp texture. You’ll hear a faint crackling sound as they cool—this is normal and means they’re crisping up perfectly.
While still warm, sprinkle the onions lightly with fine sea salt. I use about ½ teaspoon for the entire batch. The salt enhances the natural sweetness of the onions and balances their rich, fried flavor.
Gently toss the onions to distribute the salt evenly. Be careful—they’re delicate when warm but will become more sturdy as they cool completely. Let them cool to room temperature before using as a sushi topping.
Apply to Sushi for Maximum Crunch
When ready to serve, sprinkle the cooled fried onions generously over your prepared sushi rolls or nigiri. I like to add them just before serving to maintain maximum crispness. The contrast between the cool, fresh sushi and the warm, crunchy onions is what makes this topping so special.
For best results, use the fried onions within 2 hours of making them. If you need to store them, keep in an airtight container at room temperature for up to 24 hours, though they’ll lose some crispness over time.
The onions should provide a satisfying crunch with every bite, adding both texture and a subtle sweetness that complements the umami flavors of your sushi perfectly.
Tips and Common Mistakes
Getting these onions perfectly crispy requires attention to detail, especially when working with such thin slices. Here’s what I’ve learned from making batch after batch.
Slicing Consistency: In Step 1, aim for onion slices that are exactly 1/16-inch thick—no thicker, no thinner. I use a mandoline for perfect uniformity, but if slicing by hand, cut one slice first, then stack subsequent slices against it as a thickness guide. The difference between 1/16-inch and 1/8-inch might seem small, but thicker slices won’t crisp properly in the 2-3 minutes of frying time specified in Step 3.
Drying Thoroughly: After the 10-minute ice water soak in Step 2, don’t rush the drying process. Spread the onions on clean towels and pat them completely dry, then let them air-dry for 5 minutes before frying. Any residual moisture will cause dangerous oil splatter when they hit the 350°F oil. I learned this the hard way after getting burned by an enthusiastic batch that wasn’t dry enough.
Temperature Control: Maintaining that 350°F oil temperature in Step 3 is non-negotiable. Use a deep-fry thermometer and adjust the heat as needed—adding cold onions will drop the temperature temporarily. If your oil smokes, it’s too hot; if the onions sink instead of sizzling immediately, it’s too cool. Between us, I keep a second thermometer as backup because accuracy matters this much.
Timing the Drain: Those 5 minutes of draining in Step 4 aren’t just for show. The onions continue crisping as they cool, and removing them too soon can leave them greasy. Set a timer and resist the urge to touch them—the faint crackling sound you’ll hear is the magic happening. I place my wire rack over a second baking sheet to catch any stray oil drips during this crucial window.
Pro Tips for Fried Onion On Sushi
- Getting these onions perfectly crispy requires attention to detail, especially when working with such thin slices. He…
- Slicing Consistency: In Step 1, aim for onion slices that are exactly 1/16-inch thick—no thicker, no thinner. I use a…
- Drying Thoroughly: After the 10-minute ice water soak in Step 2, don’t rush the drying process. Spread the onions on …
Frequently Asked Questions
Can I use store-bought fried onions for sushi instead of making them fresh?
Store-bought fried onions (like French’s) work great for convenience—just sprinkle them on top before serving to keep them crispy. For best texture, avoid adding them too early, as moisture from the sushi can make them soggy. Freshly fried onions offer a bolder flavor, but pre-made saves time!
When’s the best time to add fried onions to sushi—before or after rolling?
Always after rolling! Fried onions lose their crunch quickly, so add them as a final topping right before serving. If you’re prepping ahead, store the onions separately and sprinkle them on just before eating. For hand rolls or nigiri, place them on top just before the first bite for maximum crispiness.
What are good alternatives if I don’t like fried onions?
Try these crispy swaps for similar texture and flavor:
- Tempura flakes (for a lighter crunch)
- Toasted sesame seeds (nutty and aromatic)
- Crushed potato chips (fun, salty twist)
- Pickled red onions (tangy, no fry needed)
How do I keep fried onions crispy on sushi for longer?
Moisture is the enemy! Fry onions right before assembling, and pat them dry with a paper towel after frying. Store them in an airtight container until ready to use. If serving a platter, keep onions in a small separate bowl for guests to add themselves—this prevents sogginess.
Why do my fried onions turn soggy on sushi so fast?
Sushi rice and fillings release moisture, which softens the onions. To fix this:
- Use less rice or press it tightly to reduce excess moisture.
- Add onions last-minute (even at the table!).
- Try a thin layer of spicy mayo or sriracha as a barrier between rice and onions.
Fried onions on sushi might sound unconventional, but this crispy, golden twist brings a bold crunch and sweet depth to every bite. Whether you’re jazzing up classic rolls or experimenting with fusion flavors, this simple topping proves that creativity in the kitchen pays off—big time. 🌟
Ready to take your sushi game further? Grab your favorite ingredients, fire up the oil, and start layering those textures. Who knows? Your next roll could be the star of the dinner table—or even your new signature dish! Tag us in your crispy creations—we’d love to see (and taste!) your masterpiece.

Trained in classic French technique but raised on slow-cooked ribs and spicy rubs, she blends culinary skill with smoke and soul.
- Recipe for Boneless Pork Chops in Cast Iron Skillet: Sear and Baste to Juicy Perfection - October 3, 2026
- Recipe for Boneless Cross Rib Roast: Slow-Roasted Beef with Herb Crust - October 3, 2026
- Hamburgers in Sauce Recipe Crock Pot: Slow-Cooked Savory Delight - October 3, 2026