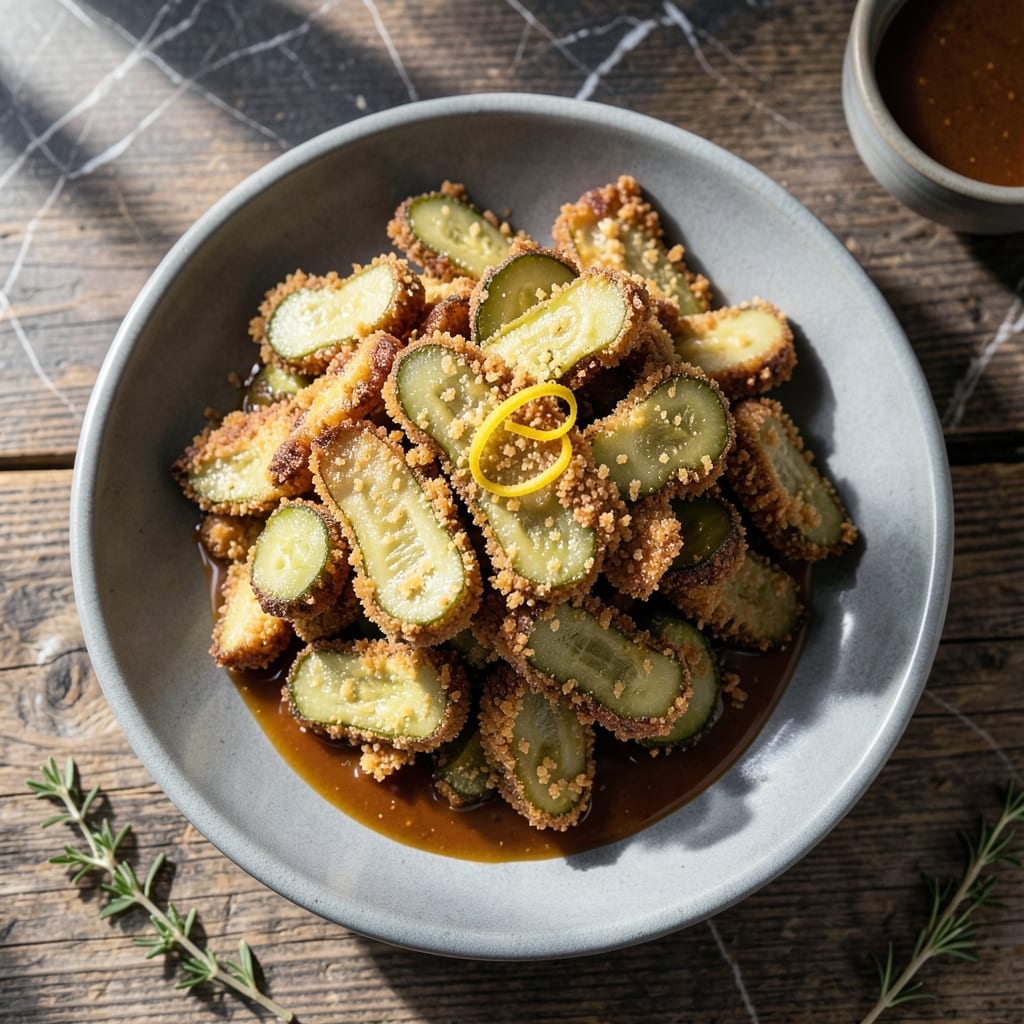
This beer-battered panko fried pickle recipe delivers a satisfying crunch that most versions miss. The combination of cold beer batter and crisp panko breadcrumbs creates a shatteringly crispy exterior that stays intact even after frying.
I developed this method after testing countless variations that resulted in soggy or unevenly coated pickles. The beer batter adds lightness and helps the panko adhere perfectly, while maintaining that signature tangy pickle flavor underneath.
You’ll achieve golden, ultra-crunchy pickles with a moist interior that contrasts beautifully with the crisp coating. The panko breadcrumbs create an irregular, craggy surface that maximizes crunch in every bite.
Serve these immediately with ranch or spicy aioli for dipping. The contrast between the hot, crispy exterior and cool, tangy center makes them irresistible.
Ingredients for Fried Pickle Recipe Panko
Cold beer, crisp panko, and tangy pickles create this irresistibly crunchy dish.
| Ingredient | Amount | Notes |
|---|---|---|
| Dill Pickle Chips 🥒 | 24 pieces | Drained, patted dry thoroughly |
| All-Purpose Flour 🌾 | 1 ½ cups | Divided for dredging and batter |
| Cold Beer 🍺 | 1 cup | Light lager or pilsner preferred |
| Panko Breadcrumbs 🍞 | 2 cups | Japanese-style for maximum crunch |
| Cornstarch 🌾 | ¼ cup | For extra crispiness in batter |
| Baking Powder 🧂 | 1 tsp | Helps batter puff and crisp |
| Salt 🧂 | 1 tsp | Divided for batter and seasoning |
| Black Pepper 🌶️ | ½ tsp | Freshly ground preferred |
| Garlic Powder 🧄 | 1 tsp | For savory depth in coating |
| Paprika 🌶️ | 1 tsp | Sweet or smoked for color |
| Vegetable Oil 🫒 | 4 cups | For deep frying, high smoke point |
| Ranch Dressing 🥛 | 1 cup | For dipping, store-bought or homemade |
| Large Eggs 🥚 | 2 whole | Beaten for batter binding |
[recipe_ingredient_scaler]
The pickles must be dill chips—whole dills won’t crisp evenly, and spears are too awkward to coat. Claussen or Vlasic have the right thickness and tang. Panko is non-negotiable here: regular breadcrumbs lack the structural integrity for that signature crunch. Look for it in the Asian aisle at most supermarkets or grab Kikkoman brand at Walmart for consistent quality.
No beer? Sparkling water plus 1 tsp vinegar mimics the carbonation and tang. For gluten-free, swap all-purpose flour for rice flour and ensure your panko is certified gluten-free. The egg can be replaced with flax eggs (1 tbsp ground flax + 3 tbsp water per egg), though the batter may be slightly less crisp. Skip the cornstarch if unavailable, but expect a denser coating.
Fry in batches to avoid crowding—this drops the oil temp and causes sogginess. Drain on a rack (not paper towels) to maintain crispness for up to 10 minutes. Best served immediately, but leftovers can be reheated in a 400°F oven for 5-8 minutes to revive the crunch.
Why You’ll Love This Recipe
- One Bowl Wonder: I just dump flour, beer, and panko in separate bowls—no fancy prep, and the cornstarch keeps the batter clinging perfectly.
- Crunch in Every Bite: That panko crust shatters with the first bite, then gives way to the briny tang of the dill pickles. Honestly, it’s the texture that hooks me.
- Crowd-Pleasing App: I serve these at game night or pack them for picnics—always the first thing to disappear.
- Budget Stretcher: A jar of pickles and a handful of pantry staples turn into a plateful of crispy snacks for pennies. I’ll be real: it’s my cheat for feeding a group without breaking the bank.
Step-by-Step Instructions for Ultra Crunchy Beer-Battered Pickles
This method guarantees maximum crunch and flavor with every bite.
Step 1: Prepare the Pickles and Dredging Station
Begin by thoroughly patting the 24 pieces Dill Pickle Chips completely dry with paper towels. Any residual moisture will prevent the coating from adhering properly, so take your time with this step—it’s the foundation of crispiness.
Set up your dredging station: In a shallow bowl, combine 1 cup All-Purpose Flour with ½ tsp Salt, ½ tsp Black Pepper, 1 tsp Garlic Powder, and 1 tsp Paprika. This seasoned flour will create the first layer of your ultra-crispy coating.
Step 2: Create the Beer Batter
In a separate mixing bowl, whisk together the remaining ½ cup All-Purpose Flour, 0.25 cup Cornstarch, 1 tsp Baking Powder, and ½ tsp Salt. The baking powder will help the batter puff and create that desirable airy texture when fried.
Make a well in the center and pour in the 1 cup Cold Beer and 2 whole Large Eggs. Whisk until just smooth—small lumps are fine, and overmixing will make the batter tough. The beer adds carbonation for extra crispiness, while the eggs ensure the batter clings to the pickles.
Step 3: Double-Coat for Maximum Crunch
Working in batches, dredge each dried pickle chip in the seasoned flour, shaking off any excess. Then dip it into the beer batter, allowing any excess to drip off for 5 seconds. Immediately roll the battered pickle in the 2 cups Panko Breadcrumbs, pressing gently to ensure full coverage.
The double-coating process is what sets this recipe apart—the initial flour layer helps the batter stick, while the panko provides that signature crunch. Place each coated pickle on a wire rack to allow the batter to set slightly before frying.
Step 4: Deep-Fry to Golden Perfection
In a heavy pot or deep fryer, heat the 4 cups Vegetable Oil to 375°F. Use a deep-fry thermometer to maintain accurate temperature—this is crucial for achieving that perfect golden-brown finish without burning the coating.
Carefully lower 4-5 pickles at a time into the hot oil, avoiding overcrowding which would drop the oil temperature. Fry for 2-3 minutes until deep golden brown and crispy. Drain on a paper towel-lined plate and immediately sprinkle with a pinch of salt.
Serve hot with 1 cup Ranch Dressing for dipping. The contrast of the cool, creamy dressing with the hot, crispy pickles is what makes this dish irresistible.
Pro Tips For Making Fried Pickle Recipe Panko
- Dry the Pickles: Pat the dill pickle chips very dry with paper towels before dredging—I learned this the hard way after my first batch turned into soggy breadcrumb blobs.
- Chill the Batter: Let the beer and flour batter rest in the fridge for 10 minutes before using; it thickens slightly and clings better to the pickles.
- Double Dredge: After the beer batter, roll the pickles in panko twice with a 30-second pause between coats—this builds that shatteringly crisp crust.
- Hot Oil Test: Drop a pinch of panko into the oil first; if it sizzles and floats immediately, the oil is at the right temp (375°F) for frying.
Dietary Considerations for These Flavors
Gluten-Free Adaptation
For a gluten-free version, swap the all-purpose flour for rice flour in both the dredge and batter. Use certified gluten-free panko breadcrumbs—I recommend Kikkoman’s gluten-free panko for consistent texture. The beer should also be gluten-free, like Omission or Glutenberg. 💪
Vegan Modifications
Replace the 2 large eggs with flax eggs (1 tbsp ground flaxseed + 3 tbsp water per egg). Use a vegan beer like Guinness 0.0 or Heineken 0.0. Ensure your pickles are vegan—most brands like Claussen are, but always check the label.
Dairy-Free Notes
The recipe itself is dairy-free, but watch your dipping sauce. Traditional ranch often contains buttermilk. I love Primal Kitchen‘s dairy-free ranch or make your own with coconut yogurt, garlic, and dill. The crispy pickles pair just as well with vegan aioli or spicy mustard. ✨
Low-Sodium Option
Use low-sodium pickles like Vlasic No Salt Added and reduce the added salt in the batter by half. Skip the final sprinkle of salt after frying. The panko and spices still provide plenty of flavor without the extra sodium.
Oil Alternatives
For a lighter option, use avocado oil or peanut oil instead of vegetable oil. Both have high smoke points and neutral flavors. I find avocado oil gives the pickles an extra crisp edge without any greasy aftertaste.
Allergen Awareness
This recipe contains wheat, eggs, and soy (in some panko brands). For nut allergies, ensure your frying oil hasn’t been cross-contaminated. Always check panko labels—some brands process in facilities with tree nuts.
Nutrition Facts
Frequently Asked Questions
Why use panko instead of regular breadcrumbs?
Panko creates a lighter, crunchier texture because of its airy structure. Regular breadcrumbs absorb more oil and can turn soggy, while panko stays crisp even after frying.
Can I bake these instead of frying?
Yes, but the texture won’t be as crisp. Bake at 425°F for 12-15 minutes on a wire rack, flipping halfway. For best results, spray with oil first to help the panko brown.
How do I keep them crispy after cooking?
Drain on a wire rack, not paper towels, to prevent steam buildup. Serve immediately—they lose crispness within 10 minutes. Reheat in a 400°F oven for 5-8 minutes if needed.
What’s the best oil for frying?
Use oils with a high smoke point like vegetable, peanut, or avocado oil. Avoid olive oil as it can burn at frying temperatures. Maintain 375°F for perfect results.

Trained in classic French technique but raised on slow-cooked ribs and spicy rubs, she blends culinary skill with smoke and soul.
- Recipe for Boneless Pork Chops in Cast Iron Skillet: Sear and Baste to Juicy Perfection - October 3, 2026
- Recipe for Boneless Cross Rib Roast: Slow-Roasted Beef with Herb Crust - October 3, 2026
- Hamburgers in Sauce Recipe Crock Pot: Slow-Cooked Savory Delight - October 3, 2026