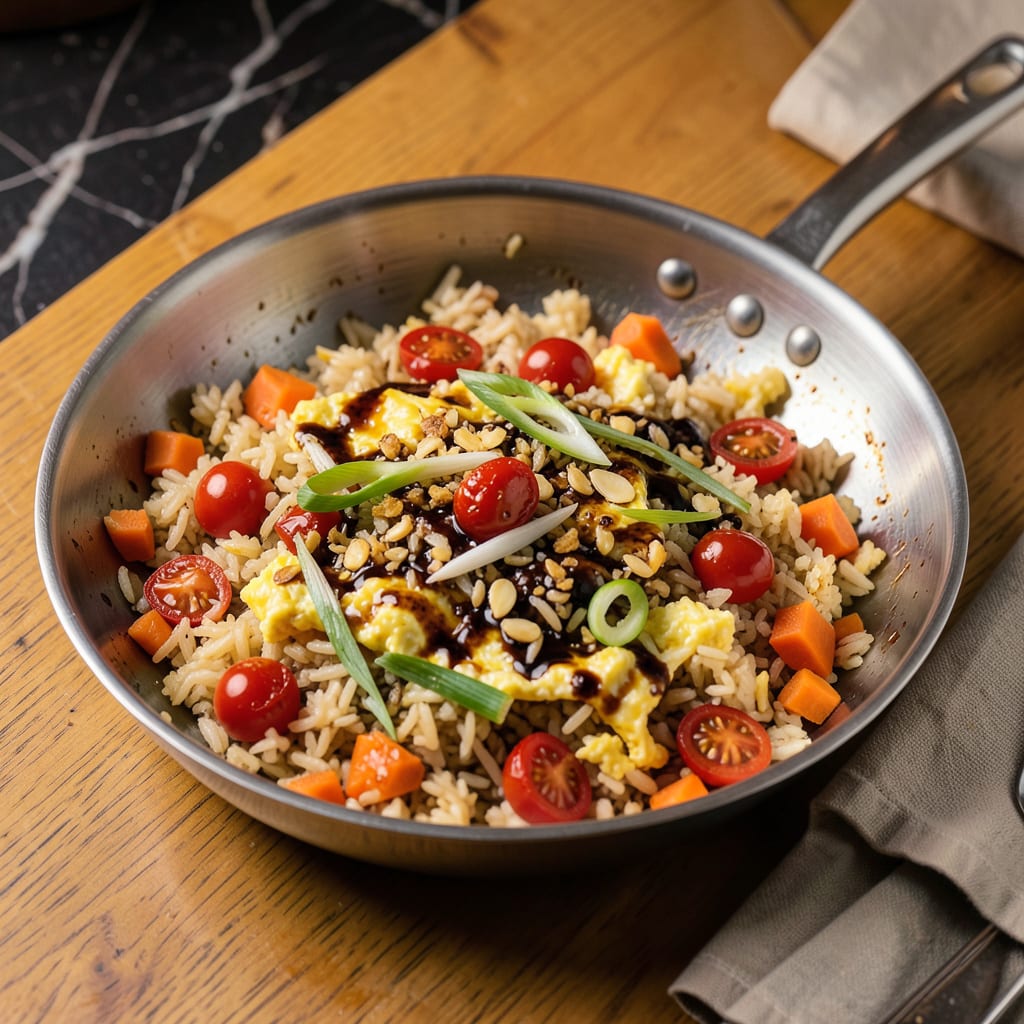
I’ll be real with you—making crispy fried rice in a stainless steel pan is easier than most people think. No wok? No problem. After years of experimenting (and a few stuck-on batches), I’ve cracked the code for achieving that coveted golden crust and perfect grain separation without special equipment.
Here’s the thing—your stainless steel pan can actually outperform a wok for home cooking. The even heat distribution creates those crispy bits we all love, while the flat surface makes tossing ingredients foolproof. I use a simple technique of preheating the pan properly and working in stages that guarantees restaurant-quality results every time.
What you’ll end up with is fried rice that’s loaded with texture—crispy edges, tender centers, and just the right amount of char. The stainless steel develops flavors that nonstick pans simply can’t match. I’ve made this with everything from leftover chicken to tofu, and it never disappoints.
Perfect for cleaning out your fridge or impressing weekend guests. The best part? You probably already have everything you need. Let’s get that pan hot and make some magic happen.
📚 In This Guide
- What You’ll Need
- Instructions
- Tips and Common Mistakes
What Youll Need
- ● Stainless steel pan (10–12 inches, heavy-bottomed for even heat)
- ● Cooked rice (2–3 cups, day-old or chilled for best texture)
- ● Protein (1 cup: diced chicken, shrimp, tofu, or scrambled eggs)
- ● Vegetables (1 cup: peas, carrots, bell peppers, or frozen mix)
- ● Garlic & aromatics (2 cloves minced, 1 tbsp ginger, 1–2 green onions)
- ● Sauces (2 tbsp soy sauce, 1 tbsp oyster sauce, 1 tsp sesame oil)
- ● Oil (2–3 tbsp high-smoke-point: avocado, peanut, or vegetable)
- ● Salt & pepper (to taste)
- ● Chili paste or sriracha (for heat 🌶️)
- ● Lime wedges (for brightness)
- ● Cilantro or sesame seeds (garnish)
Instructions
Here’s the method that transforms ordinary rice into crispy, flavorful perfection—no wok required!
Prep Ingredients for Maximum Efficiency
Before heating your pan, have everything prepped and within reach. This dish moves quickly, and you won’t have time to chop while cooking. Dice your aromatics into uniform pieces—¼-inch cubes for onions, minced garlic, and small-diced carrots ensure even cooking and consistent texture throughout.
Measure out all liquids and seasonings into small bowls: your soy sauce, oyster sauce, and sesame oil should be ready to pour. Crack eggs into a separate bowl and beat them lightly with a fork. This mise en place approach guarantees you won’t burn anything while searching for ingredients mid-cook.
Preheat and Condition Your Stainless Steel Pan
Place your stainless steel pan over medium-high heat for 3-4 minutes until it’s properly preheated. You’ll know it’s ready when a drop of water sizzles and evaporates immediately upon contact. Add 2 tablespoons of neutral oil and swirl to coat the entire surface, including the sides.
Here’s the secret to crispy rice: let the oil heat until it shimmers but doesn’t smoke. This creates the perfect environment for that coveted sear. Tilt the pan to ensure the oil pools evenly across the bottom—this prevents hot spots and ensures every grain gets equal treatment. The pan should be hot enough that ingredients sizzle aggressively when added.
Cook Aromatics and Protein in Stages
Start with your diced onions and cook for 2-3 minutes until they develop light golden edges. Add carrots and cook another 2 minutes—they should soften slightly but retain some bite. Push everything to one side of the pan and add your beaten eggs to the empty space.
Scramble the eggs quickly with a spatula until just set but still slightly runny. Immediately incorporate them into the vegetables—this creates those beautiful yellow ribbons throughout your rice. Add garlic and any other proteins (like diced chicken or shrimp) now, cooking until fragrant and proteins are 80% done. They’ll finish cooking with the rice.
Achieve Perfect Crispy Rice Texture
Add your day-old, cold rice to the pan, breaking up any clumps with your fingers as you add it. Spread it evenly across the pan’s surface and press down firmly with your spatula. Let it cook undisturbed for 2-3 minutes—this is when the magic happens and that crispy bottom layer forms.
Listen for the telltale crackling sound that indicates proper browning. Flip sections of rice as they develop a golden-brown crust, rather than stirring continuously. Drizzle your sauces around the edges of the pan and fold everything together gently to maintain those crispy bits. The rice should have distinct grains with some clusters of crispy goodness.
Finish and Serve Immediately
Turn off the heat and stir in any final additions like green onions or sesame oil. Taste and adjust seasoning—remember that flavors concentrate as the dish cools slightly. The ideal texture should have individual grains with occasional crispy clusters, not a uniform mush.
Serve immediately while the contrast between crispy and tender rice is most pronounced. The bottom layer should have a delicate crunch that gives way to perfectly seasoned, fluffy grains. Garnish with additional green onions or a fried egg for extra richness, and enjoy that perfect balance of textures and flavors you’ve created!
Tips and Common Mistakes for Perfect Crispy Fried Rice
The secret to restaurant-quality fried rice lies in these game-changing techniques that transform ordinary ingredients into something extraordinary.
The Heat Factor: That 3-4 minutes of preheating your stainless steel pan at medium-high heat isn’t just a suggestion—it’s the foundation of crispy success! I’ve found that most home cooks underheat their pans, which leads to steamed rice instead of that coveted sear. The pan should be so hot that when you add the 2 tablespoons of neutral oil, it immediately shimmers across the entire surface. This creates the perfect environment for developing that golden-brown crust on your rice grains.
Rice Preparation Breakthrough: Using day-old, cold rice is non-negotiable for achieving that perfect texture contrast. Freshly cooked rice contains too much moisture and will turn to mush when stir-fried. I spread my cooked rice on a baking sheet and refrigerate it uncovered overnight—this dries out the grains just enough to create those beautiful crispy clusters when they hit the hot pan. The difference is astonishing!
Timing Secret: Those 2-3 minutes when you let the rice cook undisturbed after adding it to the pan are absolutely critical. This is when the magic happens! Resist the urge to stir—you should hear a faint crackling sound as the bottom layer develops that golden-brown crust. I use a metal spatula to press down firmly on the rice, creating maximum contact with the hot pan surface. The result is perfectly crispy grains with just the right amount of chew.
Technique That Changed Everything: When incorporating the scrambled eggs in Step 3, work quickly! The eggs should be just set but still slightly runny when you mix them into the vegetables. This creates those beautiful yellow ribbons throughout your rice rather than dry, overcooked bits. I’ve found that using a thin, flexible spatula helps incorporate the eggs gently while preserving their delicate texture.
Pro Tips for Fried Rice In Stainless Steel Pan
- The secret to restaurant-quality fried rice lies in these game-changing techniques that transform ordinary ingredient…
- The Heat Factor: That 3-4 minutes of preheating your stainless steel pan at medium-high heat isn’t just a suggestion—…
- Rice Preparation Breakthrough: Using day-old, cold rice is non-negotiable for achieving that perfect texture contrast…
Frequently Asked Questions
Can I use a non-stick pan instead of stainless steel for fried rice?
You can, but stainless steel wins for crispy texture! Non-stick pans brown food less aggressively, so your rice may turn out softer. If using non-stick, crank the heat to medium-high and avoid overcrowding. Stainless steel’s high-heat tolerance makes it ideal for that signature wok hei (breath of the wok) flavor.
Why does my fried rice stick to the stainless steel pan?
Sticking usually means the pan wasn’t hot enough or the rice was too wet. Heat the pan on medium-high for 2–3 minutes before adding oil, and use day-old rice (fresh rice is sticky). A quick splash of water or shaoxing wine can help release stubborn bits—just keep stirring!
How do I prevent soggy fried rice in a stainless steel pan?
Soggy rice = too much moisture. Pat dry any veggies/meat before cooking, and spread rice in a thin layer to maximize contact with the hot pan. Cook in batches if needed—overcrowding steams instead of fries. Pro tip: Let the rice sit undisturbed for 30 seconds between stirs to crisp up!
What’s the best oil for fried rice in stainless steel?
High-smoke-point oils like peanut, avocado, or refined sesame oil work best—they handle stainless steel’s heat without burning. Avoid olive oil (low smoke point) or butter (burns easily). For extra flavor, add a drizzle of toasted sesame oil at the end.
How long does it take to cook fried rice in a stainless steel pan?
About 8–10 minutes total on medium-high heat: 2 minutes to heat the pan/oil, 3–4 minutes for proteins/veggies, and 3–4 minutes for the rice. The key? Constant stirring (except when letting it crisp). Adjust time if using frozen veggies or extra ingredients.
Mastering fried rice in a stainless steel pan is all about high heat, quick moves, and a little patience—no wok required! 🎉 With the right technique, you’ll get those coveted crispy grains and smoky flavor every time. Now that you’ve got the know-how, grab your pan and start cooking—your best batch of fried rice is just minutes away!
Ready to level up? Try experimenting with proteins like shrimp or tofu, or swap in different veggies for a fresh twist. Happy stir-frying! 🍚✨

Trained in classic French technique but raised on slow-cooked ribs and spicy rubs, she blends culinary skill with smoke and soul.
- Recipe for Boneless Pork Chops in Cast Iron Skillet: Sear and Baste to Juicy Perfection - October 3, 2026
- Recipe for Boneless Cross Rib Roast: Slow-Roasted Beef with Herb Crust - October 3, 2026
- Hamburgers in Sauce Recipe Crock Pot: Slow-Cooked Savory Delight - October 3, 2026