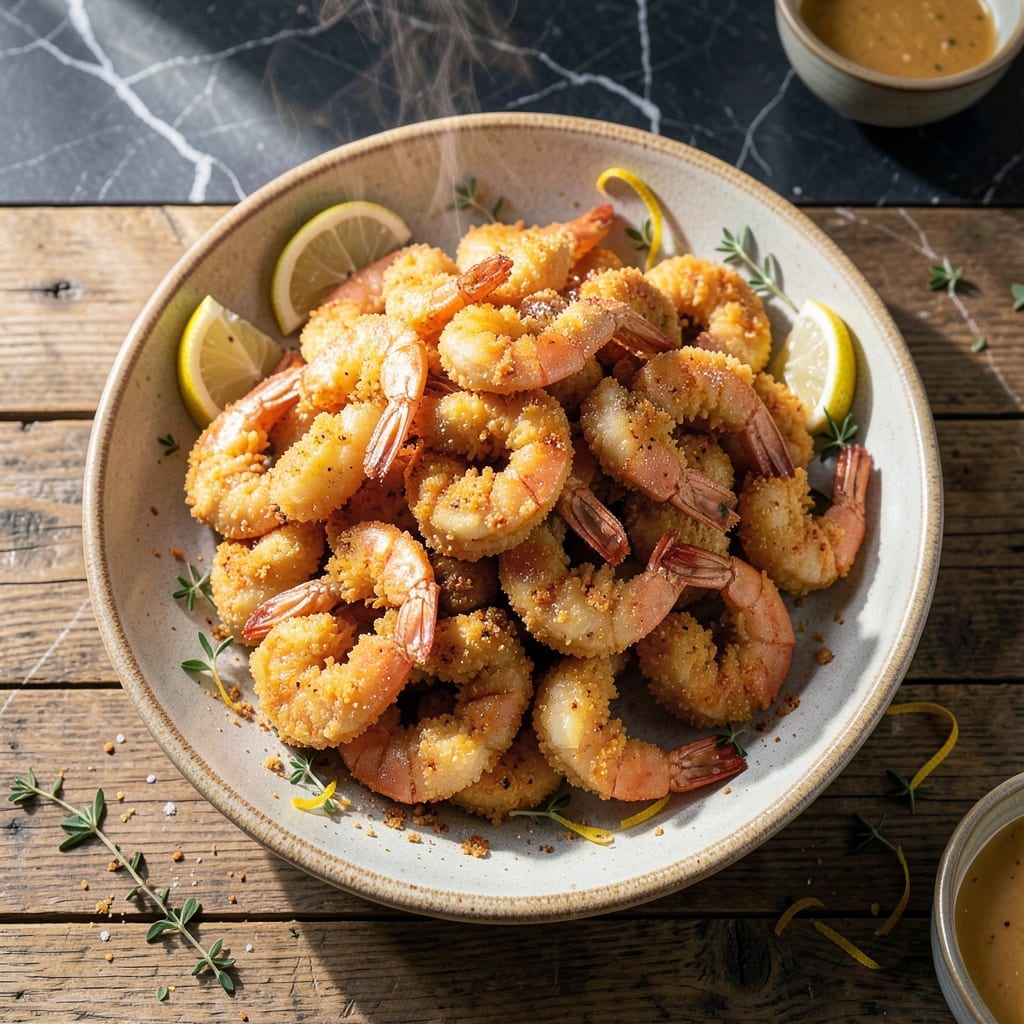
This method delivers crispy fried shrimp without a drop of dairy. I developed this approach after realizing many traditional recipes rely on milk-based batters unnecessarily.
My grandmother’s handwritten notes inspired this version, using simple pantry staples for a light yet sturdy coating. The secret lies in the double-dredge technique that creates an ultra-crispy exterior.
You’ll achieve golden, shatteringly crispy shrimp that stays crunchy even after cooling. The coating adheres perfectly without dairy, proving milk isn’t required for restaurant-quality results.
Perfect for weeknight dinners or casual gatherings. This technique works every time with minimal effort and maximum flavor.
Ingredients for Fried Shrimp Recipe No Milk
Pantry staples create that ultra-crispy coating without any dairy in sight.
| Ingredient | Amount | Notes |
|---|---|---|
| Large Shrimp 🦐 | 1 ½ lb | Peeled, deveined, tails on |
| All-Purpose Flour 🌾 | 1 ½ cups | Divided for dredging |
| Cornstarch 🌽 | ½ cup | For extra crispiness |
| Baking Powder 🧂 | 1 tsp | Creates airy coating |
| Paprika 🌶️ | 1 tsp | Smoked or sweet variety |
| Garlic Powder 🧄 | 1 tsp | Not garlic salt |
| Onion Powder 🧅 | 1 tsp | Balances seasoning blend |
| Salt 🧂 | 1 ½ tsp | Diamond Crystal kosher preferred |
| Ground Black Pepper 🌶️ | ½ tsp | Freshly ground for best flavor |
| Cayenne Pepper 🔥 | ¼ tsp | Optional for heat |
| Sparkling Water 💧 | 1 cup | Chilled, for light batter |
| Vegetable Oil 🫒 | 4 cups | For deep frying |
| Lemon Wedges 🍋 | 1 whole | For serving |
[recipe_ingredient_scaler]
The shrimp quality is paramount here. Wild-caught Gulf shrimp (16/20 count) yield the best texture and flavor. Whole Foods or Trader Joe’s offer consistently high-quality frozen options (thaw overnight in the fridge). Look for shrimp labeled ‘easy peel’ to save prep time. The cornstarch is non-negotiable—it’s what creates that shatteringly crispy exterior that stays crunchy even after cooling.
No sparkling water? Club soda or cold beer work equally well for the batter. Swap cornstarch for arrowroot powder if needed, but don’t skip the acid—it tenderizes the shrimp. For a gluten-free version, rice flour plus cornstarch at a 1:1 ratio makes an excellent substitute. The seasoning blend can be adjusted to taste, but maintain the baking powder for that airy texture.
Fry in small batches to maintain oil temperature—this prevents soggy shrimp. Leftovers keep in the fridge for 2-3 days but are best eaten immediately. Reheat in a 375°F oven for 8-10 minutes to restore some crispness. Never microwave fried foods if you want to preserve texture.
Why You’ll Love This Recipe
- No-Fuss Coating: I just toss the shrimp in flour, cornstarch, and a pinch of baking powder—no milk, no messy wet batter.
- Crispy Perfection: The cornstarch gives that light, crackly bite, and the paprika adds just the right warmth.
- Weeknight Rescue: Honestly, it’s my go-to for last-minute dinners when I need something fast and satisfying.
- Budget Friendly: Large shrimp stretch further than you’d think, and the pantry staples keep costs low.
Step-by-Step Instructions for Fried Shrimp with No Milk
Master the technique for achieving an ultra-crispy coating without any dairy products.
Step 1: Prepare the Dredging Station
In a large bowl, whisk together 1.5 cups all-purpose flour, 0.5 cup cornstarch, 1 tsp baking powder, 1 tsp paprika, 1 tsp garlic powder, 1 tsp onion powder, 1.5 tsp salt, 0.5 tsp ground black pepper, and 0.25 tsp cayenne pepper until evenly combined. The cornstarch creates that signature crunch, while the baking powder lightens the coating.
Divide the flour mixture evenly between two shallow dishes. This two-step dredging ensures maximum adhesion and a thicker, crispier crust. Set aside 1 cup sparkling water in a third dish—its effervescence will create a light, airy batter when combined with the dry ingredients.
Step 2: Heat the Oil and Prep the Shrimp
Pour 4 cups vegetable oil into a heavy-bottomed Dutch oven or deep fryer, leaving at least 2 inches of space at the top. Heat the oil over medium-high heat until it reaches 350-375°F on a deep-fry thermometer. The right temperature is crucial—too cool and the shrimp will absorb oil, too hot and the outside will burn before the inside cooks.
While the oil heats, pat the 1.5 lb large shrimp completely dry with paper towels. Any moisture will cause the oil to splatter and prevent the coating from adhering properly. Keep the shrimp tails on for presentation and easy handling.
Step 3: Create the Batter and Coat the Shrimp
Gradually whisk the chilled sparkling water into one of the dishes of flour mixture until it forms a thin batter with the consistency of heavy cream. The bubbles in the sparkling water expand in the hot oil, creating an incredibly light, crispy texture.
Working in batches, dredge each shrimp first in the dry flour mixture, shaking off any excess, then dip it into the batter to coat evenly. Return the shrimp to the dry flour mixture for a final dredge, pressing gently to ensure full coverage. This double-dip method guarantees a thick, craggy coating that stays put during frying.
Step 4: Fry to Golden Perfection
Carefully lower the coated shrimp into the hot oil in a single layer, without overcrowding the pan. Fry for 2-3 minutes until the coating turns golden brown and the shrimp float to the surface. Resist the urge to stir too much—this can cause the coating to break off.
Use a slotted spoon to transfer the fried shrimp to a wire rack set over a baking sheet. This allows air to circulate underneath, keeping them crispy instead of soggy. If the oil temperature drops significantly between batches, allow it to return to 350°F before adding more shrimp.
Step 5: Serve Immediately with Lemon Wedges
Fry all the shrimp, working in batches as needed. The coating will be at its crispiest right out of the oil, so serve immediately while hot. Arrange the shrimp on a platter with lemon wedges for squeezing over the top just before eating.
The acid from the lemon cuts through the richness and enhances the flavors of the seasoned coating. For best results, eat within 10 minutes of frying—this is one dish that doesn’t wait well. Any leftovers can be reheated in a 400°F oven for 5-7 minutes to revive some crispiness.
Pro Tips For Making Fried Shrimp Recipe No Milk
- Dry the Shrimp: Pat the shrimp completely dry with paper towels before dredging—any moisture makes the coating slide right off. I learned this the hard way after my first batch turned into sad, soggy dumplings.
- Heat the Oil First: Get the oil to 350°F before adding shrimp. After burning three batches, I finally figured out that cold oil equals greasy, undercooked shrimp.
- Use Both Flours: Mix all-purpose flour with cornstarch (about 2 parts flour to 1 part cornstarch) for a lighter, crispier crust. Sounds weird, but it works.
- Skip the Overcrowding: Fry shrimp in small batches—overcrowding drops the oil temp and gives you limp, steamed shrimp instead of crispy ones. I skip this when I’m lazy, but the dish is noticeably better when I don’t.
Health Benefits of This Dish
Protein Powerhouse
Shrimp delivers 24 grams of protein per 3-ounce serving, making this dish a fantastic muscle-building meal. The protein is complete, containing all nine essential amino acids your body needs. I love that you get this nutritional boost without heavy saturated fats. 💪
Low-Calorie Indulgence
At just 100 calories per 3-ounce serving before frying, shrimp is one of the leanest protein sources available. The crispy coating adds calories, but you’re still enjoying a lighter indulgence compared to other fried proteins.
Heart-Healthy Fats
Shrimp contains omega-3 fatty acids that support heart health, along with minimal saturated fat. A 3-ounce serving provides about 0.3 grams of omega-3s, which helps reduce inflammation and support cardiovascular function.
Rich in Selenium
This dish is packed with selenium, an antioxidant that protects cells from damage. A single serving provides over 50% of your daily needs. I notice I feel more energetic when I include selenium-rich foods regularly. ✨
Vitamin B12 Boost
Shrimp is an excellent source of vitamin B12, essential for nerve function and red blood cell production. Just 3 ounces gives you about 80% of your daily requirement, which is particularly valuable for those on plant-based diets.
Low Mercury Option
Compared to larger fish, shrimp contains very low levels of mercury, making it a safe seafood choice for regular consumption. The FDA recommends 2-3 servings per week for most adults, which I find easy to achieve with this delicious recipe.
Nutrition Facts
Frequently Asked Questions
Can I use frozen shrimp?
Yes, but thaw completely first. Pat them very dry with paper towels to prevent oil splatter and ensure the coating sticks. Frozen shrimp work just as well as fresh when properly thawed.
What oil works best for frying?
Use a neutral oil with a high smoke point like vegetable, peanut, or canola. These handle 350-375°F without burning. Avoid olive oil—its low smoke point makes it unsuitable for deep frying.
How do I keep them crispy?
Fry in small batches to maintain oil temperature. Drain on a wire rack, not paper towels, to prevent steam from making the coating soggy. Serve immediately for maximum crunch.
Can I bake instead of fry?
Yes, but texture differs. Toss coated shrimp with 1-2 tbsp oil and bake at 425°F for 12-15 minutes, flipping halfway. The result will be crispy but not as shatteringly light as fried.

Trained in classic French technique but raised on slow-cooked ribs and spicy rubs, she blends culinary skill with smoke and soul.
- Sanjeev Kapoor Egg Biryani Recipe: Fragrant Spiced Rice With Boiled Eggs - October 3, 2026
- Recipe for French Pork Spread Gorton: Savory Gallic Flavors in a Spreadable Delight - October 3, 2026
- Recipe for Pan Fried: Golden Crust with Savory Depth - October 3, 2026