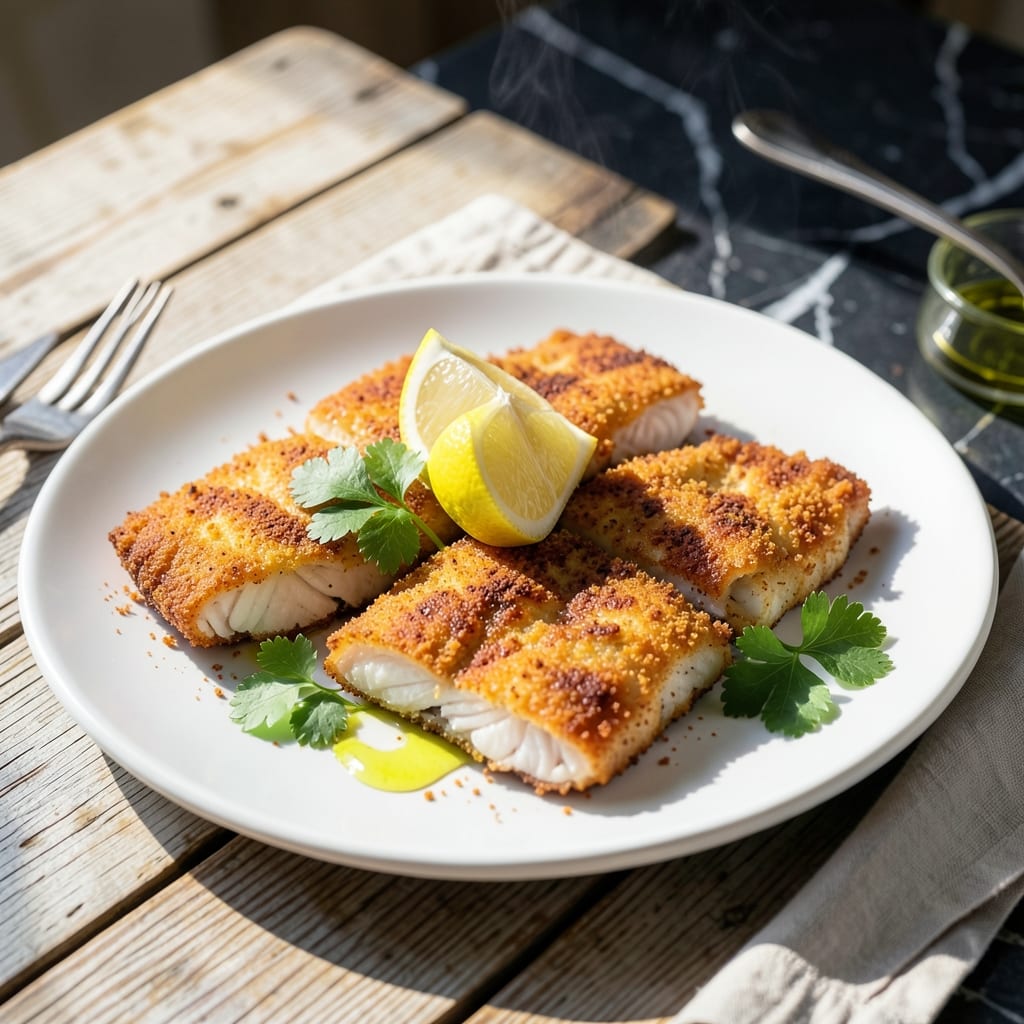
This fried tilapia recipe delivers a crispy, golden coating with minimal effort and maximum flavor. The flour-based breading creates a light, shatteringly thin crust that locks in moisture while cooking to perfect doneness.
I’ve refined this method to ensure the fish stays tender inside while achieving that signature crunch outside. The key is maintaining the right oil temperature—350°F—to prevent greasiness and promote even browning. A simple seasoning blend enhances the tilapia’s natural sweetness.
In just 15 minutes, you’ll have flaky, juicy fillets with a coating that stays intact from pan to plate. The result is restaurant-quality fish that pairs beautifully with lemon wedges or a side of tartar sauce.
Serve immediately for the best texture, and enjoy the satisfaction of a perfectly fried dish every time.
Ingredients for Fried Tilapia Recipe with Flour
Fresh tilapia, a crisp flour coating, and bold seasonings create this perfectly golden dish.
| Ingredient | Amount | Notes |
|---|---|---|
| Tilapia Fillets 🐟 | 1 ½ lb | Fresh or thawed, patted dry |
| All-Purpose Flour 🌾 | 1 ½ cups | For even coating |
| Cornstarch 🌾 | ½ cup | Adds extra crispiness |
| Salt 🧂 | 1 ½ tsp | Divided for seasoning |
| Black Pepper 🌶️ | 1 tsp | Freshly ground preferred |
| Paprika 🌶️ | 1 tsp | Sweet or smoked variety |
| Garlic Powder 🧄 | 1 tsp | Enhances flavor depth |
| Onion Powder 🧅 | 1 tsp | Balances seasoning blend |
| Vegetable Oil 🫒 | 4 cups | For deep frying, 350°F |
| Lemon 🍋 | 1 whole | Cut into wedges for serving |
| Fresh Parsley 🌿 | ¼ cup | Chopped, for garnish |
| Tartar Sauce 🥄 | ½ cup | Store-bought or homemade |
[recipe_ingredient_scaler]
The tilapia quality is paramount here. Fresh fillets from a trusted seafood counter yield the best texture—avoid pre-frozen if possible. Look for fillets that are uniform in thickness (about 3/4-inch) for even cooking. Whole Foods or local fishmongers often carry sustainably sourced options. The vegetable oil should have a high smoke point; peanut or canola oil work equally well if preferred.
No cornstarch? Replace with additional all-purpose flour—the coating will be slightly less crisp but still effective. For a gluten-free version, rice flour or a gluten-free all-purpose blend makes an excellent substitute. The paprika can be omitted if unavailable, but it adds a subtle depth of flavor. Fresh garlic and onion can replace the powders, but use half the quantity to avoid overpowering the delicate tilapia.
Fry immediately after breading to preserve crispiness. Leftovers keep in the fridge for 1-2 days but are best enjoyed fresh. To reheat, place on a wire rack in a 375°F oven for 10 minutes to restore some crunch. Never microwave—it’ll turn the coating soggy.
Why You’ll Love This Recipe
- 20-Minute Meal: I can go from fridge to plate faster than my kids can argue over who gets the last piece.
- Crispy Perfection: That golden crust from the flour and cornstarch mix? It shatters just right with every bite.
- Weeknight Hero: Here’s what sold me—it’s fancy enough for company but unfussy enough for a Tuesday night.
Step-by-Step Instructions for Fried Tilapia With Flour
Master the technique for achieving a perfectly crisp golden coating every time.
Step 1: Season and Prepare the Dredging Mixture
In a shallow dish, combine the 1.5 cups all-purpose flour, 0.5 cup cornstarch, 1.5 tsp salt, 1 tsp black pepper, 1 tsp paprika, 1 tsp garlic powder, and 1 tsp onion powder. Whisk until evenly incorporated.
The cornstarch is what gives the coating its extra crispiness, while the paprika adds a subtle depth of color and flavor. Ensure the mixture is lump-free for an even coating on every fillet.
Step 2: Dredge and Coat the Tilapia Fillets
Pat the 1.5 lb tilapia fillets completely dry with paper towels—this is critical for the coating to adhere properly. Season both sides lightly with a pinch of the reserved salt, then press each fillet firmly into the dredging mixture.
Coat both sides thoroughly, shaking off any excess. The flour should cling evenly without thick clumps. Place the dredged fillets on a wire rack to rest for 5 minutes—this helps the coating set and prevents it from falling off during frying.
Step 3: Heat the Oil and Fry to Golden Perfection
In a deep, heavy-bottomed skillet or Dutch oven, heat the 4 cups vegetable oil over medium-high heat until it reaches 350°F. Use a deep-fry thermometer for accuracy—oil that’s too cool will create a greasy coating, while oil that’s too hot will burn the outside before the inside cooks.
Carefully lower 2-3 fillets into the hot oil (don’t overcrowd the pan) and fry for 3-4 minutes per side until the coating is deep golden brown and crispy. The fillets should float freely and sizzle steadily. Use a slotted spatula to turn them gently to avoid breaking the coating.
Step 4: Drain and Serve Immediately
Transfer the fried tilapia to a paper towel-lined plate to drain excess oil. The coating will crisp further as it cools slightly. Repeat with the remaining fillets, allowing the oil to return to 350°F between batches.
Serve hot with the 1 whole lemon cut into wedges, a sprinkle of 0.25 cup chopped fresh parsley, and 0.5 cup tartar sauce on the side. The contrast of the crispy exterior and tender, flaky fish is best enjoyed right away.
Pro Tips For Making Fried Tilapia Recipe With Flour
- Pat Fillets Dry: I learned this the hard way—wet fillets make the flour coating slide right off. Use paper towels to dry them thoroughly before seasoning, or you’ll end up with a sad, patchy crust.
- Heat the Oil First: After burning a few batches, I finally figured out the oil needs to be shimmering hot (about 350°F) before adding the fish. Cold oil = greasy, soggy tilapia.
- Mix in Cornstarch: Sounds weird, but it works: replace 2 tablespoons of the flour with cornstarch in your dredge. It makes the coating crispier and holds up better to frying.
- Skip the Overcrowding: Resist the urge to fry all fillets at once—crowding the pan drops the oil temp fast. Cook in batches for that even golden-brown finish every time.
Regional Styles of These Flavors
Southern Style
In the American South, we often add a kick with 1 tsp cayenne pepper to the flour mix. This creates a subtle heat that pairs perfectly with buttermilk-dipped fillets. I like using White Lily flour for an extra-light coating. 🔥
Caribbean Approach
The islands bring bold flavors with 1 tbsp jerk seasoning blended into the dredge. I’ve found adding ½ tsp allspice to the flour creates that authentic Caribbean taste. Serve with lime wedges instead of lemon for a tropical twist.
Mexican Flavor
South of the border, they often use 1 tbsp chili powder and 1 tsp cumin in the coating. I love this version with a side of pico de gallo. The warm spices complement the mild tilapia beautifully.
Asian Fusion
For an Eastern twist, I swap ½ cup cornstarch for the flour and add 1 tbsp five-spice powder. This creates an ultra-crispy coating with complex flavors. Serve with sweet chili sauce for dipping.
Mediterranean Touch
In coastal regions, they often add 1 tsp dried oregano and 1 tsp lemon zest to the flour. I’ve found using semolina flour gives a slightly coarser, more rustic texture that pairs well with tzatziki.
Cajun Style
Louisiana brings the heat with a Cajun seasoning blend in the dredge. I use Tony Chachere’s for authentic flavor. The key is balancing the spice with the fish’s mildness. Serve with remoulade sauce for the full experience.
Nutrition Facts
Frequently Asked Questions
What oil works best for frying?
Vegetable, canola, or peanut oil are ideal due to their high smoke points. Avoid olive oil as it burns at lower temperatures. Maintain oil at 350°F for perfect results.
How do I keep the coating from falling off?
Pat fillets completely dry first. Let dredged fish rest 5 minutes before frying to help the flour adhere. Don’t overcrowd the pan.
Can I bake instead of fry?
Yes, but texture differs. Bake at 400°F for 12-15 minutes, flipping halfway. Spray fillets with oil for extra crispiness.
Why is my fish greasy?
Oil temperature was likely too low. Use a thermometer to confirm 350°F before adding fish. Drain on a wire rack instead of paper towels.

Trained in classic French technique but raised on slow-cooked ribs and spicy rubs, she blends culinary skill with smoke and soul.
- Recipe for Boneless Pork Chops in Cast Iron Skillet: Sear and Baste to Juicy Perfection - October 3, 2026
- Recipe for Boneless Cross Rib Roast: Slow-Roasted Beef with Herb Crust - October 3, 2026
- Hamburgers in Sauce Recipe Crock Pot: Slow-Cooked Savory Delight - October 3, 2026