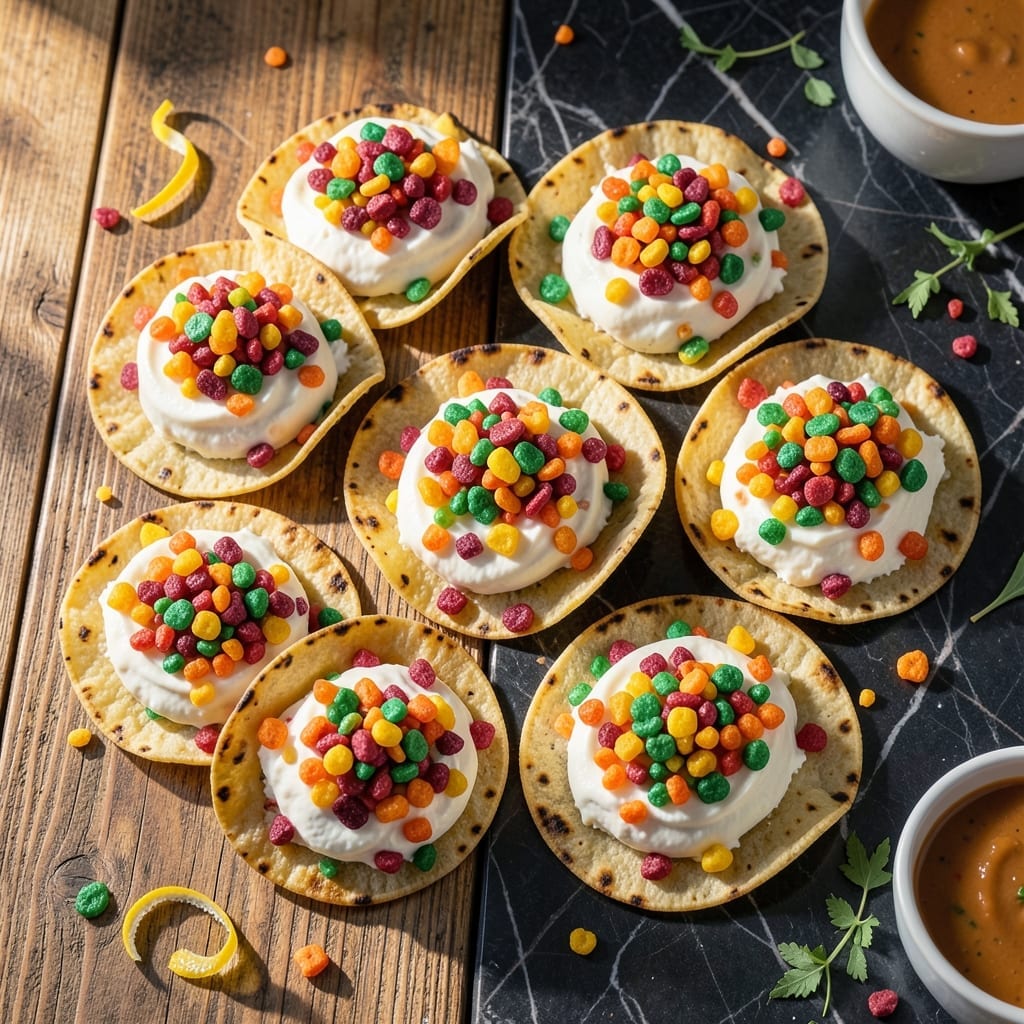
Imagine the creamy tang of cheesecake meeting the nostalgic crunch of Fruity Pebbles in taco form. This dessert redefines what sweet and playful can be.
I developed this recipe by combining a no-bake cheesecake filling with a colorful cereal shell that stays crisp. The contrast between textures is what makes these tacos unforgettable.
The filling comes together in minutes with simple ingredients, while the taco shells require just one extra step to maintain their structure. It’s a dessert that looks impressive but takes surprisingly little effort.
Perfect for parties or when you want to surprise with something unique. The vibrant colors and layered flavors make every bite a celebration.
Ingredients for Fruity Pebbles Cheesecake Tacos
A few pantry staples plus cereal create this vibrant, textured dessert masterpiece.
| Ingredient | Amount | Notes |
|---|---|---|
| Fruity Pebbles Cereal 🥣 | 4 cups | Plus extra for topping |
| Cream Cheese 🧀 | 16 oz | Full-fat, softened to room temperature |
| Granulated Sugar 🍚 | ½ cup | Fine white sugar preferred |
| Vanilla Extract 🌿 | 1 tsp | Pure vanilla for best flavor |
| Heavy Whipping Cream 🥛 | ½ cup | Cold, for stiff peaks |
| Corn Tortillas 🌮 | 8 pieces | Small street taco size |
| Unsalted Butter 🧈 | 2 tbsp | Melted for brushing shells |
| Cinnamon 🌿 | ½ tsp | Ground, for dusting |
| Salt 🧂 | ¼ tsp | Fine sea salt |
| Powdered Sugar 🍚 | 2 tbsp | For dusting finished tacos |
| Fresh Lemon Juice 🍋 | 1 tsp | Brightens cream cheese flavor |
[recipe_ingredient_scaler]
The cereal is non-negotiable—Fruity Pebbles specifically, as generics lack the same vibrant color and crunch. Kroger and Walmart carry them in the cereal aisle. For the cream cheese, Philadelphia full-fat delivers the smoothest texture, though store brands work in a pinch. Ensure it’s fully softened to avoid lumps in your filling.
No heavy cream? Coconut cream (chilled overnight) makes a dairy-free swap. The corn tortillas must be small street-taco size—regular tortillas won’t fold properly. If you’re avoiding dairy, vegan cream cheese (like Kite Hill) works but may need extra sugar to balance tang. The butter can be replaced with coconut oil for brushing.
Assemble the tacos just before serving to maintain the cereal’s crunch. Leftovers? Store components separately in the fridge for up to 2 days—the shells will soften if combined. The filling holds for 3 days in an airtight container.
Why You’ll Love This Recipe
- No-Bake Magic: I just mix cream cheese, sugar, and vanilla, then fold in whipped cream—no oven, no stress.
- Crunch Meets Cream: That Fruity Pebbles crunch with the silky cheesecake filling? Honestly, it’s like a party in your mouth.
- Crowd Pleaser: I bring these to potlucks and watch them disappear—kids and adults alike can’t resist the colorful fun.
- Budget-Friendly Treat: A box of cereal and a few pantry staples make a dessert that feels fancy but costs pennies. Between us, I’ve made these three weeks in a row.
Step-by-Step Instructions for Fruity Pebbles Cheesecake Tacos
This method ensures a perfect balance of crispy taco shells and luscious cheesecake filling every time.
Step 1: Prepare the Fruity Pebbles Cheesecake Filling
In a large mixing bowl, beat the 16 oz Cream Cheese until smooth and creamy, about 2 minutes with an electric mixer. This step is crucial for eliminating lumps and achieving that signature velvety texture.
Gradually add the 0.5 cup Granulated Sugar, mixing until fully incorporated. Stir in the 1 tsp Vanilla Extract and 1 tsp Fresh Lemon Juice—the lemon brightens the sweetness beautifully. In a separate bowl, whip the 0.5 cup Heavy Whipping Cream to stiff peaks, then gently fold it into the cream cheese mixture. The filling should be thick yet spreadable, with visible ribbons from the whisk.
Step 2: Shape and Chill the Filling
Line a shallow dish with parchment paper. Spoon the cheesecake mixture onto the paper, shaping it into a 1-inch thick rectangle roughly the width of your 8 pieces Corn Tortillas. This creates uniform portions for each taco.
Refrigerate the shaped filling for 30 minutes to firm up. Chilling makes the mixture easier to handle and prevents it from oozing out of the tortillas during assembly. The filling should hold its shape when pressed lightly with a finger.
Step 3: Crisp the Tortilla Shells
Preheat your oven to 375°F. Lightly brush both sides of each Corn Tortilla with the 2 tbsp Unsalted Butter, then dust with a pinch of the 0.5 tsp Cinnamon and 0.25 tsp Salt mixture. The butter helps the tortillas crisp evenly while the cinnamon adds warmth.
Arrange the tortillas on a baking sheet and bake for 6-8 minutes until golden and crisp. Remove from the oven and let cool for 2 minutes—they’ll firm up as they cool. For extra crunch, I fold them over a wooden spoon handle while warm to create a taco shape.
Step 4: Assemble and Finish the Tacos
Cut the chilled cheesecake filling into 8 equal strips. Place one strip into each crisped Corn Tortilla, pressing gently to adhere. The filling should peek slightly out of the ends for visual appeal.
Dust the assembled tacos with the 2 tbsp Powdered Sugar and sprinkle with additional Fruity Pebbles Cereal for color and crunch. Serve immediately—the contrast of the cool, creamy filling against the crisp, warm shell is irresistible. Each taco should hold its shape when picked up, with no filling spilling out.
Pro Tips For Making Fruity Pebbles Cheesecake Tacos
- Chill the Shells: Pop your Fruity Pebbles taco shells in the fridge for 15 minutes before filling—I learned this the hard way after my first three collapsed under the weight of the cheesecake mixture.
- Room-Temp Cream Cheese: Take the cream cheese out 2 hours before mixing, or you’ll end up with lumps no amount of stirring can fix. Sounds obvious, but I skipped this step more times than I care to admit.
- Crust First, Filling Later: Press the Fruity Pebbles into the taco shells firmly with a spoon, then bake them for 5 minutes to set before adding the filling. My grandmother swore by this, and she was right: it prevents soggy bottoms.
- Whip It Good: Beat the heavy whipping cream separately until stiff peaks form, then fold it in gently—this keeps the filling light and fluffy instead of dense and heavy. I was skeptical until I tried it.
Storing and Reheating This fruity pebbles cheesecake tacos
Fridge Storage
Store the cheesecake filling in an airtight container for up to 3 days. I use glass Pyrex with snap-on lids to keep it fresh. The cereal shells should be kept in a separate container at room temperature to maintain their crunch. ❄️
Freezing the Filling
You can freeze the filling for up to 1 month without significant texture changes. Portion it into ¼ cup servings in freezer bags, squeezing out excess air. Thaw overnight in the fridge before using.
Reviving the Shells
If your cereal shells lose their crispness, reheat them in a 350°F oven for 3-4 minutes. Watch closely to avoid burning. I place them directly on the oven rack for even heat distribution.
Assemble Before Serving
Always assemble the tacos just before serving to keep the cereal crunchy. The filling can sit at room temperature for 30 minutes before assembly, but don’t let it warm completely. The contrast of temperatures is key.
No Reheating Needed
This dessert tastes best fresh and doesn’t require reheating. If you must store assembled tacos, keep them in the fridge for no more than 2 hours—the shells will soften quickly. 💡
Nutrition Facts
Frequently Asked Questions
Can I use a different cereal?
Stick with Fruity Pebbles for the best color and crunch. Other cereals may not hold their shape or provide the same vibrant look.
How do I keep the shells crispy?
Assemble tacos just before serving. Store shells separately at room temperature in an airtight container to prevent softening.
Can I make this ahead of time?
Prepare the filling up to 3 days ahead and chill. Shape and crisp shells the day of serving for best texture.
What if my filling is too soft?
Chill it for 30-60 minutes longer. If still soft, fold in extra whipped cream for stability.

Trained in classic French technique but raised on slow-cooked ribs and spicy rubs, she blends culinary skill with smoke and soul.
- Recipe for Boneless Pork Chops in Cast Iron Skillet: Sear and Baste to Juicy Perfection - October 3, 2026
- Recipe for Boneless Cross Rib Roast: Slow-Roasted Beef with Herb Crust - October 3, 2026
- Hamburgers in Sauce Recipe Crock Pot: Slow-Cooked Savory Delight - October 3, 2026