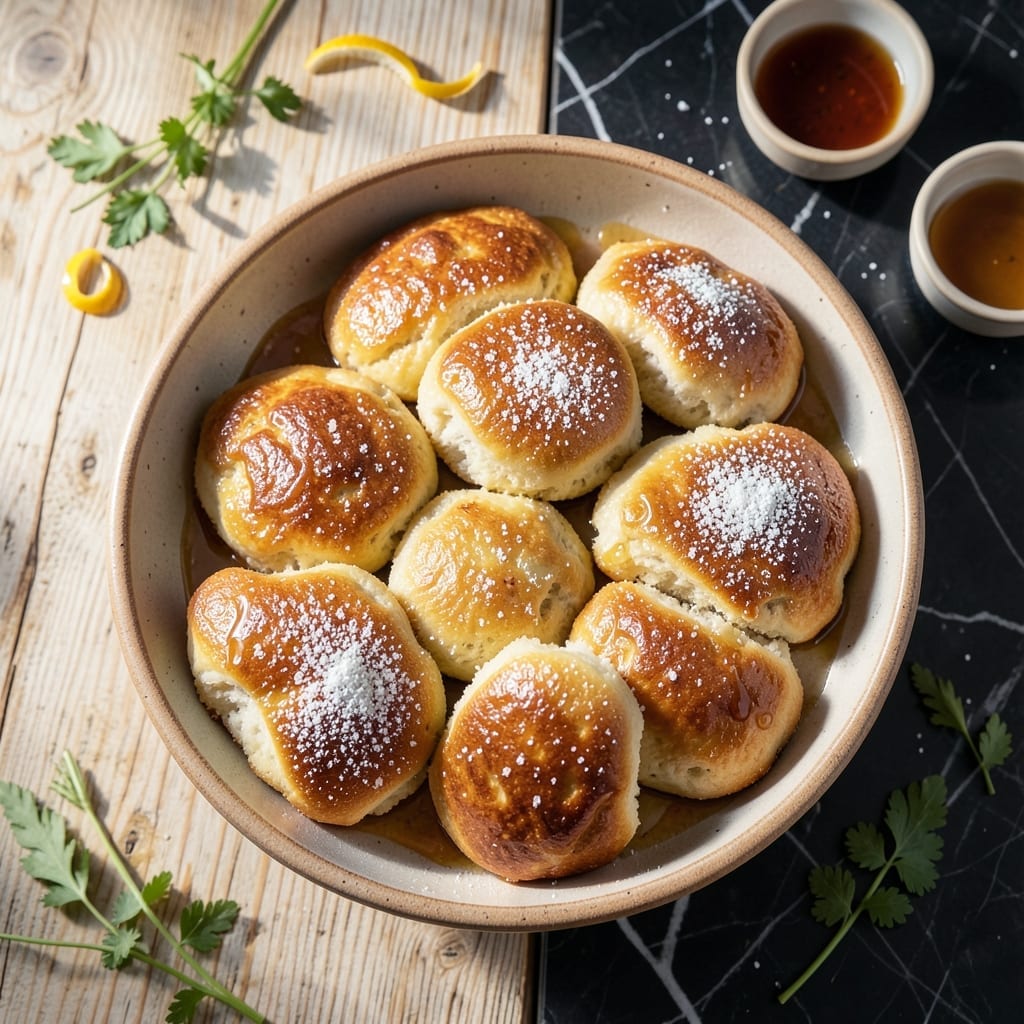
There’s something magical about achieving perfectly fluffy fry bread with a golden crust using instant yeast. This method delivers consistent results with minimal effort.
Instant yeast speeds up the rising process, creating light, airy dough that fries into pillowy bread. The key is letting the dough rest just long enough to develop flavor without becoming dense.
The frying process transforms the soft dough into crisp, golden rounds with tender interiors. Each bite offers a satisfying contrast of textures that’s impossible to resist.
This technique works every time, whether you’re making a batch for dinner or a special occasion. The results speak for themselves.
Ingredients for Fry Bread Recipe with Instant Yeast
Simple ingredients deliver fluffy, golden fry bread with instant yeast. No special tools required.
| Ingredient | Amount | Notes |
|---|---|---|
| All-Purpose Flour 🌾 | 4 cups | Plus extra for dusting |
| Instant Yeast 🍞 | 2 ¼ tsp | One packet, active dry works too |
| Granulated Sugar 🍚 | 1 tbsp | Feeds the yeast for rising |
| Salt 🧂 | 1 ½ tsp | Fine sea salt preferred |
| Warm Water 💧 | 1 ½ cups | 110-115°F for yeast activation |
| Vegetable Oil 🫒 | ½ cup | For frying, plus extra as needed |
| Unsalted Butter 🧈 | 2 tbsp | Melted, for dough softness |
| Whole Milk 🥛 | ¼ cup | Warmed, for richness |
| Baking Powder 🧂 | 1 tsp | Ensures extra lift |
| Honey 🍯 | 1 tbsp | Optional for slight sweetness |
[recipe_ingredient_scaler]
The instant yeast is non-negotiable for speed and reliability. SAF Red or Fleischmann’s are professional-grade choices available at most supermarkets. Warm water temperature is critical—use a thermometer if unsure (110-115°F is the sweet spot). King Arthur Flour is the gold standard for all-purpose, but store brands work if fresh. The milk adds tenderness; whole milk yields the best texture though 2% works in a pinch.
No instant yeast? Use active dry at the same amount but proof it first in warm water with sugar. Short on milk? Evaporated milk (undiluted) adds richness without thinning the dough. The honey can be swapped for maple syrup or sugar—just adjust sweetness to taste. For extra fluffiness, replace 1 cup flour with bread flour. The baking powder isn’t traditional but guarantees lift.
Dough rests best in a warm, draft-free spot (turn your oven light on for 30 minutes of gentle heat). Fry immediately after shaping—resting too long makes dense bread. Leftovers keep 2 days sealed at room temperature, but they’re best fresh. Reheat in a dry skillet to revive crispness.
Why You’ll Love This Recipe
- No Fuss Rising: Honestly, the instant yeast does all the work—just mix, rest, and fry. No waiting hours for dough to rise.
- Golden Crisp: That sugar in the dough caramelizes into the most addictive crunch with a soft, pillowy center.
- Breakfast or Dinner: I serve it with honey for breakfast or as a side with chili at dinner. Between us, leftovers don’t last long.
- Pantry Staples: Flour, yeast, sugar, salt—things I always have. Saves me a grocery run every single time.
Step-by-Step Instructions for Fry Bread With Instant Yeast
Master the technique for achieving that perfect balance of fluffy interior and crisp golden exterior.
Step 1: Activate the Yeast and Prepare the Dough
In a large mixing bowl, combine the 2.25 tsp Instant Yeast, 1 tbsp Granulated Sugar, and 1.5 cups Warm Water. Stir gently and let sit for 5-7 minutes until the mixture becomes frothy and opaque—this confirms the yeast is active.
Add the 4 cups All-Purpose Flour, 1.5 tsp Salt, 2 tbsp Unsalted Butter (melted), 0.25 cup Whole Milk, 1 tsp Baking Powder, and 1 tbsp Honey. Mix with a wooden spoon until a shaggy dough forms. The dough should feel slightly tacky but pull away from the sides of the bowl.
Step 2: Knead and First Rise
Turn the dough onto a lightly floured surface and knead for 8-10 minutes until smooth and elastic. You’ll notice the texture transform from rough to silky as the gluten develops. If the dough feels too sticky, dust with a small amount of flour, but avoid adding too much—this keeps the bread tender.
Place the dough in a lightly greased bowl, cover with a damp towel, and let rise in a warm, draft-free area for 1-1.5 hours or until doubled in volume. The dough should spring back slowly when pressed gently with a finger, indicating it’s properly proofed.
Step 3: Shape and Second Rise
Punch down the risen dough to release excess air, then divide it into 8 equal portions. Roll each portion into a ball, then flatten into a ½-inch thick disc. Place the discs on a parchment-lined tray, cover lightly, and let rest for 15-20 minutes.
During this second rise, the dough will relax slightly, making it easier to stretch or press into the desired shape just before frying. This step ensures an even texture and prevents the bread from becoming dense during cooking.
Step 4: Fry to Golden Perfection
Heat the 0.5 cup Vegetable Oil in a deep skillet over medium-high heat until it reaches 350-375°F. A small piece of dough dropped into the oil should sizzle immediately and rise to the surface. Carefully slide one or two dough discs into the hot oil—don’t overcrowd the pan.
Fry for 2-3 minutes per side until deep golden brown and puffed. Use a slotted spoon to transfer the bread to a paper towel-lined plate to drain excess oil. The exterior should be crisp and blistered, while the interior remains soft and slightly chewy.
Repeat with the remaining dough, maintaining the oil temperature between batches. Serve warm for the best texture and flavor.
Pro Tips For Making Fry Bread Recipe With Instant Yeast
- Check Water Temp: Use water around 110°F—hot enough to activate the instant yeast but not so hot it kills it. I learned this the hard way after a few batches that refused to rise.
- Knead Just Enough: Work the dough until smooth, about 3-5 minutes, but don’t overdo it. Over-kneading makes the fry bread tough instead of light and fluffy.
- Rest the Dough: Let the dough rise for at least 30 minutes, covered, in a warm spot. Skipping this step leaves you with dense, chewy bread instead of airy layers.
- Fry in Small Batches: Crowding the pan lowers the oil temp, leading to greasy, undercooked bread. Fry 1-2 pieces at a time for even browning and that perfect crisp exterior.
Pro Cooking Tips for This Dish
Yeast Activation Tricks
Always verify your yeast is fresh by proofing it first—I test mine in 110-115°F water with sugar. If it doesn’t foam within 5-7 minutes, your bread won’t rise properly. SAF Red instant yeast is my go-to for reliability. 💡
Dough Handling
Knead just until smooth—overworking develops too much gluten, making your bread tough. The dough should feel slightly tacky but pull cleanly from the bowl. I learned this from my grandmother in Sicily, who always said, “Less is more with bread dough.”
Optimal Rising Conditions
Create a warm, draft-free environment for rising. Turn your oven light on for 30 minutes to gently warm the space. The dough should double in 1-1.5 hours—if it’s taking longer, check your yeast or room temperature.
Frying Temperature Control
Maintain oil between 350-375°F for perfect results. Use a deep skillet and a thermometer—I swear by my Taylor digital thermometer. If the oil smokes, it’s too hot; if bread absorbs oil, it’s too cool. 🔥
Shaping Perfection
Flatten discs to ½-inch thickness for even cooking. Press from the center outward, avoiding thin edges that burn before the middle cooks. This technique ensures pillowy centers with crisp exteriors.
Post-Fry Care
Drain on paper towels immediately to remove excess oil. Serve warm for the best texture—these are at their peak within 10 minutes of frying. Reheat in a dry skillet if needed, but they’re best fresh.
Nutrition Facts
Frequently Asked Questions
Can I use active dry yeast instead of instant?
Yes, but proof it first in warm water with sugar for 5-7 minutes. Use the same amount. Instant yeast saves time by skipping this step.
Why did my bread turn out dense?
Over-kneading or insufficient rising time are common causes. Let the dough double in volume during the 1-1.5 hour first rise.
How do I know the oil is hot enough?
A small dough piece should sizzle and rise immediately. Use a thermometer for 350-375°F.
Can I make the dough ahead?
Prepare the dough, refrigerate after kneading, and let it rise slowly overnight. Shape and fry the next day.

Trained in classic French technique but raised on slow-cooked ribs and spicy rubs, she blends culinary skill with smoke and soul.
- Recipe for Boneless Pork Chops in Cast Iron Skillet: Sear and Baste to Juicy Perfection - October 3, 2026
- Recipe for Boneless Cross Rib Roast: Slow-Roasted Beef with Herb Crust - October 3, 2026
- Hamburgers in Sauce Recipe Crock Pot: Slow-Cooked Savory Delight - October 3, 2026