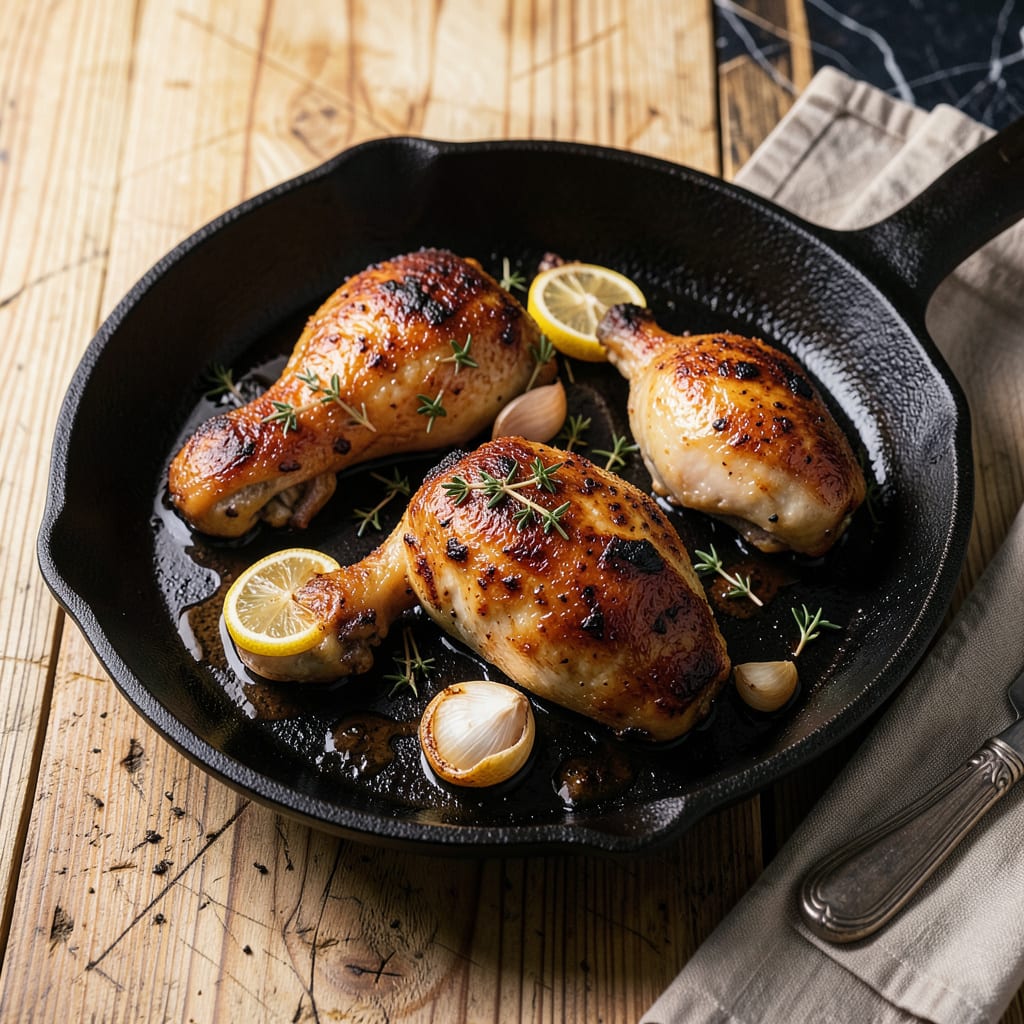
There’s nothing quite like biting into perfectly fried chicken with crispy skin that shatters and juicy meat that practically melts in your mouth. I’ve been perfecting this method since my backyard cookout days, and the secret starts with the marinade—it’s where all the flavor magic happens before the chicken even hits the pan.
What makes this recipe special is how simple ingredients transform into something extraordinary. A quick marinade in buttermilk and spices tenderizes the meat while adding layers of flavor. Then comes the frying—hot oil at just the right temperature creates that golden, shatteringly crispy crust we all crave. No fancy equipment needed, just a thermometer and some patience.
The result is chicken that’s juicy inside with skin so crispy it crackles when you cut into it. I like to serve it with tangy coleslaw and buttery cornbread to balance the richness. Fair warning: once you try this, you’ll never settle for dry, bland fried chicken again.
Whether you’re cooking for a crowd or just treating yourself, this method delivers restaurant-quality results at home. And if you’re watching calories, I’ll share my air-fryer adaptation that gets surprisingly close to the real deal. Let’s get that oil heating!
📚 In This Guide
- What You’ll Need
- Instructions
- Tips and Common Mistakes
What Youll Need
- ● Marinated chicken: 2–4 lbs (1–2 kg) of bone-in, skin-on thighs or drumsticks (or boneless breasts for leaner options). Pro tip: Pat dry before frying for extra crispiness! 🍗
- ● Oil for frying: 1–2 cups (240–480 ml) of high-smoke-point oil like peanut, canola, or vegetable oil. Avoid olive oil—it burns easily!
- ● Frying setup: Deep skillet (10–12″ cast iron or stainless steel) or
- ● Dutch oven (5–6 qt) for deeper frying.
- ● Tongs or slotted spoon: For safe flipping and draining. No forks—they pierce the meat! 🥘
- ● Paper towels or wire rack: To drain excess oil post-frying. A cooling rack keeps chicken crispier than paper!
- ○ Optional but handy: Meat thermometer (instant-read) to hit 165°F (74°C) perfectly. 🌡️
- ● Splatter guard to tame oil pops.
- ● Kitchen timer for precise cooking. ⏰
Instructions
Here’s my foolproof method for achieving perfectly crispy skin while keeping the meat incredibly juicy and flavorful.
Prepare the Chicken for Frying
Remove the marinated chicken from the refrigerator and let it sit at room temperature for 20-30 minutes. This step is crucial—cold chicken straight from the fridge will lower the oil temperature too much when added, resulting in greasy rather than crispy skin.
While the chicken comes to temperature, pat each piece completely dry with paper towels. I can’t stress this enough: moisture is the enemy of crispiness. Pay special attention to any crevices where marinade might pool. The drier the surface, the better the sear and crunch you’ll achieve.
Heat the Oil to the Perfect Temperature
Choose a heavy-bottomed skillet or Dutch oven and fill it with 1-1½ inches of neutral, high-smoke-point oil. I prefer peanut or avocado oil for their clean flavor and stability at high temperatures. Heat the oil over medium-high heat until it reaches 350-375°F on a deep-fry thermometer.
Here’s the thing—if you don’t have a thermometer, you can test the oil by carefully dipping the edge of a piece of chicken into it. If it sizzles vigorously and bubbles form around the edges immediately, your oil is ready. If it just sits there, the oil needs more time to heat. Don’t rush this step; proper temperature ensures crispy skin without overcooking the meat.
Fry the Chicken in Batches
Working in batches to avoid crowding the pan, carefully lower the chicken pieces into the hot oil using tongs. I always start with the dark meat pieces first since they can handle slightly longer cooking times. Fry for 6-8 minutes per side for bone-in pieces, or 4-5 minutes per side for boneless cuts.
You’ll know it’s time to flip when the edges turn deep golden brown and the chicken releases easily from the pan. Don’t be tempted to move the pieces around—let them develop that beautiful crust undisturbed. Maintain the oil temperature between 325-350°F throughout cooking; if it drops too low, the chicken will absorb oil instead of crisping.
Drain and Rest for Optimal Texture
As each batch finishes, transfer the chicken to a wire rack set over a baking sheet—not paper towels. The rack allows air to circulate completely around the chicken, preventing the crispy skin from steaming and becoming soggy. I’ve found that paper towels can actually trap steam against the skin, ruining that perfect crunch you worked so hard to achieve.
Let the chicken rest for 5-10 minutes before serving. This brief resting period allows the juices to redistribute throughout the meat, ensuring every bite is moist and flavorful. Real talk: this might be the hardest part because the aroma will be intoxicating, but resist the urge to cut into it immediately. Your patience will be rewarded with perfectly juicy meat.
Tips and Common Mistakes
The difference between good fried chicken and truly exceptional fried chicken comes down to a few critical details. Here’s what I’ve learned from years of perfecting this technique.
Temperature Control: The 20-30 minutes at room temperature in Step 1 isn’t just about taking the chill off—it’s about even cooking. Cold chicken shock-cools hot oil, creating that dreaded greasy layer instead of crispy skin. I’ve found that 25 minutes is the sweet spot for most pieces. And when heating your oil to 350-375°F in Step 2, remember that oil temperature drops when you add chicken. That’s why we maintain 325-350°F during frying—it accounts for this natural fluctuation while keeping the cooking process precise.
The Technique That Changed Everything: In Step 3, when frying bone-in pieces for 6-8 minutes per side, resist the urge to peek or move them. That initial undisturbed contact creates the foundation for your crispy crust. I learned this the hard way after years of impatient flipping—now I set a timer and walk away. For boneless cuts, those 4-5 minutes fly by, so stay vigilant. The moment you see deep golden brown edges forming, that’s your visual cue to flip, not the clock alone.
What to Watch For: Step 4’s wire rack isn’t just preference—it’s science. Paper towels create a steam chamber that turns crispy skin soggy in minutes. The 5-10 minute rest isn’t just about juices redistributing (though that’s crucial), it’s also about letting the crust set completely. I’ve ruined perfect batches by cutting this short, and the difference between 5 minutes and 10 minutes of resting is noticeable in both texture and juice retention.
Equipment Recommendation: A heavy-bottomed Dutch oven maintains oil temperature better than thin pans during the 6-8 minute frying windows. I’ve tested this with multiple pans, and the heat retention makes a significant difference in how evenly the chicken cooks. If you’re using a thermometer (and you should), clip it to the side of the pan so you can monitor without lifting the lid, which causes temperature drops.
Pro Tips for Frying Marinated Chicken
- The difference between good fried chicken and truly exceptional fried chicken comes down to a few critical details. H…
- Temperature Control: The 20-30 minutes at room temperature in Step 1 isn’t just about taking the chill off—it’s about…
- The Technique That Changed Everything: In Step 3, when frying bone-in pieces for 6-8 minutes per side, resist the urg…
Frequently Asked Questions
Got questions about frying marinated chicken? You’re not alone! Here are the most common concerns—answered fast so you can get back to cooking that perfect batch.
How long should I marinate chicken before frying?
For maximum flavor, marinate boneless cuts (like thighs or breasts) for 4–12 hours in the fridge. Whole pieces or bone-in chicken can handle 12–24 hours. Avoid over-marinating with acidic ingredients (lemon, vinegar)—they can turn meat mushy after 24 hours.
Can I fry marinated chicken without flour or breading?
Absolutely! Skip the coating for a lighter result, but pat the chicken very dry first to avoid steaming. For extra crispiness, dust lightly with cornstarch or fry at a slightly higher temp (375°F). Pro tip: Air-fryer works great for this method!
Why is my fried marinated chicken soggy instead of crispy?
Three likely culprits: 1) Not patting the chicken dry post-marinade, 2) Overcrowding the pan (lowering oil temp), or 3) Covering it after frying (traps steam). Fry in batches and drain on a wire rack, not paper towels.
What’s the best oil for frying marinated chicken?
Neutral, high-smoke-point oils like peanut, canola, or vegetable oil (375–400°F) are ideal. Avoid olive oil—it burns at high temps. For extra flavor, add a tiny splash of sesame oil to the marinade (not the frying oil!).
Can I bake or air-fry marinated chicken instead of deep-frying?
Yes! For baking, use 400°F on a wire rack (20–25 mins). For air-frying, 375°F for 12–15 mins (flip halfway). Brush with oil first for crispiness.
Mastering frying marinated chicken is all about balance—crispy skin, juicy meat, and bold flavors! 🍗 With the right marinade, proper heat control, and a little patience, you’ll serve up restaurant-quality chicken every time. Whether it’s for a weeknight dinner or a weekend feast, this technique is your ticket to deliciousness.
Ready to put your skills to the test? Grab your favorite marinade, fire up the pan, and get cooking! Don’t forget to experiment with spices and sides to make it your own. Happy frying! 🔥

Trained in classic French technique but raised on slow-cooked ribs and spicy rubs, she blends culinary skill with smoke and soul.
- Recipe for Boneless Pork Chops in Cast Iron Skillet: Sear and Baste to Juicy Perfection - October 3, 2026
- Recipe for Boneless Cross Rib Roast: Slow-Roasted Beef with Herb Crust - October 3, 2026
- Hamburgers in Sauce Recipe Crock Pot: Slow-Cooked Savory Delight - October 3, 2026