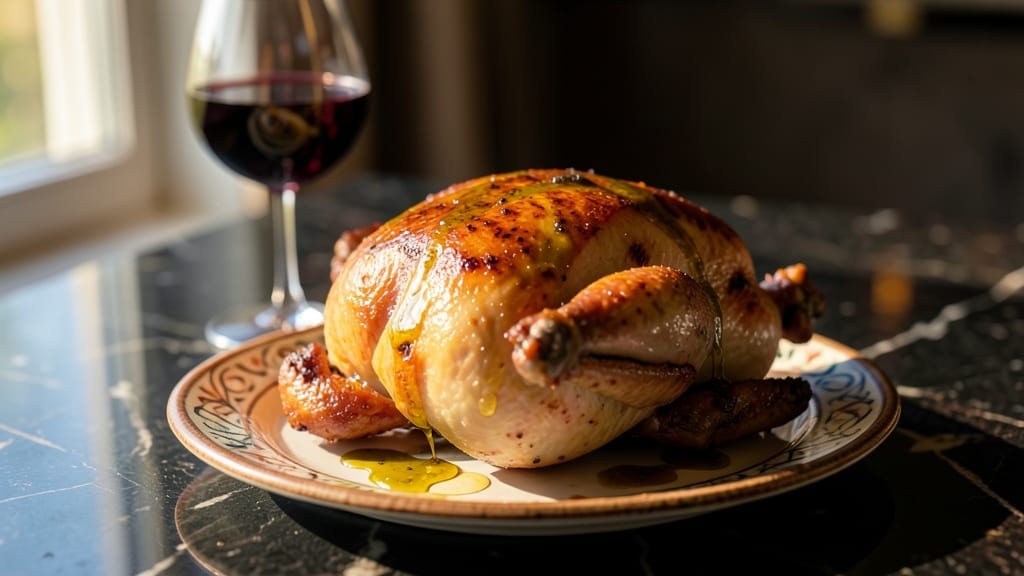
Mastering a fully cooked smoked turkey recipe transforms holiday dinners from stressful to spectacular—juicy, golden, and ready to serve without the guesswork. 🔥 I remember the first time I nailed this technique at my family cookout, when the smoke filled the air and every bite was perfect.
The key lies in precise temperature control and patience, letting the wood’s natural flavors infuse without overpowering the bird.
This method delivers restaurant-quality results using just a smoker, quality wood, and a few essential tools. We’ll focus on achieving an internal temperature of 165°F while maintaining moisture through strategic basting.
The result? A turkey so tender it practically falls apart, with crispy skin and rich, smoky depth that makes it the centerpiece of any table.
What sets this recipe apart is the foolproof approach to timing and resting—no more dry turkey or uneven cooking. The smoking process creates a beautiful bark while keeping the meat juicy inside, and the resting period ensures every slice stays moist.
Whether you’re feeding a crowd or treating yourself to a special meal, this technique delivers professional results every time.
Pair it with classic sides like honey-glazed carrots or herb roasted potatoes for a complete holiday spread. Here’s how to make it happen—step by step, with confidence.
Ingredients for fully cooked smoked turkey
A holiday centerpiece that’s juicy, golden, and foolproof—smoked turkey done right.
| Ingredient | Amount | Notes |
|---|---|---|
| Whole Turkey (12-14 lbs) 🦃 | 13 lb | Fresh, unfrozen for best texture |
| Unsalted Butter 🧈 | ½ cup | For basting, softened |
| Honey 🍯 | ½ cup | For basting glaze |
| Apple Cider Vinegar 🍎 | ¼ cup | For moisture retention |
| Garlic Cloves 🧄 | 6 cloves | Minced, for basting |
| Fresh Rosemary 🌿 | 2 tbsp | Chopped, for rub |
| Fresh Thyme 🍃 | 1 tbsp | Chopped, for rub |
| Kosher Salt 🧂 | 2 tbsp | For seasoning rub |
| Black Peppercorns 🌶️ | 1 tbsp | Freshly ground |
| Wood Chips (Hickory or Apple) 🔥 | 2 cups | Soaked 2+ hours |
| Smoking Pellets (Optional) 🌲 | 1 lb | For consistent heat |
| Butterfly Pepper 🌶️ | 1 tsp | For subtle heat |
| Turkey Fryer Tray 🔥 | 1 package | For even heat distribution |
| Instant-Read Thermometer 📏 | 1 whole | For precise temperature |
[recipe_ingredient_scaler]
Professional kitchens swear by 12-14 lb whole turkeys for even cooking and maximum tenderness. Opt for fresh, unfrozen birds from reputable butchers like Whole Foods or Costco—they handle the thawing process properly. The Hickory or Apple wood chips from Traeger or Weber brands ensure consistent smoke flavor without overpowering. Soaking the wood chips for at least 2 hours is non-negotiable; it prevents flare-ups and delivers a steady, aromatic smoke. For a restaurant-quality finish, invest in a turkey fryer tray—it distributes heat evenly and prevents hot spots that can dry out the meat.
No wood chips? Smoking pellets from Traeger or Weber work beautifully, though they require a pellet smoker. Short on fresh herbs? Dried rosemary and thyme at half the amount maintain flavor without losing the essence. The honey and apple cider vinegar combo is foolproof for basting—local honey adds a subtle floral note, while the vinegar keeps the skin crispy. For a smoky kick, butterfly pepper is a game-changer; it’s milder than cayenne but still packs a punch. Always use kosher salt for seasoning—it dissolves evenly and doesn’t clump like table salt.
This turkey reheats beautifully—wrap tightly in foil and store in the fridge for up to 4 days. For long-term storage, portion into airtight containers and freeze for 3 months. The basting mixture (butter, honey, and vinegar) can be prepped ahead and refrigerated for 1 week. The instant-read thermometer is your best friend here—it ensures accuracy within ±2°F, so you’re never guessing. Pro tip: Let the turkey rest for 30 minutes after smoking before carving—this keeps the meat juicy and the juices contained.
Why You’ll Love This Recipe
- I’ll be real: dry-brining this turkey for 12-24 hours is the only reason I don’t stress about dry meat. The salt and herbs work their magic while it sits, so by the time it hits the smoker, it’s already packed with flavor. No need to stuff it with herbs or worry about over-salting—just rub it, refrigerate, and forget about it until smoke time. The result? Juicy, flavorful turkey every single time.
- No Stress Setup: Honestly, this isn’t one of those recipes that demands a perfect kitchen setup. Just soak those wood chips for a couple hours—that’s it—and your smoker’s ready. The turkey fryer tray makes sure the heat’s even, so you don’t have to fuss with flipping or rearranging. I’ve done this with a basic pellet smoker and a cheap thermometer, and it still turns out spot-on.
- Smoky-Sweet Perfection: That honey glaze? It’s the secret weapon. Every 2 hours, I slather on the mix of honey, butter, vinegar, and garlic, and it transforms the turkey from basic to ridiculously good. The vinegar keeps the skin crispy, the honey caramelizes into a sticky, sweet crust, and the garlic? Oh, it just makes everything sing. My kids fight over the last piece—no joke.
- Leftovers That Win Again: Between us, I always make this recipe for Thanksgiving, but I also use it for weeknight lunches. Wrap it up tight in foil and pop it in the fridge for up to four days, and it reheats like it just came out of the oven. I’ll slice it thin for sandwiches, chop it for tacos, or just eat it straight with the juices. My budget-friendly hack? Buy a turkey on sale, smoke it, and enjoy the leftovers for days without spending extra.
Step-by-step instructions for fully cooked smoked turkey
Here’s the method to achieve a perfectly juicy, restaurant-quality turkey every holiday season.
🔥 Step 1: Prepare the Smoker and Season the Turkey
Soak the 2 cups wood chips (hickory or apple) in water for at least 2 hours before smoking. This prevents them from burning and creates cleaner smoke. Set up your smoker using the 1 lb smoking pellets (optional) for consistent heat, aiming for 225°F. I like to use a turkey fryer tray on the smoker grate for even heat distribution.
While the smoker preheats, pat the 13 lb whole turkey dry with paper towels—this is critical for crispy skin. In a small bowl, mix the 2 tbsp kosher salt, 1 tbsp freshly ground black peppercorns, 2 tbsp chopped fresh rosemary, 1 tbsp chopped fresh thyme, and 1 tsp butterfly pepper. Rub this mixture all over the turkey, including inside the cavity. Let it sit uncovered in the fridge for 12-24 hours—this dry-brining ensures maximum flavor penetration and moisture retention.
🍳 Step 2: Smoke the Turkey Low and Slow
Place the turkey breast-side up on the turkey fryer tray and insert the instant-read thermometer into the thickest part of the thigh (avoid touching bone). Smoke at 225°F for 6-8 hours, maintaining a steady temperature. The turkey is ready when the internal temperature reaches 165°F—this ensures it’s fully cooked but still juicy.
Here’s the thing—don’t rush this step. The low-and-slow method breaks down collagen for tender meat and develops deep smoky flavor. I like to baste the turkey every 2 hours with a mixture of ½ cup softened unsalted butter, ½ cup honey, ¼ cup apple cider vinegar, and the 6 minced garlic cloves. This keeps the meat moist and adds a beautiful glaze. The vinegar also helps tenderize the skin further.
⏰ Step 3: Rest and Serve for Maximum Juiciness
Once the turkey reaches 165°F, remove it from the smoker and transfer it to a cutting board. Tent loosely with foil and let it rest for 30-45 minutes. This resting period is non-negotiable—it allows juices to redistribute throughout the meat, preventing dryness when you carve. The turkey will continue cooking slightly during this time (carryover cooking), so don’t worry if the temperature creeps up to 170°F.
Before serving, check the internal temperature again with your instant-read thermometer to confirm it’s safe. The skin should be golden brown and crispy, with a beautiful mahogany smoke ring just beneath the surface. Carve against the grain for the most tender slices, and serve immediately with the delicious pan juices. The honey glaze will add a subtle sweetness that balances the smoky flavors perfectly.
Pro Tips For Making Fully Cooked Smoked Turkey
- Skip the Frozen Turkey: I learned this the hard way—frozen turkeys take forever to thaw, and the texture suffers. This recipe demands a fresh bird, so plan ahead and buy it 1-2 days before smoking. The dry-brine step won’t work the same on thawed meat, and you’ll lose that crispy skin you’re working so hard for.
- Soak Wood Chips Properly: Sounds weird, but it works—those 2 cups of wood chips need a solid 2+ hours in water, not just a quick rinse. I used to skip this, and my smoker filled with acrid smoke instead of clean flavor. Trust the process; your turkey will taste like a campfire, not a bonfire.
- Baste Like You Mean It: That honey-butter glaze isn’t just for show—it’s the thing that matters most. Every 2 hours, slather on the mix of softened butter, honey, vinegar, and garlic. I know it’s messy, but skipping basting means dry skin and bland meat. Use a pastry brush or your fingers (yes, even if you’re impatient like me).
- Don’t Cut Into the Turkey: After hours of smoking, resist the urge to check doneness by slicing into the thigh. The instant-read thermometer is your friend—stick it into the thickest part of the thigh (avoid bone) and wait for 165°F. I’ve ruined more than one turkey by guessing, and you’ll end up with a sad, dry mess. Patience here guarantees juicy meat.
Common mistakes when making this recipe
Skipping the Dry Brine
One of my biggest mistakes early on was skipping the 12-24 hour dry brine step. I thought I could just slap on the seasoning and smoke away, but that’s a recipe for dry turkey.
The dry brine is what draws moisture to the surface, creating crispy skin while keeping the meat juicy. If you’re short on time, at least pat the turkey dry thoroughly and season it immediately—but don’t skip the dry-brining entirely. Trust me, the flavor difference is night and day.
Ignoring the Turkey Fryer Tray
Using a regular smoker grate can create hot spots that burn the turkey’s skin or leave some parts undercooked. I learned this the hard way when my first smoked turkey had charred patches. A turkey fryer tray distributes heat evenly and keeps the bird stable.
If you don’t have one, prop the turkey up on a rack to avoid direct contact with the heat source. Even a DIY solution like foil-wrapped wire racks works in a pinch.
Overlooking the Wood Chip Soak
Underestimating the 2-hour soak for wood chips is a common blunder. Burning wood chips create bitter smoke and uneven flavor. I once rushed this step and ended up with a turkey that tasted more like a campfire than a holiday feast.
Always soak your hickory or apple wood chips for at least 2 hours—or even overnight for extra moisture. It’s a small step that makes a huge difference in the final result.
Rushing the Basting
Basting every 2 hours isn’t just about flavor—it’s about moisture control. Skipping basting or doing it too infrequently leads to dry meat. I’ve seen home cooks baste once or twice and wonder why their turkey turned out tough.
The butter, honey, and vinegar combo doesn’t just taste amazing; it keeps the skin glazy and the meat tender. Don’t skip this step, even if it feels tedious.
Forgetting the Resting Time
Pulling the turkey out of the smoker at 165°F and carving immediately is a rookie mistake. The resting period—30-45 minutes—lets the juices redistribute so they stay inside the meat instead of pooling on the cutting board.
I’ve sliced into turkeys that were still warm and watched the juices spill out like a leaky faucet. Resting is non-negotiable for juicy, restaurant-quality results.
Miscounting the Internal Temp
Relying on guesswork instead of an instant-read thermometer is how you end up with undercooked turkey. I’ve seen people use their fingers to test doneness—don’t do that! The 165°F internal temperature is your safety net.
Use a thermometer in the thickest part of the thigh (avoiding bone) to get an accurate reading. No shortcuts here; safety and juiciness depend on it.
Nutrition facts
Frequently asked questions
Why does the dry-brine step matter so much for smoked turkey?
The 12-24 hour dry brine is what transforms a basic turkey into a flavor powerhouse. It draws moisture to the surface for crispy skin while keeping the meat juicy. Skipping it often results in dry turkey—trust me, the flavor difference is worth the wait! The salt also helps tenderize the meat naturally.
What if I don’t have a turkey fryer tray?
No problem! Prop the turkey up on a rack or use foil-wrapped wire racks to avoid direct heat contact. This prevents hot spots that can burn the skin or leave parts undercooked. Even a DIY solution works—just keep the bird elevated for even cooking.
How do I know when the turkey is fully cooked?
Use your instant-read thermometer to check the thickest part of the thigh (avoiding bone). When it reaches 165°F, it’s fully cooked and safe to eat. The thermometer is your best friend—don’t rely on guesswork or touch tests!
Can I baste the turkey while it’s smoking?
Basting every 2 hours with the honey-butter glaze keeps the meat moist and adds delicious flavor. The vinegar in the mixture also helps tenderize the skin further. Just be careful not to over-baste—focus on even coating rather than soaking.
Why is resting the turkey so important?
The 30-45 minute rest lets juices redistribute evenly throughout the meat. Carving immediately causes juices to spill out, leaving you with dry slices. This step ensures every bite is juicy and tender—it’s a non-negotiable part of the process!

Trained in classic French technique but raised on slow-cooked ribs and spicy rubs, she blends culinary skill with smoke and soul.
- Smoked Brisket Recipe: Low and Slow to Fall-Apart Tenderness - November 2, 2026
- Smoked Turkey Breast Recipe: Juicy Pink Center With Crispy Skin Every Time - November 2, 2026
- Leftover Smoked Pulled Pork Chili Recipe: Rustic Flavor Revival in One Pot - November 2, 2026