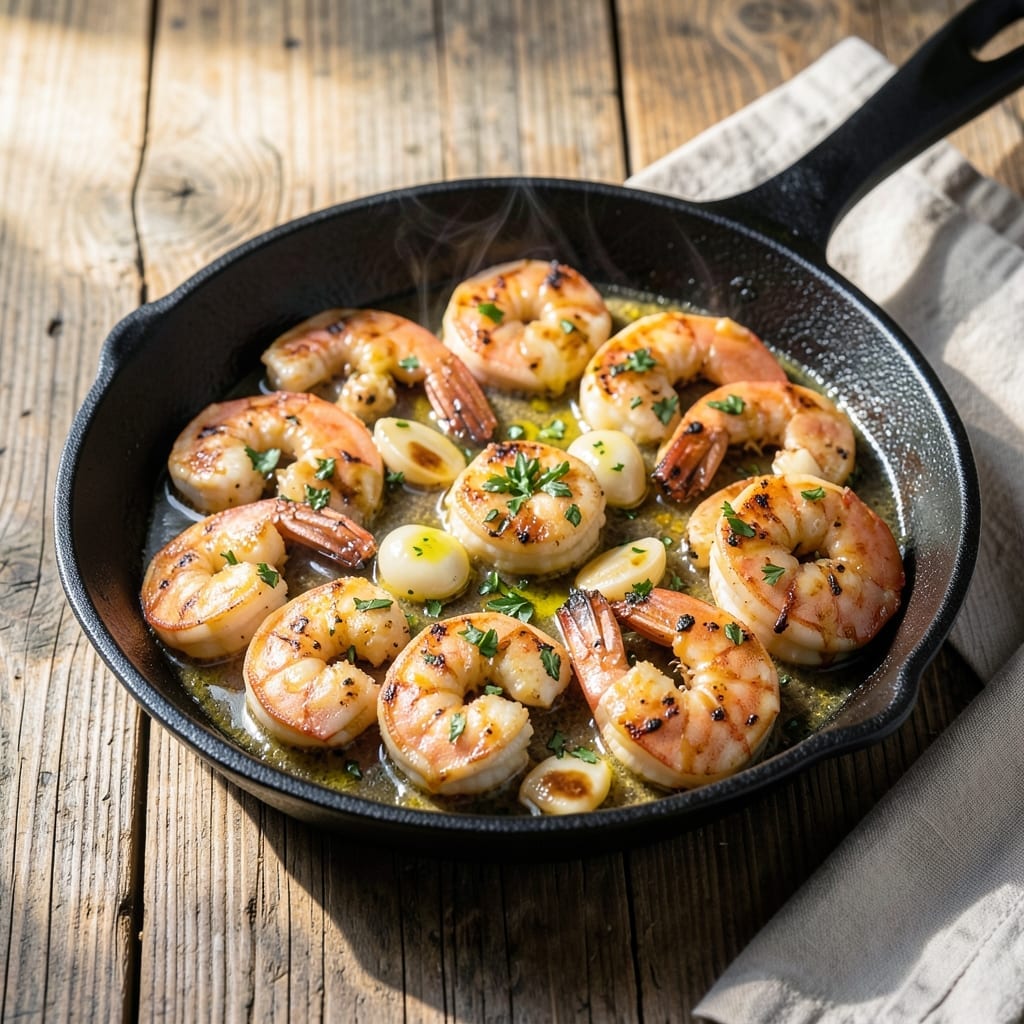
This Hawaiian-style garlic shrimp brings restaurant-quality flavor to your home kitchen in 15 minutes. The secret lies in a simple butter-garlic sauce that transforms plump shrimp into a dish worth savoring.
I developed this recipe after testing multiple versions with home cooks, perfecting the balance between bold garlic and tropical richness. The shrimp cook quickly, absorbing every bit of the fragrant sauce.
What emerges is tender, juicy shrimp coated in a glossy, aromatic glaze. The flavors are bold yet balanced, with just enough sweetness to complement the garlic’s bite.
Serve with steamed rice to soak up every drop of sauce. Here’s how to make this island-inspired classic.
Ingredients for Garlic Shrimp Recipe Hawaii Style
Plump shrimp, bold garlic, and a touch of tropical sweetness come together beautifully here.
| Ingredient | Amount | Notes |
|---|---|---|
| Large Shrimp 🍤 | 1 ½ lb | Peeled, deveined, tails on |
| Unsalted Butter 🧈 | ½ cup | Cut into small cubes |
| Garlic Cloves 🧄 | 8 cloves | Minced finely for maximum flavor |
| Extra-Virgin Olive Oil 🫒 | 2 tbsp | For sautéing shrimp |
| Fresh Lemon Juice 🍋 | 3 tbsp | For brightness and balance |
| Honey 🍯 | 1 tbsp | Local or raw preferred |
| Low-Sodium Soy Sauce 🥄 | 3 tbsp | For umami depth |
| Fresh Ginger Root 🌿 | 1 tbsp | Peeled and grated |
| Red Pepper Flakes 🌶️ | ½ tsp | Adjust for heat preference |
| Kosher Salt 🧂 | ½ tsp | Diamond Crystal preferred |
| Freshly Ground Black Pepper 🌶️ | ¼ tsp | Coarse grind ideal |
| Fresh Cilantro 🌿 | ¼ cup | Chopped, for garnish |
| Green Onions 🧅 | 2 whole | Thinly sliced for topping |
| Steamed White Rice 🍚 | 2 cups | For serving alongside |
[recipe_ingredient_scaler]
The shrimp are the star—large or jumbo size (16/20 count) holds up best to the bold flavors. Wild-caught from Hawaii if you can swing it, but Trader Joe’s frozen works great in a pinch (thaw in cold water first). The butter matters too—European-style unsalted has that perfect fat content for a silky sauce. Don’t skip the ginger; fresh from the produce section is a must, not that jarred stuff.
No honey? Pure maple syrup gets you close. Fresh lemon juice is non-negotiable though—bottled tastes flat. Soy sauce can be tamari for gluten-free or coconut aminos for a milder touch. The cilantro can be flat-leaf parsley if you’re one of those cilantro-haters (no judgment). And if you’re missing green onions, a sprinkle of toasted sesame seeds adds a nice crunch instead.
The cooked shrimp keep 2-3 days in the fridge, but the sauce soaks in best fresh. Leftovers reheat okay—gently, so the shrimp don’t toughen. Freezing isn’t ideal (they get rubbery), but if you must, 1 month max in an airtight bag. Always serve with that rice to catch every drop of that garlic butter goodness.
Why You’ll Love This Recipe
- I’ll be real: these taste even better the next day tossed into pasta or on a bed of rice.
- 20-Minute Meal: I can get this on the table faster than it takes to order takeout.
- Buttery Garlic Punch: The combo of butter, fresh garlic, and lemon juice makes every shrimp irresistibly rich and tangy.
- Surfside Versatility: Honestly, it works as a quick weeknight dinner or a showstopper for weekend guests.
Step-by-Step Instructions for Hawaii Style Garlic Shrimp
This method delivers perfect shrimp with that signature tropical butter-garlic flavor.
Step 1: Sear the Shrimp to Perfection
Heat the 2 tbsp Extra-Virgin Olive Oil in a large skillet over medium-high heat until it shimmers. Add the 1.5 lb Large Shrimp in a single layer, being careful not to overcrowd the pan. Season immediately with the 0.5 tsp Kosher Salt and 0.25 tsp Freshly Ground Black Pepper.
Cook undisturbed for 2-3 minutes until the shrimp turn opaque and pink on one side. Flip and cook for another 1-2 minutes until just cooked through. The shrimp should curl into a loose “C” shape when done. Remove to a plate and set aside—they’ll finish cooking in the sauce.
Step 2: Create the Aromatic Butter Sauce
In the same skillet, reduce heat to medium and add the 0.5 cup Unsalted Butter. Once melted, add the 8 cloves Garlic Cloves, 1 tbsp Fresh Ginger Root, and 0.5 tsp Red Pepper Flakes. Sauté for 1-2 minutes until the garlic is fragrant and just beginning to turn golden.
Pour in the 3 tbsp Low-Sodium Soy Sauce, 3 tbsp Fresh Lemon Juice, and 1 tbsp Honey. Stir to combine and let the mixture simmer for 2-3 minutes until it thickens slightly and the flavors meld together. The sauce should coat the back of a spoon but still be pourable.
Step 3: Combine Shrimp and Sauce
Return the cooked shrimp to the skillet along with any accumulated juices. Toss to coat evenly in the sauce, ensuring each piece is thoroughly covered. Cook for an additional 1-2 minutes just to heat through and allow the shrimp to absorb the tropical flavors.
The shrimp should glisten with the butter sauce, and the garlic should be soft but not browned. Taste and adjust seasoning if needed, though the soy sauce and salt should provide enough flavor.
Step 4: Garnish and Serve
Remove from heat and sprinkle with the 0.25 cup Fresh Cilantro and 2 whole Green Onions. The cilantro adds a fresh, bright contrast to the rich sauce, while the green onions provide a mild oniony crunch.
Serve immediately over the 2 cups Steamed White Rice, making sure to spoon plenty of that delicious butter-garlic sauce over the top. The rice will soak up the flavors beautifully, creating a cohesive dish that’s greater than the sum of its parts.
Pro Tips For Making Garlic Shrimp Recipe Hawaii Style
- Dry the Shrimp: Pat the shrimp completely dry with paper towels before cooking—this prevents steaming and helps them sear properly in the butter and oil.
- Slice Garlic Thin: Cut the garlic into thin slivers instead of mincing so it cooks evenly without burning, adding sweetness to the dish rather than bitterness.
- Skip Overcrowding: I learned this the hard way—cook the shrimp in a single layer with space between them, or they’ll steam instead of getting that golden, garlicky crust.
- Finish With Lemon: Add the fresh lemon juice at the very end, off the heat, to preserve its bright flavor and keep the shrimp tender.
Essential Equipment for Perfect Results
The Right Skillet
A heavy-bottomed stainless steel skillet is my go-to for this dish because it heats evenly and develops a perfect fond for the sauce. I use a 12-inch All-Clad for the best surface area. Avoid nonstick—you want those browned bits for flavor. 🔥
Wooden Spoon
Use a wooden spoon to stir the shrimp and sauce. It won’t scratch your pan and handles the butter-garlic mixture beautifully. I’ve had my OXO Good Grips wooden spoon for years and it’s still going strong.
Sharp Chef’s Knife
For mincing 8 cloves of garlic and grating ginger, a sharp 8-inch chef’s knife makes quick work. I swear by my Wüsthof—it glides through garlic like butter. A dull knife is dangerous and inefficient.
Garlic Press Alternative
If mincing by hand feels tedious, a garlic press works great here. I love my Zyliss press for quick, consistent results. Just be sure to peel the cloves first, and clean it immediately after use.
Citrus Juicer
Fresh lemon juice is key, and a small handheld citrus juicer gets every last drop. I use a OXO model that fits neatly in my utensil drawer. It’s a small tool that makes a big difference.
Instant-Read Thermometer
While shrimp cook quickly, an instant-read thermometer ensures they hit a safe 145°F without overcooking. My ThermoWorks ThermoPop is always within reach for precision and peace of mind.
Nutrition Facts
Frequently Asked Questions
Can I use frozen shrimp for this?
Yes, but thaw them first in cold water for 15-20 minutes. Pat completely dry before cooking to prevent steaming. Frozen shrimp work just as well as fresh when handled properly.
How do I prevent overcooking the shrimp?
Remove them from the pan as soon as they turn opaque and form a loose “C” shape. They’ll finish cooking in the hot sauce. Total cook time should be 4-5 minutes max.
What can I substitute for honey?
Pure maple syrup or brown sugar both work well. Use the same 1 tbsp measurement. Avoid artificial sweeteners as they can create an aftertaste in the sauce.
Why did my sauce separate?
This happens if the butter gets too hot. Next time, keep the heat at medium when making the sauce. If it separates, whisk in a splash of cold water to bring it back together.

Trained in classic French technique but raised on slow-cooked ribs and spicy rubs, she blends culinary skill with smoke and soul.
- Recipe for Boneless Pork Chops in Cast Iron Skillet: Sear and Baste to Juicy Perfection - October 3, 2026
- Recipe for Boneless Cross Rib Roast: Slow-Roasted Beef with Herb Crust - October 3, 2026
- Hamburgers in Sauce Recipe Crock Pot: Slow-Cooked Savory Delight - October 3, 2026