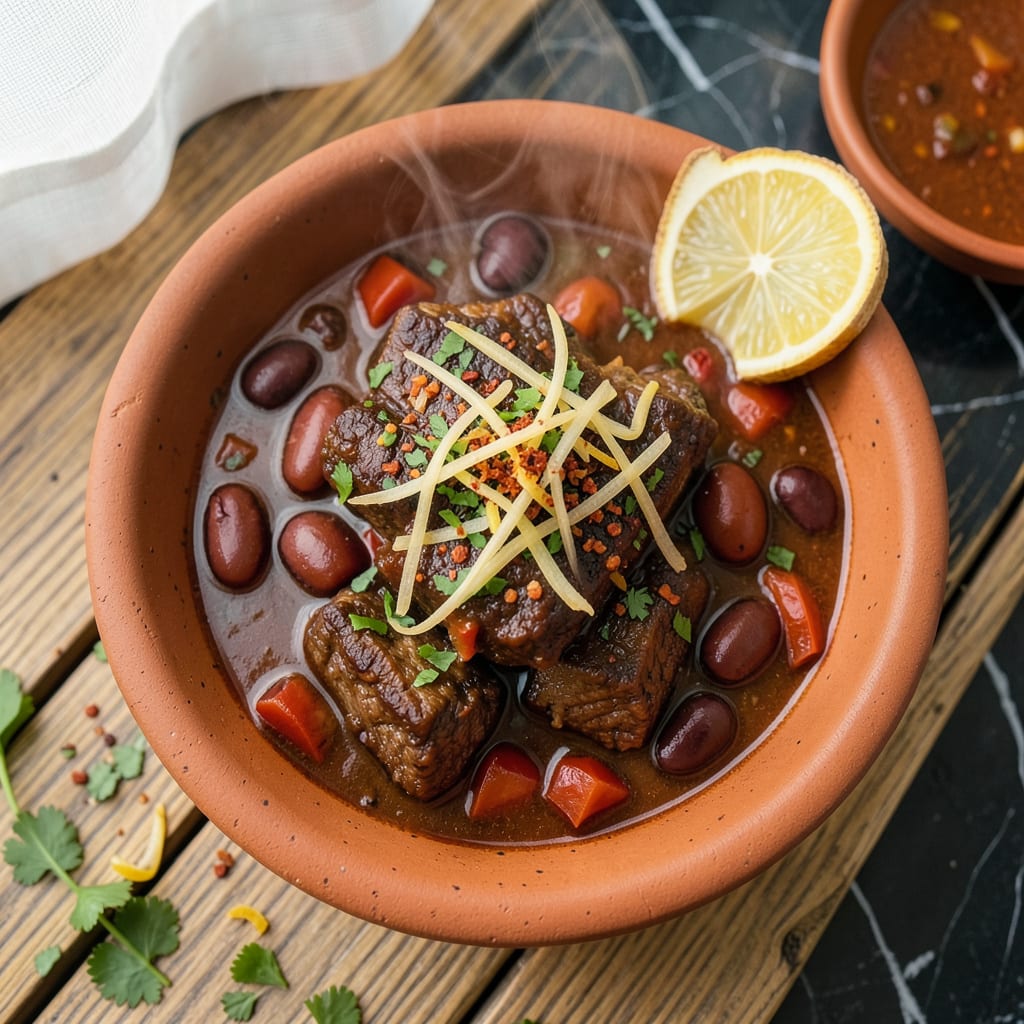
I’ll be real with you—ginger in chili might sound unusual at first, but it’s the secret weapon that transforms good chili into something extraordinary. That first time I added fresh ginger to my pot, the difference was immediate: deeper warmth, brighter layers, and a complexity that had everyone asking for seconds. This isn’t about overpowering heat; it’s about building flavor from the ground up.
Here’s the thing—ginger works its magic in two ways. Added early with onions and garlic, it mellows into a rich, earthy base. Stirred in later, it brings a zesty brightness that cuts through the richness. I’ve tested this with beef, black beans, and even smoked tofu, and every version benefits from that ginger backbone. It’s the kind of ingredient that makes people pause mid-bite and say, “What’s in this?”
The beauty of this chili is how it balances boldness and comfort. You’ll get that familiar hearty texture with chunks of protein and beans, but the ginger adds an unexpected warmth that lingers. I like finishing each bowl with fresh cilantro and lime—those bright notes play perfectly against the ginger’s depth. Trust me, once you try this, you’ll never go back to plain chili.
Whether you’re feeding a crowd or meal prepping for the week, this recipe adapts easily. The ginger’s versatility means it pairs just as well with cornbread as it does over rice. And if you’re feeling adventurous, try a splash of coconut milk for a creamy twist that complements the ginger beautifully. Let’s get that pot simmering.
📚 In This Guide
- What You’ll Need
- Instructions
- Tips and Common Mistakes
What Youll Need
- ● Fresh ginger root – 1 to 2 inches (peeled and minced or grated; adjust to taste)
- ● Ground beef or plant-based crumbles – 1.5 lbs (or 2 cups dried beans for vegetarian)
- ● Canned tomatoes – 2 (14.5 oz) cans (diced or crushed)
- ● Tomato paste – 2 tbsp (for depth of flavor)
- ● Chili powder – 2 tbsp (adjust for heat preference)
- ● Cumin – 1 tsp (ground, for earthy warmth)
- ● Onion & garlic – 1 medium onion (diced) + 3 cloves (minced)
- ● Beef or vegetable broth – 2 cups (low-sodium preferred)
- ○ Kidney or black beans – 1 (15 oz) can (drained, optional for texture)
- ● Olive oil – 1 tbsp (for sautéing)
- ● Salt & black pepper – to taste
- ● Large pot or Dutch oven (5-6 qt)
- ● Cutting board & sharp knife
- ● Microplane or grater (for ginger)
- ● Wooden spoon (for stirring)
- ○ Optional: Slow cooker (for hands-off simmering)
Instructions
Here’s how to layer ginger into your chili for maximum flavor impact—simple but transformative.
Choose and Prepare Your Ginger
Start by selecting fresh ginger root that feels firm to the touch with smooth, taut skin. Avoid pieces that look wrinkled or have soft spots. You’ll want about a 2-inch piece for a standard 4-serving pot of chili—this gives you enough depth without overpowering.
Peel the ginger using the edge of a spoon (it follows the contours better than a peeler) and mince it finely. I aim for pieces no larger than 1/8 inch—small enough to distribute evenly but still noticeable when you bite into them. For a smoother texture, you can grate it instead, but I prefer the little bursts of fresh ginger flavor.
Bloom the Ginger with Aromatics
Heat your pot over medium heat and add your oil. Once it shimmers, toss in the minced ginger along with your other aromatics (like onions, garlic, or peppers). Cook for 2-3 minutes, stirring frequently, until the ginger becomes fragrant and slightly golden at the edges.
This blooming step is crucial—it transforms raw ginger’s sharp bite into something warmer and more complex. You’ll know it’s ready when the kitchen fills with that distinctive spicy-sweet aroma. Be careful not to let it burn, as burnt ginger turns bitter and can ruin your chili’s balance.
Build Flavor Layers with Ginger
Add your ground meats and spices to the pot with the bloomed ginger. As you brown the meat, the ginger will meld with the other spices, creating a rich foundation. I like to let this mixture cook until the meat is fully browned and the spices have darkened slightly—about 8-10 minutes of cooking time.
The ginger works subtly here, enhancing the earthy notes of cumin and chili powder while adding its own bright warmth. You won’t taste it as a distinct flavor yet, but it’s working behind the scenes to deepen the overall profile. This is where the magic happens—trust the process.
Simmer for Maximum Infusion
Once you’ve added your liquids and beans, reduce the heat to low and let the chili simmer uncovered for at least 30 minutes. The ginger’s flavors will continue to develop and permeate the entire pot during this time. I recommend tasting after 20 minutes—you should notice a warm, slightly peppery undertone that wasn’t there before.
As the chili simmers, the ginger’s volatile oils will distribute throughout, creating that signature depth we’re after. The longer it cooks (up to 2 hours), the more integrated the ginger becomes, though I find 45 minutes strikes the perfect balance between freshness and integration.
Adjust and Finish
Before serving, taste your chili and consider whether the ginger presence matches your preference. If you want it more pronounced, a pinch of ground ginger stirred in at the end can boost the flavor without adding texture. For a brighter finish, a squeeze of lime juice enhances the ginger’s natural zing.
Let the chili rest for 10 minutes off the heat before serving—this allows the flavors to marry completely. The ginger should be present but not dominant, adding complexity that makes people wonder what your secret ingredient is. Serve with your favorite toppings and enjoy the warm, satisfying depth that only ginger can provide.
Tips and Common Mistakes
Here’s what I’ve learned about getting the most from ginger in your chili—small details that make a big difference.
The Heat Factor: In Step 2, those 2-3 minutes of blooming ginger over medium heat are everything. Watch for the edges to turn just slightly golden—that’s when the raw bite transforms into warm, aromatic depth. Stir constantly to prevent burning, which happens fast and ruins the flavor. I like to pull it off heat if I need to step away for even a moment.
Texture Secret: For Step 1, don’t skip the 1/8-inch mince—it’s the sweet spot. Too large and you’ll get overwhelming bites of ginger; too fine and it disappears. I use a sharp chef’s knife and rock it through the ginger for consistent pieces. If you prefer a smoother texture, grating works but loses those delightful little flavor bursts.
Simmer Strategy: The 30-minute minimum simmer in Step 4 is non-negotiable for full flavor infusion. Taste at 20 minutes like the instructions suggest—you’ll notice the ginger’s warmth emerging. I often go the full 45 minutes for perfect balance, but don’t exceed 2 hours or the freshness fades. Keep it uncovered to let flavors concentrate.
Resting Matters: That final 10-minute rest in Step 5 isn’t just for show. It lets the ginger’s oils distribute evenly through the chili. Skipping this makes the first bite taste different from the last. I cover mine loosely with a lid during resting to keep it warm without trapping steam.
Pro Tips for Ginger In Chili
- Here’s what I’ve learned about getting the most from ginger in your chili—small details that make a big difference.
- The Heat Factor: In Step 2, those 2-3 minutes of blooming ginger over medium heat are everything. Watch for the edges…
- Texture Secret: For Step 1, don’t skip the 1/8-inch mince—it’s the sweet spot. Too large and you’ll get overwhelming …
Frequently Asked Questions
Can I use ground ginger instead of fresh in chili?
Yes! Use ¼ teaspoon ground ginger for every 1 tablespoon fresh ginger called for. Ground ginger is more concentrated but lacks freshness. Add it early (with spices) to bloom flavors, but expect a slightly drier, earthier taste. For best results, pair it with a splash of lime juice to brighten the dish.
When’s the best time to add ginger to chili?
Add fresh ginger with aromatics (onions, garlic) to mellow its sharpness. For ground ginger, toast it with cumin/chili powder to deepen flavor. Avoid adding it too late—ginger needs 10+ minutes to infuse. Pro tip: Grate it finely to avoid fibrous textures!
What if my chili tastes too gingery?
Balance it! Stir in 1 teaspoon sugar/honey or 1 tablespoon tomato paste to counteract sharpness. Acid helps too—try a splash of vinegar or citrus. If overpowering, dilute with broth or beans, then simmer 15+ minutes to blend flavors.
Are there good ginger substitutes for chili?
Try these swaps (1:1 ratio unless noted):
- Galangal: Earthier, citrusy (common in Thai chili).
- Turmeric (½ amount): Adds warmth but changes color.
- Allspice (¼ amount): Sweet, peppery depth.
- Ginger paste: 1:1 substitute (check for additives).
Avoid nutmeg—it’s too sweet!
Does ginger make chili spicier?
No—ginger adds warmth and zing, not heat. It enhances perceived spiciness by boosting other flavors (like chili powder). For actual heat, pair it with jalapeños or cayenne. Fun fact: Ginger’s gingerol compound can soothe capsaicin burn if eaten separately!
Adding ginger to chili transforms a simple dish into a complex, warming masterpiece—balancing heat, depth, and brightness in every bite. Whether you prefer fresh, powdered, or pickled, this humble root elevates flavors while packing a nutritional punch. 🌶️✨
Ready to spice things up? Grab your pot and experiment—start with a small amount, taste as you go, and let your chili’s personality shine. Don’t forget to bookmark our favorite ginger-infused chili recipe for your next cookout!

Trained in classic French technique but raised on slow-cooked ribs and spicy rubs, she blends culinary skill with smoke and soul.
- Recipe for Boneless Pork Chops in Cast Iron Skillet: Sear and Baste to Juicy Perfection - October 3, 2026
- Recipe for Boneless Cross Rib Roast: Slow-Roasted Beef with Herb Crust - October 3, 2026
- Hamburgers in Sauce Recipe Crock Pot: Slow-Cooked Savory Delight - October 3, 2026