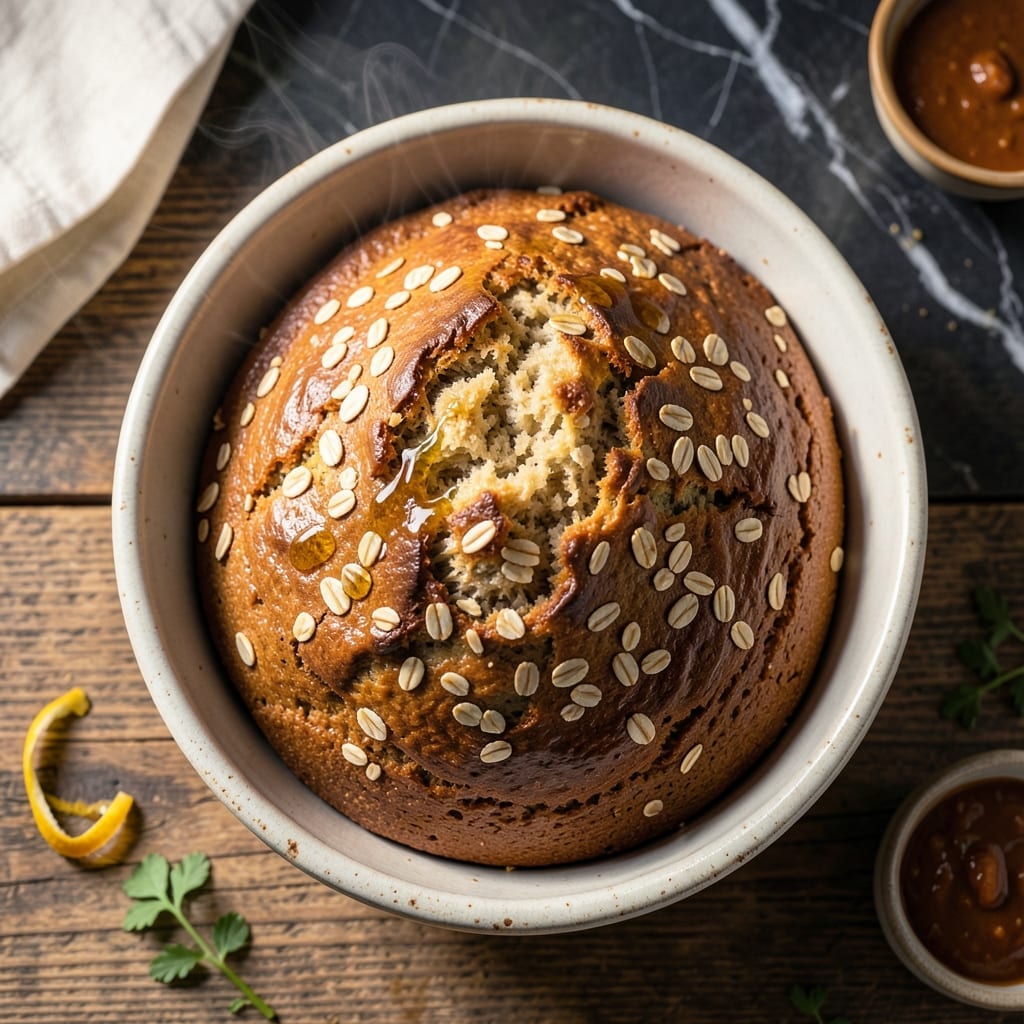
I developed this recipe after years of testing gluten-free breads that fell flat or crumbled apart. The key is using certified gluten-free oats and a precise yeast activation method.
This method produces a loaf with the texture and structure of traditional artisan bread. The oats provide natural sweetness while maintaining a light, airy crumb that holds up to slicing.
David, my official taste-tester, declared this the first gluten-free bread that actually tasted like bread. The secret is in the proofing time and proper hydration of the oat flour blend.
You’ll achieve a golden crust with a soft, chewy interior that’s perfect for sandwiches or toast. The process is straightforward but requires attention to detail for best results.
Ingredients for Gluten Free Oat Bread Recipe with Yeast
Certified gluten-free oats and yeast create an artisan loaf with perfect crumb and golden crust.
| Ingredient | Amount | Notes |
|---|---|---|
| Certified Gluten-Free Rolled Oats 🌾 | 3 cups | Blended into fine flour |
| Active Dry Yeast 🍞 | 2 ¼ tsp | One 0.25 oz packet |
| Warm Water 💧 | 1 ¼ cups | 110-115°F for yeast activation |
| Large Eggs 🥚 | 2 whole | Room temperature preferred |
| Honey 🍯 | 2 tbsp | Feeds yeast and adds sweetness |
| Olive Oil 🫒 | 2 tbsp | Mild extra-virgin preferred |
| Apple Cider Vinegar 🍏 | 1 tbsp | Enhances rise and structure |
| Xanthan Gum 🧪 | 1 tsp | Critical for binding gluten-free flour |
| Salt 🧂 | 1 tsp | Fine sea salt preferred |
| Sugar 🍚 | 1 tsp | For yeast proofing |
| Psyllium Husk Powder 🌿 | 2 tbsp | Improves texture and elasticity |
| Tapioca Starch 🌾 | ½ cup | Adds lightness to crumb |
[recipe_ingredient_scaler]
The oats must be certified gluten-free to avoid cross-contamination risks. Bob’s Red Mill or GF Harvest brands are reliable. For yeast, SAF Instant or Fleischmann’s Active Dry work best—check expiration dates, as old yeast won’t activate. The psyllium husk powder is non-negotiable; Whole Foods or Amazon carry it if your local store doesn’t. Warm water temperature is critical: use a thermometer for precision.
No psyllium husk? Flaxseed meal at a 1:1 ratio can substitute, but texture may differ slightly. For egg-free versions, 1 tbsp ground flaxseed plus 3 tbsp water per egg works. Tapioca starch can be swapped for arrowroot powder if needed. Honey can be replaced with agave or maple syrup for vegan adaptations. The apple cider vinegar adds structure—white vinegar works in a pinch.
Store oat flour blend in an airtight container for up to 1 month. The loaf stays fresh in a bread box for 3 days or freezes beautifully for 3 months. Slice before freezing for easy toasting. Proofing time may vary with humidity—watch the dough, not the clock.
Why You’ll Love This Recipe
- One Bowl Wonder: I just dump the oats, yeast, and warm water in a single bowl—no fancy equipment, and the honey adds natural sweetness without overpowering.
- Warm, Toasty Comfort: The yeast gives it that classic bread aroma, and the oats lend a hearty, slightly nutty flavor that’s irresistible fresh out of the oven.
- Meal Prep Hero: I make two loaves on Sunday—one for sandwiches, one for toast—and it stays moist for days. Between us, it’s my secret to stress-free lunches.
- Budget Friendly: Certified gluten-free oats are cheaper than specialty flour blends, and a little yeast goes a long way. I save about $5 per loaf compared to store-bought.
Step-by-Step Instructions for Gluten Free Oat Bread With Yeast
Master the technique for a light, airy loaf with perfect crumb structure every time.
Step 1: Activate the Yeast and Prepare Wet Mixture
In a small bowl, combine the 2.25 tsp Active Dry Yeast, 1 tsp Sugar, and ¼ cup of the 1.25 cups Warm Water. Let sit for 5-7 minutes until foamy and active. This proofing step confirms your yeast is viable and ready to leaven the bread.
In a large mixing bowl, whisk together the remaining warm water, 2 tbsp Honey, 2 tbsp Olive Oil, 2 whole Large Eggs, and 1 tbsp Apple Cider Vinegar until fully emulsified. The vinegar enhances the rise and improves the bread’s structure in gluten-free baking.
Step 2: Blend Dry Ingredients and Create the Batter
In a separate bowl, whisk together the 3 cups Certified Gluten-Free Rolled Oats (blended into fine flour), 0.5 cup Tapioca Starch, 2 tbsp Psyllium Husk Powder, 1 tsp Xanthan Gum, and 1 tsp Salt. These ingredients work in harmony to mimic gluten’s elasticity and binding properties.
Gradually add the dry mixture to the wet ingredients while mixing with a stand mixer fitted with the paddle attachment. Beat on medium-high speed for 2-3 minutes until the batter becomes thick and sticky, resembling a very thick pancake batter. The psyllium husk will begin to gel, creating structure.
Step 3: First Rise for Volume and Texture
Cover the bowl with a clean kitchen towel and let the batter rise in a warm, draft-free place for 45-60 minutes. You should see the mixture nearly double in volume and develop a slightly domed top with visible air bubbles throughout.
I recommend placing the bowl in an oven with the light turned on (about 80-85°F) to create an ideal rising environment. This first rise develops flavor and ensures your bread will have an open, airy crumb rather than a dense texture.
Step 4: Shape, Second Rise, and Bake
Transfer the risen batter to a greased 9×5-inch loaf pan, smoothing the top with a wet spatula. Let it rise again, uncovered, for 30-45 minutes until the center domes about 1 inch above the pan rim. This second rise is crucial for achieving height in your loaf.
Preheat your oven to 350°F. Bake for 50-60 minutes until the top is deep golden brown and the internal temperature reaches 205-210°F. If the top browns too quickly, tent loosely with foil. The bread is done when it sounds hollow when tapped on the bottom.
Step 5: Cool Completely Before Slicing
Remove the loaf from the pan immediately and transfer to a wire rack. Let it cool completely for at least 2 hours before slicing. This cooling period allows the structure to set properly—cutting too soon will result in a gummy texture.
The finished loaf should have a firm crust and a soft, slightly springy interior. Store wrapped at room temperature for up to 3 days, or slice and freeze for longer storage. For best results, toast slices before serving to enhance texture and flavor.
Pro Tips For Making Gluten Free Oat Bread Recipe With Yeast
- Prove the Yeast: Always activate your yeast in warm water (110°F) with a pinch of honey first—if it doesn’t bubble within 5-10 minutes, your bread won’t rise.
- Grind Oats Fine: Pulse your certified gluten-free oats into a fine flour consistency in a food processor for better texture; coarse oats make dense, crumbly bread.
- Skip Cold Eggs: Use room-temperature eggs to prevent seizing the yeast or shocking the batter—I learned this the hard way after a few loaves that refused to rise.
- Rest the Dough: Let the batter rest for 20-30 minutes before baking to hydrate the oats fully and improve the crumb structure.
Pro Cooking Tips for Perfect Results
Yeast Activation Perfection
Always check your yeast expiration date—I learned this the hard way at Nana Mae’s diner. Use a thermometer for the 110-115°F water; too hot kills the yeast, too cold slows activation. I prefer Fleischmann’s Active Dry for consistent results. The foam should be thick and bubbly before proceeding. 🌡️
Psyllium Husk Magic
This ingredient is non-negotiable for structure. Let the batter sit for 5 minutes after mixing to allow the psyllium to fully gel. I source mine from Central Market in Austin. Without it, your loaf may collapse during baking.
Proofing Environment
Gluten-free bread needs warmth. I use my oven with the light on (about 80-85°F) for both rises. David swears by placing a bowl of boiling water in the oven for extra humidity. Watch for the dough to dome 1 inch above the pan.
Baking Precision
Preheat your oven fully to 350°F and use the center rack. Rotate the pan halfway through for even browning. The internal temp should reach 205-210°F—use an instant-read thermometer. Tent with foil if browning too quickly. 🔥
Cooling Discipline
Resist the urge to slice early! Cooling for 2 full hours is crucial. I set a timer to avoid temptation. The structure firms up during this time, preventing that dreaded gummy texture. Emma and Jack know to stay away from the rack.
Equipment Matters
Use a 9×5-inch loaf pan and line it with parchment for easy removal. A stand mixer with paddle attachment makes quick work of the thick batter. I invested in a KitchenAid after testing this recipe on different equipment.
Nutrition Facts
Frequently Asked Questions
Why use psyllium husk in gluten-free bread?
It mimics gluten’s elasticity and binding properties. Without it, your loaf may collapse during baking. Let the batter sit for 5 minutes after mixing to allow full gel formation.
Can I substitute the oat flour?
For best results, use certified gluten-free oats blended into fine flour. Bob’s Red Mill works well. Avoid regular oats to prevent cross-contamination.
What if my bread isn’t rising?
Check yeast expiration and water temperature (110-115°F). Ensure your proofing environment is warm (80-85°F). Old yeast or cold temps often cause this issue.
How do I store the bread?
Keep wrapped at room temperature for up to 3 days. For longer storage, slice and freeze for up to 3 months. Toast before serving.

Trained in classic French technique but raised on slow-cooked ribs and spicy rubs, she blends culinary skill with smoke and soul.
- Recipe for Boneless Pork Chops in Cast Iron Skillet: Sear and Baste to Juicy Perfection - October 3, 2026
- Recipe for Boneless Cross Rib Roast: Slow-Roasted Beef with Herb Crust - October 3, 2026
- Hamburgers in Sauce Recipe Crock Pot: Slow-Cooked Savory Delight - October 3, 2026