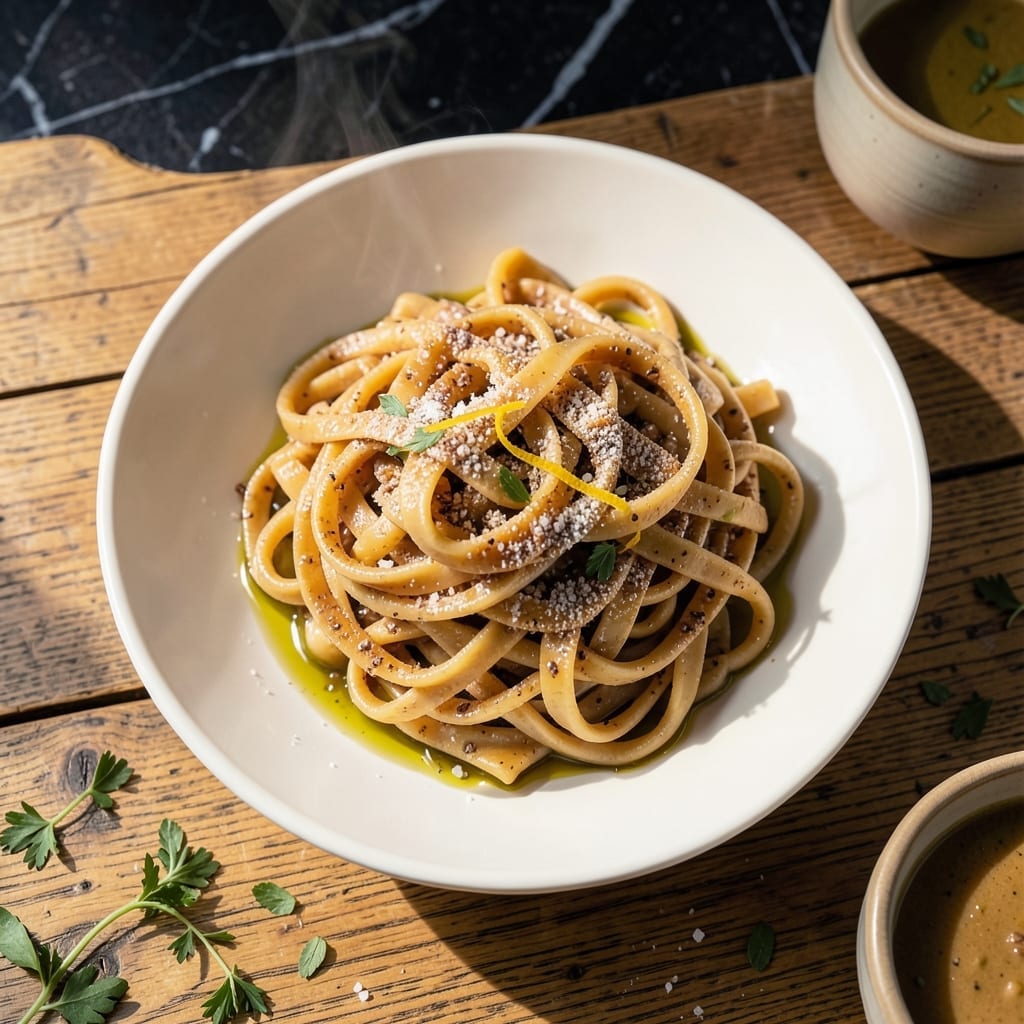
Making homemade pasta without gluten may seem challenging, but with the right technique and a Philips pasta machine, it becomes a simple process that yields impressive results.
This recipe uses a blend of gluten-free flours and xanthan gum to create dough that holds together beautifully as it moves through the machine. The key is finding the perfect moisture balance, which ensures the pasta maintains structure without becoming brittle.
Once rolled and cut, these noodles cook quickly—just 2-3 minutes in boiling water—revealing a tender texture that rivals traditional pasta. The machine’s precise settings make it easy to achieve consistent thickness every time.
Serve with your favorite sauce for a delicious, gluten-free meal that satisfies both dietary needs and culinary standards. Here’s how to get started.
Ingredients for Gluten Free Pasta Recipe for Philips Pasta Machine
Pantry staples plus a few specialty items. Fresh pasta without the gluten.
| Ingredient | Amount | Notes |
|---|---|---|
| Brown Rice Flour 🌾 | 1 ½ cups | Superfine grind preferred |
| Tapioca Starch 🌾 | ½ cup | Also called tapioca flour |
| Cornstarch 🌽 | ¼ cup | For elasticity in dough |
| Xanthan Gum 🧪 | ½ tsp | Essential for binding |
| Large Eggs 🥚 | 3 whole | Room temperature for best results |
| Extra-Virgin Olive Oil 🫒 | 1 tbsp | High quality for flavor |
| Salt 🧂 | ½ tsp | Fine sea salt preferred |
| Water 💧 | 2 tbsp | Adjust as needed for consistency |
| All-Purpose Gluten-Free Flour Blend 🌾 | ½ cup | Use a trusted brand like King Arthur |
| Psyllium Husk Powder 🌿 | ½ tsp | Optional for extra binding |
[recipe_ingredient_scaler]
The gluten-free flours are non-negotiable here. Bob’s Red Mill and King Arthur have reliable blends—just avoid anything with bean flours for this recipe (they make the pasta gritty). Xanthan gum is the magic that holds everything together. I buy mine in bulk from Amazon since it lasts forever. Superfine brown rice flour gives the best texture, so if yours feels gritty, pulse it in a food processor first.
No xanthan gum? Psyllium husk powder at half the amount works in a pinch. Out of tapioca starch? Arrowroot powder is a decent swap. For the eggs, size matters—large eggs add the right amount of liquid. If you’re vegan, try flax eggs (3 tbsp ground flax + 9 tbsp water), but the texture will differ. The olive oil can be swapped for avocado oil if that’s what you have.
Dough keeps wrapped tightly in plastic for 24 hours in the fridge. Fresh pasta cooks fast—2-3 minutes max—so keep an eye on it. Freeze uncooked noodles on a tray first, then transfer to a bag for up to 1 month.
Why You’ll Love This Recipe
- One Bowl Mix: I just dump the brown rice flour, tapioca starch, cornstarch, xanthan gum, and eggs in a bowl—no messy countertops or complicated steps.
- Ridiculously Good Texture: The combo of tapioca and cornstarch gives it that perfect chew, not the gummy mess I’ve had with other gluten-free pastas.
- Meal Prep Dream: I make a big batch on Sunday, let it dry, and it holds up beautifully in the fridge for quick weeknight dinners.
- Budget Stretcher: Honestly, a bag of brown rice flour and a few eggs cost less than store-bought gluten-free pasta—and this tastes way better.
Step-by-Step Instructions for Gluten Free Pasta for Philips Pasta Machine
This method delivers perfectly elastic dough that rolls beautifully through your machine.
Step 1: Whisk the Dry Ingredients for Structure
In a large bowl, whisk together the 1.5 cups Brown Rice Flour, 0.5 cup Tapioca Starch, 0.25 cup Cornstarch, 0.5 cup All-Purpose Gluten-Free Flour Blend, 0.5 tsp Xanthan Gum, 0.5 tsp Psyllium Husk Powder, and 0.5 tsp Salt until fully combined. I always sift these first to eliminate any lumps—gluten-free flours can clump stubbornly.
The combination of these flours and binders creates the elasticity that gluten normally provides. The psyllium husk starts absorbing moisture immediately, so work quickly once you add the wet ingredients. You’ll notice the mixture looks slightly grayish—that’s normal for gluten-free flour blends.
Step 2: Create the Wet Mixture for Binding
In a separate bowl, whisk the 3 whole Large Eggs, 1 tbsp Extra-Virgin Olive Oil, and 2 tbsp Water until the eggs are fully homogeneous. Room temperature eggs emulsify better with the oil, creating a more cohesive dough.
This wet mixture needs to be incorporated gradually into the dry ingredients. If you add it all at once, you risk activating too much psyllium husk too quickly, which can make the dough gummy. The olive oil adds richness and helps tenderize the final pasta.
Step 3: Combine and Knead to Perfect Consistency
Make a well in the center of your dry ingredients and pour in half of the wet mixture. Using a fork, gradually incorporate the flour into the liquid, working from the center outward. Once that’s combined, add the remaining wet ingredients and continue mixing.
When the dough becomes too stiff for the fork, turn it out onto a clean surface and knead by hand for 5-7 minutes. The dough should feel smooth but slightly tacky—not sticky. If it’s too dry, add water 1 teaspoon at a time; if too wet, dust with a bit more Brown Rice Flour. You’ll know it’s ready when it springs back slightly when pressed.
Step 4: Rest and Roll Through the Pasta Machine
Wrap the dough in plastic wrap and let it rest at room temperature for 30 minutes. This resting period allows the flours to fully hydrate and the binders to work their magic. The dough will relax and become more pliable, making it easier to roll out.
Divide the dough into 4 equal portions and flatten each into a rectangle about ½ inch thick. Set your Philips pasta machine to its widest setting and feed the first piece through. Fold the resulting sheet in thirds like a letter, turn it 90 degrees, and roll it through again. Repeat this process 3-4 times at the widest setting before gradually decreasing the thickness setting with each pass.
Step 5: Cut and Cook Your Fresh Pasta
Once you’ve reached your desired thickness (I recommend setting 5 or 6 for most shapes), run the sheet through the cutting attachment of your choice. For long pasta like fettuccine or spaghetti, I like to dust the cut strands lightly with cornstarch to prevent sticking.
Cook the fresh pasta in a large pot of boiling salted water for 2-3 minutes—fresh gluten-free pasta cooks much faster than dried. You’ll know it’s done when the noodles float to the surface and are tender but still have a slight bite. Drain immediately and serve with your favorite sauce, as gluten-free pasta can overcook quickly.
Pro Tips For Making Gluten Free Pasta Recipe For Philips Pasta Machine
- Pre-blend dry ingredients: Whisk the brown rice flour, tapioca starch, cornstarch, and xanthan gum together before adding eggs—I learned this the hard way after ending up with clumpy dough that jammed my Philips machine.
- Rest the dough: Let the mixed dough sit covered for 10-15 minutes before extrusion; it relaxes the starches and prevents the pasta from cracking as it comes out.
- Use room temperature eggs: Cold eggs make the dough seize up in the machine, so take them out of the fridge 30 minutes beforehand—sounds fussy, but it actually changes the outcome.
- Dust with rice flour: Skip regular flour for dusting and use extra brown rice flour instead to keep the pasta from sticking without introducing gluten.
Make-Ahead Tips for This Recipe
Prep Ahead Dough
Mix and knead your dough up to 24 hours before rolling. Wrap tightly in plastic and refrigerate. This actually improves texture as the flours hydrate fully. Let it sit at room temp for 30 minutes before using. 💡
Uncooked Pasta Storage
Cut noodles can be dusted with cornstarch and stored in airtight containers in the fridge for 2 days. Keep layers separated with parchment to prevent sticking. The machine’s precision helps maintain shape during storage.
Freezing for Later
Spread uncooked strands on a tray, freeze for 1 hour, then transfer to bags. They’ll keep for 1 month. No need to thaw—cook directly from frozen, adding 1 extra minute to boiling time.
Pre-Cooked Pasta
Cooked gluten-free pasta holds well for 3-4 days in the fridge. Toss with 1 tsp olive oil before storing to prevent clumping. Reheat by plunging into boiling water for 30 seconds to refresh.
Sauce Pairing Prep
Make sauces ahead too! Hearty tomato or cream sauces reheat beautifully. Store separately and combine just before serving. This keeps the pasta from absorbing too much sauce while stored.
Machine Cleaning
Always clean your Philips machine immediately after use. The gluten-free dough can dry quickly. I use a dry brush for residue, then wipe with a damp cloth. Never immerse the machine in water. ✨
Nutrition Facts
Frequently Asked Questions
Why does the dough need to rest before rolling?
Resting allows the gluten-free flours to fully hydrate and the binders to activate. This makes the dough more pliable and prevents cracking during rolling. 30 minutes is ideal for best results.
Can I use only one type of gluten-free flour?
No, a blend is essential for texture and elasticity. Using just brown rice flour would make the pasta gritty and brittle. The recipe’s combination ensures proper structure and taste.
How do I prevent the pasta from sticking to the machine?
Dust the dough lightly with cornstarch before each pass through the machine. Also, keep the machine clean and dry between uses. This prevents buildup and sticking.
What if my dough is too crumbly or dry?
Add water 1 teaspoon at a time until the dough comes together. If it’s too sticky, add a bit more brown rice flour. The perfect consistency is smooth but slightly tacky.

Trained in classic French technique but raised on slow-cooked ribs and spicy rubs, she blends culinary skill with smoke and soul.
- Recipe for Boneless Pork Chops in Cast Iron Skillet: Sear and Baste to Juicy Perfection - October 3, 2026
- Recipe for Boneless Cross Rib Roast: Slow-Roasted Beef with Herb Crust - October 3, 2026
- Hamburgers in Sauce Recipe Crock Pot: Slow-Cooked Savory Delight - October 3, 2026