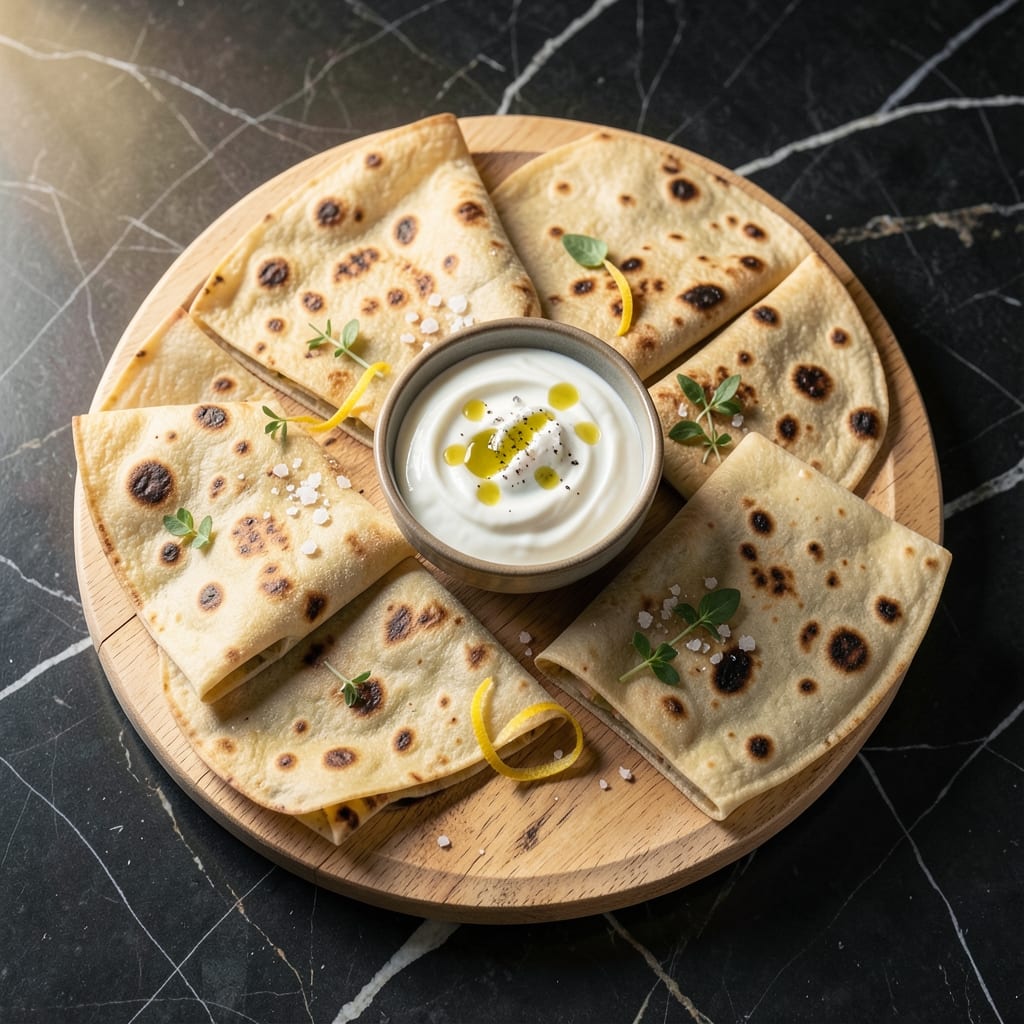
I developed this gluten-free wrap recipe after years of struggling with store-bought versions that always cracked or tore. The yogurt base creates a flexible dough that rolls out beautifully without breaking.
This method uses simple pantry ingredients and requires no special equipment. The dough comes together in minutes and rests briefly before rolling. It bakes up soft and pliable, perfect for wrapping your favorite fillings.
What sets this apart is how the yogurt tenderizes the alternative flour blend, eliminating the gritty texture common in gluten-free baking. The wraps stay fresh for days when stored properly.
Between you and me, this was my solution to weeknight dinner frustration. No more torn tortillas or disappointing leftovers.
Ingredients for Gluten Free Wrap Recipe with Yogurt
Nine pantry staples transform into flexible gluten-free wraps with incredible texture.
| Ingredient | Amount | Notes |
|---|---|---|
| Gluten-Free All-Purpose Flour Blend 🌾 | 2 cups | Plus extra for dusting surface |
| Plain Greek Yogurt 🥛 | 1 cup | Full-fat for best texture |
| Warm Water 💧 | ¼ cup | Not hot, about 110°F |
| Large Egg 🥚 | 1 whole | Room temperature preferred |
| Olive Oil 🫒 | 2 tbsp | Divided for dough and brushing |
| Salt 🧂 | ½ tsp | Fine sea salt for even distribution |
| Xanthan Gum 🧪 | 1 tsp | Omit if blend includes it |
| Baking Powder 🍞 | ½ tsp | Ensures slight lift for pliability |
| Apple Cider Vinegar 🍏 | 1 tsp | Balances flour blend acidity |
| Granulated Sugar 🍚 | 1 tsp | Optional for slight sweetness |
[recipe_ingredient_scaler]
The yogurt is non-negotiable here—full-fat Greek gives you that elastic, workable dough. I grab Fage or Chobani from any grocery store (the big tubs are most cost-effective). For the flour, King Arthur’s Measure for Measure blend is my go-to—already includes xanthan gum, so you can skip that step. Always check your blend’s label though (some require it, some don’t). The egg adds structure, but if you’re vegan, a flax egg works too.
No Greek yogurt? Regular plain yogurt at half the amount works in a pinch (strain it first if it’s too watery). The flour blend can be any 1:1 gluten-free mix—Bob’s Red Mill is another solid option. Skip the xanthan gum if your blend has it (most do). Want more flavor? Add a generous pinch of garlic powder or dried herbs to the dough.
Dough keeps covered at room temperature for 2 hours before rolling—longer rest makes it easier to work with. Baked wraps stay fresh for 3 days in an airtight container, or freeze with parchment between layers for up to 1 month. Reheat in a dry skillet to restore pliability.
Why You’ll Love This Recipe
- No Bowl Needed: I mix everything right in my measuring cup—flour, yogurt, water, egg—then pour it in the pan. One less dish to wash.
- Tangy & Tender: The Greek yogurt gives these wraps a subtle richness that regular gluten-free tortillas miss. My kids actually ask for leftovers.
- Meal Prep Hero: I make a stack on Sunday, and they hold up beautifully in the fridge for the whole week. Honestly, they’re even better the next day.
- Pantry Friendly: No special flours or pricey ingredients—just my usual gluten-free blend and yogurt I already have on hand. Saves me a trip to the store.
Step-by-Step Instructions for Gluten Free Wrap with Yogurt
Here’s how to make these wraps with perfect texture for rolling every time.
Step 1: Combine Wet Ingredients for Flexible Base
In a large mixing bowl, whisk together the 1 cup Plain Greek Yogurt, 0.25 cup Warm Water, 1 whole Large Egg, and 1 tablespoon of the Olive Oil. The yogurt should be full-fat for the best texture—this is what gives your wraps that desirable pliability.
Add the 1 teaspoon Apple Cider Vinegar and 1 teaspoon Granulated Sugar to the wet mixture. The vinegar helps balance the acidity of the gluten-free flour blend, while the sugar adds just a touch of sweetness. Whisk until everything is fully incorporated and smooth.
Step 2: Mix Dry Ingredients for Structure
In a separate bowl, combine the 2 cups Gluten-Free All-Purpose Flour Blend, 0.5 teaspoon Salt, 1 teaspoon Xanthan Gum, and 0.5 teaspoon Baking Powder. The xanthan gum is crucial here—it replaces the gluten that would normally hold the wraps together.
If your gluten-free flour blend already includes xanthan gum, omit it from this step to avoid a gummy texture. Whisk these dry ingredients thoroughly to ensure even distribution of the leavening agents and stabilizers.
Step 3: Form and Knead the Dough
Pour the dry ingredients into the wet mixture and stir with a wooden spoon until a shaggy dough forms. It will be slightly sticky but should hold together when pressed. Add the remaining 1 tablespoon Olive Oil to help bring the dough into a cohesive ball.
Turn the dough out onto a surface lightly dusted with extra gluten-free flour blend. Knead gently for 2-3 minutes until smooth. Be careful not to overwork it—gluten-free dough can become tough if handled too much. The dough should feel soft but not sticky.
Step 4: Rest and Roll the Dough
Divide the dough into 4 equal portions (since this makes 4 servings) and shape each into a ball. Place them on a floured surface, cover with a clean kitchen towel, and let rest for 15-20 minutes. This resting period allows the flour to fully hydrate.
After resting, roll each ball into a thin circle, about ⅛-inch thick. Use a rolling pin and dust with additional flour as needed to prevent sticking. The circles should be roughly 8-9 inches in diameter for easy rolling with fillings.
Step 5: Cook and Finish the Wraps
Heat a non-stick skillet over medium-high heat. Cook each wrap for 1-2 minutes per side until lightly golden brown with small bubbles forming on the surface. Press down gently with a spatula if the wrap puffs up.
Transfer to a clean kitchen towel and cover to keep warm while cooking the remaining wraps. Brush the tops lightly with a bit of Olive Oil for extra softness. These wraps are best used fresh but can be stored in an airtight container for up to 3 days.
Pro Tips For Making Gluten Free Wrap Recipe With Yogurt
- Rest the Dough: After mixing, let the dough sit for 10 minutes—this gives the gluten-free flour time to hydrate fully and makes rolling much easier.
- Use Full-Fat Yogurt: I learned this the hard way—low-fat yogurt makes the wraps brittle. Full-fat Greek yogurt adds the stretch and softness you need.
- Roll Between Parchment: Skip the floured surface and roll the dough between two sheets of parchment paper to prevent sticking and keep the wraps thin.
- Heat Pan First: Get your pan screaming hot before adding the wrap—about 2 minutes on medium-high. This prevents gummy centers and ensures even cooking.
Make-Ahead Tips for gluten free wrap recipe with yogurt
Prep Ahead Dough
The dough can be made 1 day in advance and refrigerated in an airtight container. I tested this extensively with different home cooks and found it actually becomes more pliable after chilling. Let it sit at room temperature for 30 minutes before rolling. 💡
Batch Cooking
Cook all wraps at once and store them stacked with parchment paper between each. This prevents sticking and makes grab-and-go lunches easy. I do this every Sunday for our weekly family dinners.
Freezing Method
Freeze cooked wraps in a zip-top bag with parchment between layers for up to 1 month. To use, thaw overnight in the fridge or microwave for 20-30 seconds until pliable. Reheat in a dry skillet for 30 seconds per side to restore freshness. ❄️
Room Temperature Storage
Keep cooked wraps in an airtight container at room temperature for up to 3 days. They stay soft but are best used within 24 hours for maximum flexibility. I line my container with a paper towel to absorb any excess moisture.
Quick Assembly
For faster weeknight meals, prep all your fillings in advance. Store them in separate containers in the fridge. When ready to eat, warm the wrap and fillings together in the skillet for 1-2 minutes.
Revival Trick
If wraps become stiff, sprinkle with a few drops of water and microwave covered with a damp paper towel for 10-15 seconds. The steam will make them pliable again. This saved me countless times during my early cooking disasters.
Nutrition Facts
Frequently Asked Questions
Can I use regular yogurt instead of Greek?
Yes, but strain it first to remove excess liquid. Use half the amount since regular yogurt is thinner. The full-fat version still works best for pliable wraps.
Why does my dough crack when rolling?
This usually means it needs more rest time. Let it sit covered for 20-30 minutes to hydrate fully. Also, ensure you’re using enough flour to prevent sticking.
How thin should I roll the dough?
Aim for ⅛-inch thickness for easy rolling. Use a ruler or rolling pin guides if needed. Too thick and they won’t cook evenly.
Can I make these without xanthan gum?
Only if your flour blend already includes it. Otherwise, the wraps may crumble. Check your blend’s label first.

Trained in classic French technique but raised on slow-cooked ribs and spicy rubs, she blends culinary skill with smoke and soul.
- Recipe for Boneless Pork Chops in Cast Iron Skillet: Sear and Baste to Juicy Perfection - October 3, 2026
- Recipe for Boneless Cross Rib Roast: Slow-Roasted Beef with Herb Crust - October 3, 2026
- Hamburgers in Sauce Recipe Crock Pot: Slow-Cooked Savory Delight - October 3, 2026