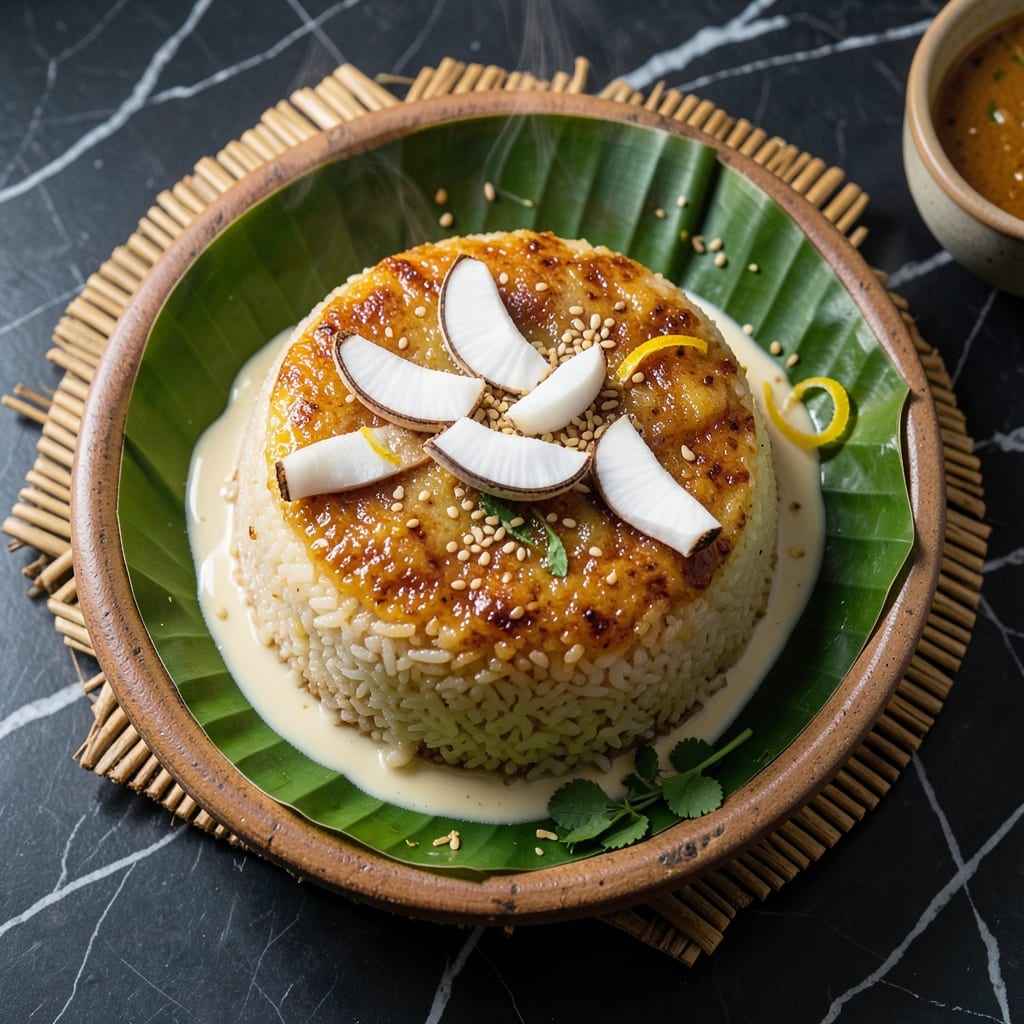
This traditional Filipino holiday treat brings warm, comforting flavors to your table. Using glutinous rice and rich coconut milk, the dish captures authentic taste through generations-old techniques.
Perfect for festive gatherings, the recipe delivers a soft, slightly chewy texture with a golden crust. The combination of coconut and rice creates a naturally sweet, aromatic experience that honors its cultural roots.
Ingredients for Glutinous Rice Bibingka Recipe with Coconut Milk
Traditional Filipino ingredients come together for this authentic holiday bibingka with rich coconut flavor.
| Ingredient | Amount | Notes |
|---|---|---|
| Glutinous Rice 🌾 | 2 cups | Soaked overnight for best texture |
| Coconut Milk 🥥 | 1 ½ cups | Full-fat for creaminess |
| Brown Sugar 🍚 | ¾ cup | Packed, for sweetness |
| Water 💧 | 1 cup | For adjusting consistency |
| Salt 🧂 | ½ tsp | Fine sea salt preferred |
| Coconut Oil 🫒 | 2 tbsp | For greasing and flavor |
| Banana Leaves 🍃 | 2 pieces | Optional, for authentic aroma |
| Vanilla Extract 🌿 | 1 tsp | Pure for best flavor |
| Pandan Leaves 🌿 | 2 pieces | Optional, for traditional fragrance |
| Toasted Coconut Flakes 🥥 | ¼ cup | For garnish and texture |
[recipe_ingredient_scaler]
The glutinous rice is non-negotiable—look for it labeled as ‘sweet rice’ or ‘sticky rice’ at Asian markets. Thai or Japanese brands work best. For coconut milk, full-fat cans from Thai Kitchen or Chaokoh deliver the richest results. Banana leaves (found frozen at Filipino or Latin markets) add authenticity but can be skipped if unavailable.
No banana leaves? Parchment paper works in a pinch. Swap brown sugar for coconut sugar at a 1:1 ratio. If pandan leaves are hard to find, a drop of pandan extract (sold at Asian grocery stores) works. The coconut flakes can be substituted with chopped macadamia nuts for crunch.
Storeglutinous rice in an airtight container for up to 6 months. Coconut milk keeps 1 week in the fridge once opened. Prepared bibingka stays fresh for 3 days at room temperature (if using banana leaves) or 5 days refrigerated.
Why You’ll Love This Recipe
- One Pot Wonder: I just dump everything in a pot—glutinous rice, coconut milk, sugar—and let it simmer. No fancy techniques, no stress.
- Coconut Heaven: That rich coconut milk soaks into the rice, giving it this creamy, slightly sweet taste with a hint of nuttiness. Honestly, it’s the kind of flavor that lingers.
- Feeds a Crowd: I make a big batch for potlucks or lazy Sundays, and it’s always a hit. Works just as well for a cozy weeknight treat.
- Budget Friendly: Glutinous rice and coconut milk stretch far, and a little brown sugar goes a long way. Leftovers taste even better the next day.
Step-by-Step Instructions for Glutinous Rice Bibingka
Follow this authentic method to create a traditional bibingka with perfect texture and aroma.
Step 1: Prepare the Glutinous Rice Mixture
In a large mixing bowl, combine the 2 cups Glutinous Rice with 1.5 cups Coconut Milk, 0.75 cup Brown Sugar, 1 cup Water, and 0.5 tsp Salt. Whisk thoroughly until the sugar dissolves completely and the mixture appears smooth. I use a spatula to scrape the sides and ensure even distribution.
The glutinous rice should be fully submerged in the liquid. This soaking step initiates the cooking process and ensures even texture. Let the mixture sit for 15 minutes while you prepare the other components. The rice grains will begin to plump slightly, a sign they’re ready for the next step.
Step 2: Prepare the Banana Leaves and Steamer
Rinse the 2 pieces Banana Leaves under warm water to soften them, then cut to fit your steamer basket. Lightly brush each leaf with 1 tbsp Coconut Oil to prevent sticking and add subtle coconut flavor. Arrange the leaves in the steamer, slightly overlapping if necessary.
Place the 2 pieces Pandan Leaves in the steaming water for added fragrance. Bring the water to a boil in the base of your steamer. The steam should be vigorous but not so forceful that it disturbs the delicate arrangement of leaves.
Step 3: Steam the Bibingka Mixture
Pour the rice mixture over the prepared banana leaves in the steamer basket, spreading it into an even layer about 1 inch thick. Drizzle the remaining 1 tbsp Coconut Oil over the top and add the 1 tsp Vanilla Extract. Cover with a clean kitchen towel before placing the lid on the steamer to catch condensation.
Steam over medium-high heat for 45-50 minutes until the center is set and the edges pull slightly away from the leaves. Check for doneness by inserting a toothpick—it should come out clean with no wet batter clinging to it. The top should look matte with a slightly springy texture when pressed gently.
Step 4: Finish and Garnish
Remove the bibingka from the steamer and let it cool for 10 minutes on a wire rack. This cooling period allows the structure to set completely. Carefully peel back the banana leaves to reveal the cake.
Sprinkle the 0.25 cup Toasted Coconut Flakes evenly over the top while the bibingka is still warm, pressing lightly so they adhere. The contrast between the soft, slightly chewy cake and the crisp coconut flakes is essential to authentic bibingka texture. Serve warm for the best traditional experience.
Pro Tips For Making Glutinous Rice Bibingka Recipe With Coconut Milk
- Soak the Rice: Glutinous rice needs at least 4 hours in warm water—I learned this the hard way after ending up with a crunchy, undercooked mess.
- Use Full-Fat Coconut Milk: Skip the light version; the fat in full-fat coconut milk gives bibingka that rich, creamy texture it’s known for.
- Watch the Sugar: Brown sugar can burn easily, so stir it into the coconut milk mixture before adding to the rice to avoid bitter spots.
- Steam Low and Slow: After burning three batches, I finally figured out that medium-low heat for 45-60 minutes prevents the bottom from scorching while the top cooks through.
Wine and Beer Pairings for This glutinous rice bibingka recipe with coconut milk
Sweet Wine Pairings
This dish pairs beautifully with Moscato d’Asti from Italy—its light effervescence and notes of peach and apricot complement the coconut’s richness. The 6% ABV ensures it won’t overpower the delicate rice flavor. 🍷
Dessert Wines
Try a Sauternes from Bordeaux for a luxurious match. Its honeyed sweetness and tropical fruit undertones mirror the caramelized edges of bibingka. Serve chilled at 50-55°F for optimal balance.
Beer Options
A Belgian witbier like Hoegaarden works wonderfully—the citrus and coriander notes cut through the coconut creaminess. The 4.9% ABV keeps it refreshing without competing with the dish’s sweetness.
Tropical Beer Pairing
For a bolder choice, Hawaiian Maui Brewing Co.’s Coconut Porter enhances the coconut milk with its toasted coconut flavor. The dark malt base adds depth that pairs well with the caramelized sugar in the recipe.
Non-Alcoholic
Sparkling coconut water with a squeeze of lime offers a light, tropical contrast. Chill for 2 hours before serving to let the flavors meld. This works especially well for daytime gatherings. 🌴
Nutrition Facts
Frequently Asked Questions
Can I use regular rice instead of glutinous?
No, regular rice won’t give the same chewy texture. Glutinous rice is essential for that signature sticky consistency. You can find it labeled as “sweet rice” at Asian markets.
Why does my bibingka come out dry?
Oversteaming or insufficient liquid is usually the culprit. Check at 40 minutes and add 2 tablespoons water if the top looks dry. Cover with a towel to retain moisture.
How do I store leftovers?
Keep in an airtight container at room temperature for 2 days or refrigerate for up to 5 days. Reheat by steaming for 5-10 minutes to restore moisture.
Can I bake it instead of steaming?
Yes! Bake at 350°F for 30-35 minutes in a greased pan. The texture will be slightly denser but still delicious. Line with banana leaves if available.

Trained in classic French technique but raised on slow-cooked ribs and spicy rubs, she blends culinary skill with smoke and soul.
- Recipe for Boneless Pork Chops in Cast Iron Skillet: Sear and Baste to Juicy Perfection - October 3, 2026
- Recipe for Boneless Cross Rib Roast: Slow-Roasted Beef with Herb Crust - October 3, 2026
- Hamburgers in Sauce Recipe Crock Pot: Slow-Cooked Savory Delight - October 3, 2026