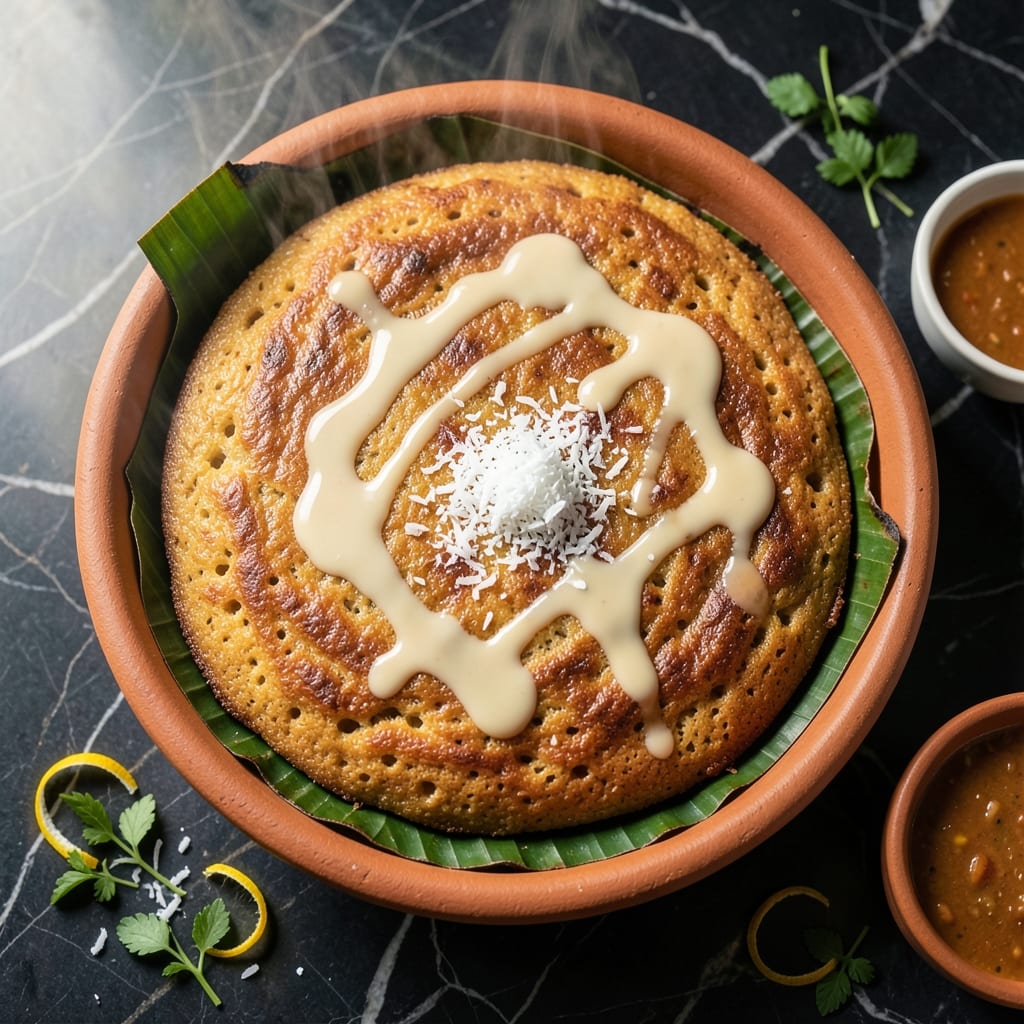
This traditional Filipino dessert brings holiday warmth to any table with its soft, slightly chewy texture and rich coconut flavor. I’ve refined this version to ensure perfect results every time.
Using glutinous rice flour and coconut milk, this bibingka bakes into a golden, fragrant cake that’s naturally vegan. The secret lies in the balance of sweetness and the aromatic touch of coconut.
Ingredients for Glutinous Rice Flour Bibingka Recipe with Coconut Milk
Simple pantry items create this fragrant Filipino dessert with rich coconut depth.
| Ingredient | Amount | Notes |
|---|---|---|
| Glutinous Rice Flour 🌾 | 2 cups | Also called sweet rice flour |
| Coconut Milk 🥥 | 1 ½ cups | Full-fat, canned for richness |
| Granulated Sugar 🍚 | ¾ cup | White or coconut sugar works |
| Baking Powder 🧂 | 2 tsp | Ensures a light texture |
| Salt 🧂 | ½ tsp | Balances the sweetness |
| Coconut Oil 🫒 | ¼ cup | Melted, for greasing and flavor |
| Fresh Coconut 🥥 | ½ cup | Shredded, for topping (optional) |
| Brown Sugar 🍚 | 2 tbsp | For caramelized topping |
| Vanilla Extract 🌿 | 1 tsp | Pure extract for best flavor |
| Water 💧 | ½ cup | Adjust for batter consistency |
| Banana Leaves 🍃 | 4 pieces | For lining, optional but traditional |
| Toasted Sesame Seeds 🌰 | 1 tbsp | For garnish (optional) |
[recipe_ingredient_scaler]
Glutinous rice flour is non-negotiable here—look for it in Asian markets or the international aisle at Whole Foods. Brands like Bob’s Red Mill or Erawan are reliable. Coconut milk should be full-fat, canned, and well-shaken before measuring. The fresh coconut topping is optional but adds a satisfying crunch (the pre-shredded kind works in a pinch).
No glutinous rice flour? Regular rice flour won’t give the same chew, but it’s your only swap. For coconut milk, coconut cream thinned with water works—use equal parts. Brown sugar can be swapped for muscovado or coconut sugar at 1:1. If banana leaves aren’t available, parchment paper is fine (just lack the aroma).
Store flour in an airtight container for up to 6 months. Coconut milk keeps 1 week once opened. The bibingka is best served warm but reheats well—cover with foil and warm in a 300°F oven for 10 minutes.
Why You’ll Love This Recipe
- One Bowl Wonder: I just dump the glutinous rice flour, coconut milk, and sugar in a single bowl, whisk, and pour—no fuss, no extra dishes.
- Coconut Cloud: The coconut milk bakes into this rich, creamy layer that makes every bite taste like a warm hug from a tropical beach.
- Holiday or Tuesday: I make it for Christmas Eve, but honestly, it’s so good I’ve been caught baking it on random weeknights just because.
- Pennywise Crowd Pleaser: A bag of glutinous rice flour and a can of coconut milk feed my whole family for less than the cost of takeout.
Step-by-Step Instructions for Glutinous Rice Flour Bibingka with Coconut Milk
This traditional method delivers the authentic holiday taste with a moist, slightly chewy texture.
Step 1: Prepare the Banana Leaves and Batter Base
Begin by briefly passing the 4 pieces Banana Leaves over an open flame for 10-15 seconds per side to soften them and release their aroma. This step prevents cracking and adds subtle smokiness. Cut the leaves into 8-inch squares to fit your baking pan.
In a large bowl, whisk together the 2 cups Glutinous Rice Flour, 0.75 cup Granulated Sugar, 2 tsp Baking Powder, and 0.5 tsp Salt. I always sift these dry ingredients first to prevent lumps and ensure even distribution throughout the batter.
Step 2: Create the Wet Mixture
In a separate bowl, combine the 1.5 cups Coconut Milk, 0.25 cup Coconut Oil, 0.5 cup Water, and 1 tsp Vanilla Extract. The coconut oil should be melted but not hot—warm to the touch is ideal. Whisk until the mixture is smooth and fully emulsified.
Slowly pour the wet ingredients into the dry mixture while whisking continuously. The batter should be thin enough to pour but thick enough to coat the back of a spoon. If it seems too thick, add a splash more Water—the 0.5 cup Water is a starting point, and you may need slightly more depending on your flour.
Step 3: Assemble and Prepare for Baking
Line an 8×8-inch baking pan with the prepared Banana Leaves, overlapping them slightly at the edges. Pour the batter into the pan, spreading it evenly. The batter should be about ½-inch thick—this ensures even cooking and the right texture.
Sprinkle the 2 tbsp Brown Sugar evenly over the top of the batter. This will create a sweet, caramelized crust as it bakes. Let the batter rest for 10 minutes while you preheat the oven to 350°F. This resting period allows the glutenous rice flour to fully hydrate.
Step 4: Bake to Golden Perfection
Bake on the middle rack for 35-40 minutes until the edges are golden brown and a toothpick inserted in the center comes out clean. Rotate the pan halfway through baking to ensure even browning, especially if your oven has hot spots.
During the last 5 minutes of baking, sprinkle the 0.5 cup Fresh Coconut over the top. This topping should toast lightly, adding texture and fresh coconut flavor. Watch closely to prevent over-browning.
Step 5: Finish and Serve Warm
Remove the bibingka from the oven and let it cool in the pan for 5 minutes. This brief rest helps it set and makes it easier to slice. Gently lift the bibingka out of the pan using the banana leaves as handles.
Transfer to a serving platter and sprinkle with the 1 tbsp Toasted Sesame Seeds for added crunch and visual appeal. Serve warm, cutting into squares while still slightly warm. The contrast of the soft, slightly chewy cake with the crispy edges and sweet toppings embodies the holiday spirit perfectly.
Pro Tips For Making Glutinous Rice Flour Bibingka Recipe With Coconut Milk
- Preheat the Pan: I learned this the hard way—always preheat your baking pan or clay pot for at least 5 minutes before pouring the batter. It guarantees an even golden crust on the bottom.
- Warm the Coconut Milk: After my first batch turned out dense, I started warming the coconut milk to room temperature before mixing. It blends smoothly with the glutinous rice flour and prevents lumps.
- Don’t Overmix: Stir just until the batter is combined—overmixing develops the gluten in the rice flour, making the bibingka tough instead of tender.
- Use Full-Fat Coconut Milk: Sounds obvious, but I was skeptical until I tried it. Full-fat coconut milk adds richness and moisture that low-fat versions just can’t match.
Health Benefits of This Dish
Rich in Energy
This dessert provides complex carbohydrates from glutinous rice flour, offering sustained energy release. The 2 cups of flour create a satisfying base that fuels you longer than refined wheat options. I find this perfect after a long day. 💪
Healthy Fats Boost
The 1.5 cups coconut milk delivers medium-chain triglycerides (MCTs), which your body metabolizes efficiently for quick energy. These healthy fats support brain function and heart health without spiking blood sugar.
Dairy-Free Delight
Being naturally vegan, this recipe avoids dairy while still delivering richness. The 0.25 cup coconut oil provides plant-based saturated fats that are easier for many to digest compared to butter.
Mineral Richness
Coconut milk contributes iron, magnesium, and potassium. The 0.5 cup fresh coconut topping adds fiber and copper, supporting immune function and red blood cell production.
Low Glycemic Impact
While sweet, the combination of glutinous rice flour and coconut creates a lower glycemic response than traditional cakes. The 2 tsp baking powder helps create a lighter texture without heavy refined carbs.
Natural Sweetness
Using 0.75 cup granulated sugar plus 2 tbsp brown sugar allows for sweetness without excessive processing. The natural sugars in coconut balance the overall glycemic load. 🥗
Nutrition Facts
Frequently Asked Questions
Can I use regular rice flour instead?
No, regular rice flour won’t give the same chewy texture. Glutinous rice flour is essential for that signature bibingka consistency. If unavailable, try a mix of tapioca starch and rice flour as a last resort.
Why did my bibingka turn out dense?
Overmixing the batter or using expired baking powder can cause this. Ensure your 2 tsp baking powder is fresh and mix just until combined. Baking at 350°F for 35-40 minutes also helps.
Can I make this ahead of time?
Yes! Bake it a day in advance and store at room temperature in an airtight container. Reheat covered in foil at 300°F for 10 minutes before serving. It stays moist for up to 3 days.

Trained in classic French technique but raised on slow-cooked ribs and spicy rubs, she blends culinary skill with smoke and soul.
- Recipe for Boneless Pork Chops in Cast Iron Skillet: Sear and Baste to Juicy Perfection - October 3, 2026
- Recipe for Boneless Cross Rib Roast: Slow-Roasted Beef with Herb Crust - October 3, 2026
- Hamburgers in Sauce Recipe Crock Pot: Slow-Cooked Savory Delight - October 3, 2026