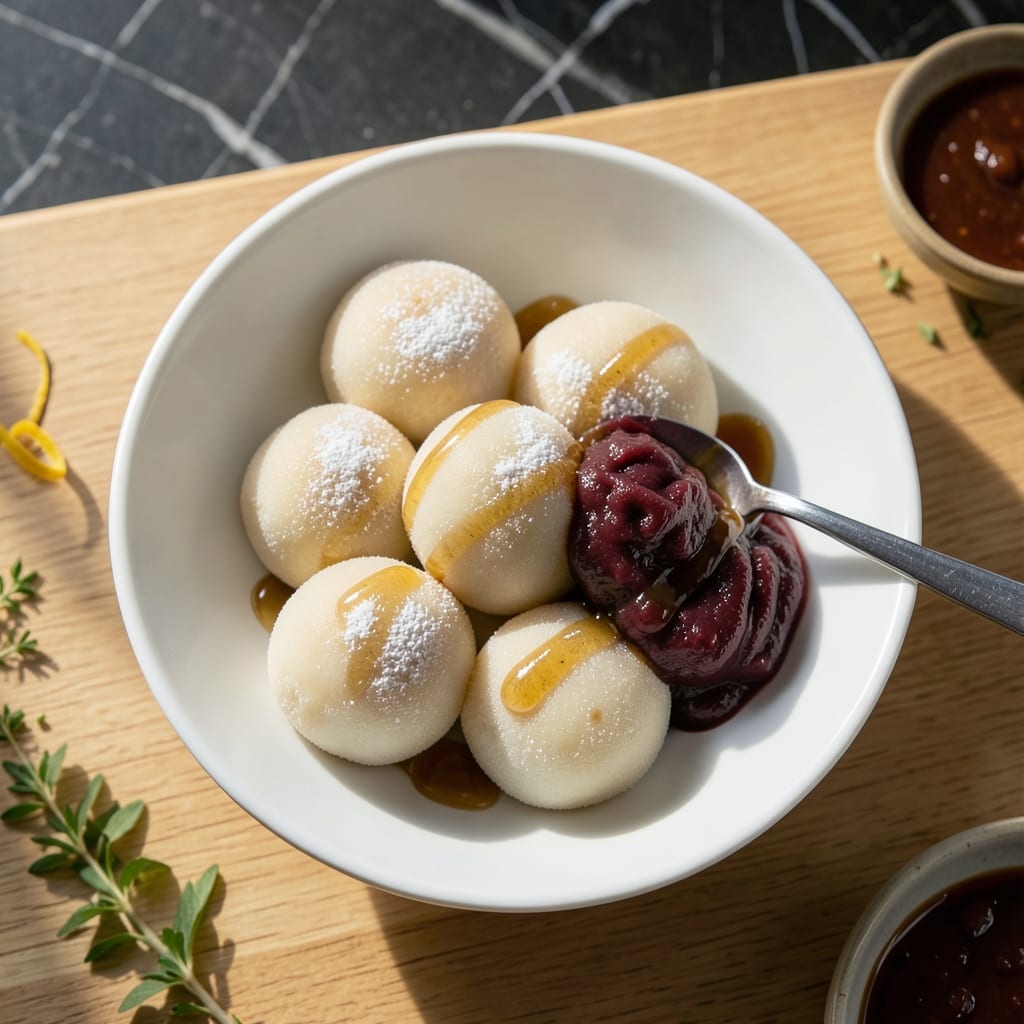
There’s something magical about the first time you make mochi from scratch, turning simple glutinous rice flour into soft, chewy pillows. This recipe delivers that perfect balance of elasticity and tenderness, with a sweet red bean filling that adds depth without overpowering.
The process is precise but rewarding. Steaming the flour mixture creates the right texture before kneading into a smooth, stretchy dough. The key is working quickly while the dough is warm to maintain its signature chewiness.
Each bite offers a delicate exterior that gives way to a slightly sticky interior, with the filling providing a rich contrast. The technique ensures consistent results every time, whether you’re making these for a special occasion or just a treat.
Serve warm for the best experience, when the texture is at its peak. The filling stays perfectly centered, creating a harmonious blend of flavors in every piece.
Ingredients for Glutinous Rice Flour Recipe Mochi
Transform glutinous rice flour into chewy, sweet mochi with simple pantry ingredients.
| Ingredient | Amount | Notes |
|---|---|---|
| Glutinous Rice Flour 🌾 | 2 cups | Also called sweet rice flour |
| Granulated Sugar 🍚 | ½ cup | For dough sweetness |
| Water 💧 | 1 ¼ cups | Warm for mixing |
| Cornstarch 🌾 | ¼ cup | For dusting work surface |
| Sweet Red Bean Paste 🍫 | 1 cup | Canned or homemade anko |
| Maple Syrup 🍁 | 2 tbsp | For filling adjustment |
| Coconut Oil 🥥 | 1 tbsp | Melted, for dough handling |
| Salt 🧂 | ¼ tsp | For balance in dough |
| Vanilla Extract 🌿 | 1 tsp | Pure for best flavor |
| Potato Starch 🥔 | 2 tbsp | Optional for texture |
[recipe_ingredient_scaler]
The glutinous rice flour is non-negotiable—Mochiko brand is the gold standard for authentic texture. Look for it in the Asian aisle at Whole Foods or any well-stocked grocery. The red bean paste, called anko, is sold canned at H Mart or Asian markets. Don’t confuse this flour with regular rice flour; they behave completely differently in recipes.
No anko? Any sweet filling works—nut butters, fruit jams, or even vegan chocolate hazelnut spread. The maple syrup can be swapped for agave at a 1:1 ratio. If your dough gets sticky, add extra cornstarch while kneading. Coconut oil can be replaced with neutral vegetable oil, but it adds a subtle richness worth keeping.
Store unfilled dough wrapped tightly at room temp for 24 hours, or filled mochi in an airtight container for 3 days. Freeze for up to 1 month—thaw at room temperature before serving. Re-steam briefly to restore freshness if needed.
Why You’ll Love This Recipe
- Mix & Steam: Honestly, it’s just flour, sugar, and water—mix, steam, and you’re halfway to mochi heaven.
- Sweet Chewy Bliss: That first bite of soft, stretchy dough with the sweet red bean paste inside? Pure satisfaction.
- Party or Snack: I’ve served these at gatherings and stashed them in lunchboxes—they work anywhere.
- Budget Stretcher: A bag of glutinous rice flour makes dozens, and the fillings are endlessly customizable.
Step-by-Step Instructions for Chewy Pillows With Sweet Red Bean Filling
Master the technique for perfect texture and a balanced sweet-savory filling every time.
Step 1: Prepare the Dough Mixture
In a large microwave-safe bowl, whisk together the 2 cups Glutinous Rice Flour, 0.5 cup Granulated Sugar, and 0.25 tsp Salt. Gradually add the 1.25 cups Water and 1 tsp Vanilla Extract while stirring to prevent lumps.
The mixture should be smooth and slightly thick, like pancake batter. I’ve found that using warm water helps the glutinous rice flour dissolve more evenly. Stir in the 1 tbsp Coconut Oil until fully incorporated, ensuring a glossy, cohesive mixture.
Step 2: Steam the Dough to Perfection
Cover the bowl with a damp kitchen towel or microwave-safe lid. Microwave on high for 2 minutes, then stir the dough thoroughly. Return it to the microwave and cook in 1-minute increments for a total of 4-5 minutes, stirring between each interval.
You’ll notice the dough transforming from a liquid batter to a stretchy, translucent mass. It’s ready when it pulls away from the sides of the bowl and has a slightly glossy, elastic texture. If it’s still sticky, microwave for an additional 30 seconds and check again.
Step 3: Shape and Fill the Mochi
Dust a clean work surface generously with the 0.25 cup Cornstarch. Transfer the steamed dough onto the surface and let it cool for 5 minutes until it’s safe to handle. Divide the dough into 4 equal portions.
Flatten each portion into a thin circle about ¼-inch thick. Place ¼ cup Sweet Red Bean Paste mixed with ½ tbsp Maple Syrup in the center of each circle. Gently pull the edges up and over the filling, pinching to seal completely. If the dough sticks, dust your hands with more cornstarch.
Step 4: Optional Texture Enhancement
For an extra-smooth finish, roll each filled mochi in the remaining 2 tbsp Potato Starch. This step is optional but helps prevent sticking and adds a delicate sheen. The potato starch also gives the exterior a slightly firmer texture, which contrasts beautifully with the soft dough and creamy filling.
If the sweet red bean paste is too thick, warm it slightly and stir in the remaining 1.5 tbsp Maple Syrup to achieve a spreadable consistency. This adjustment ensures the filling stays in place during shaping.
Step 5: Rest and Serve
Arrange the mochi on a parchment-lined plate and let them rest at room temperature for 10 minutes. This brief rest allows the dough to set fully, making it easier to handle and enhancing the chewy texture.
Serve immediately for the best texture. The mochi should be soft and pillowy with a slight bounce when pressed. The sweet red bean paste should be creamy and slightly sweet, balanced by the subtle flavor of the dough. Store any leftovers in an airtight container for up to 3 days, though they’re best enjoyed fresh.
Pro Tips For Making Glutinous Rice Flour Recipe Mochi
- Steam Evenly: Use a bamboo steamer lined with cheesecloth—I learned this the hard way after my first three batches stuck to the metal insert. The cloth lets steam circulate while keeping the mochi from tearing.
- Microwave the Filling: Warm the sweet red bean paste for 20-30 seconds before wrapping. Cold paste makes the mochi crack when you try to seal it, and nobody wants a cracked dumpling.
- Dust Generously: Coat your work surface and hands with cornstarch—about 2 tablespoons total—before handling the dough. Glutinous rice flour is sticky as hell, and this is the only thing that keeps it manageable.
- Rest Before Shaping: Let the steamed dough sit covered for 5 minutes after cooking. It firms up just enough to stretch without tearing, which saves you from the frustration of mochi that falls apart mid-wrap.
Dietary Considerations for This Recipe
Gluten-Free Friendly
Despite its name, glutinous rice flour contains no gluten—it’s completely safe for gluten-free diets. This makes mochi a fantastic treat for anyone avoiding wheat. David, my official taste-tester, has celiac disease and gives this recipe his full approval. 💪
Vegan Adaptation
This recipe is naturally vegan as written. The traditional sweet red bean paste and plant-based ingredients like coconut oil and maple syrup ensure no animal products are used. I love serving these to vegan friends who are always thrilled by the texture.
Nut Allergy Note
While the base recipe is nut-free, be cautious with fillings. Some commercial red bean pastes may contain traces of nuts. For severe allergies, I recommend making homemade anko or verifying labels at H Mart. Always dust with cornstarch instead of almond flour.
Low Sugar Option
Reduce the granulated sugar to ¼ cup and use sugar-free maple syrup for a lower-sugar version. The texture remains the same, though the sweetness will be more subtle. I’ve tested this with Swerve sweetener—it works, but the flavor differs slightly.
Diabetic Considerations
Mochi is high in carbs due to the rice flour, so portion control is key. One piece contains about 30g net carbs. Pair with protein like edamame to balance blood sugar. Always consult your doctor for personalized advice.
Storage Allergens
Keep mochi separate from wheat-based flours to avoid cross-contamination. Store in a dedicated airtight container and label clearly. At home, I use a separate shelf in the pantry for gluten-free baking supplies. 🥗
Nutrition Facts
Frequently Asked Questions
Can I use regular rice flour instead?
No, regular rice flour lacks the sticky, elastic properties of glutinous rice flour. The texture will be crumbly instead of chewy. Always use Mochiko brand for authentic results.
Why is my mochi dough too sticky?
It needs more steaming time or cornstarch. Microwave in 30-second bursts until it pulls from the bowl, then dust generously with cornstarch while kneading.
How do I store leftover mochi?
Keep in an airtight container at room temp for 3 days or freeze for 1 month. Thaw at room temperature before serving. Re-steam briefly to refresh texture.
Can I make mochi without a microwave?
Yes! Steam the dough in a bamboo steamer over boiling water for 20 minutes, stirring every 5 minutes. The texture will be just as chewy.

Trained in classic French technique but raised on slow-cooked ribs and spicy rubs, she blends culinary skill with smoke and soul.
- Recipe for Boneless Pork Chops in Cast Iron Skillet: Sear and Baste to Juicy Perfection - October 3, 2026
- Recipe for Boneless Cross Rib Roast: Slow-Roasted Beef with Herb Crust - October 3, 2026
- Hamburgers in Sauce Recipe Crock Pot: Slow-Cooked Savory Delight - October 3, 2026