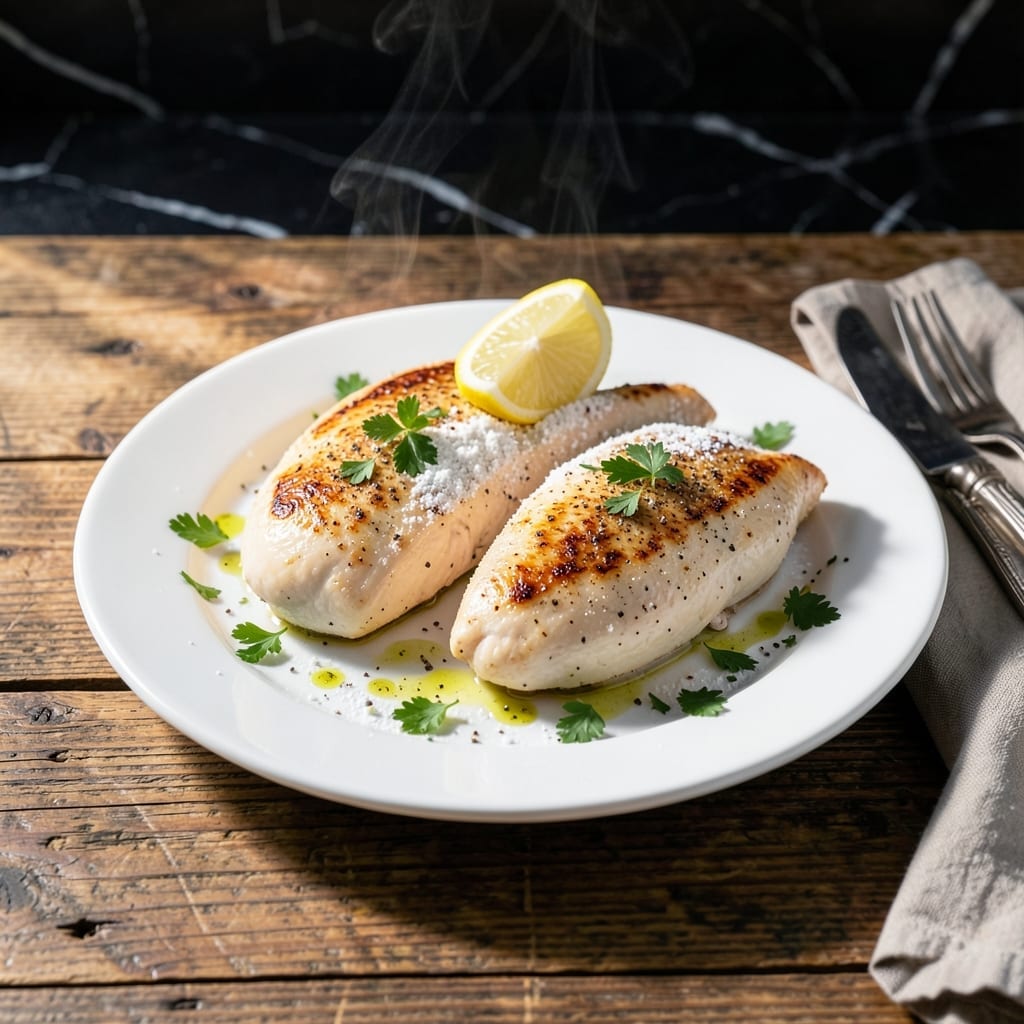
Pounding chicken breast to even thickness solves the age-old problem of dry, overcooked edges and underdone centers. This proven technique ensures uniform cooking and tender results every time.
I developed this method after years of struggling with inconsistent doneness. The process is simple: pound the thicker end of each breast to match the thinner end, creating a cutlet with even thickness throughout.
With this approach, you’ll achieve juicy, perfectly cooked chicken that stays moist from edge to edge. The uniform shape allows for precise cooking times and consistent results, whether grilling, baking, or pan-searing.
This technique works for any chicken breast recipe and takes just minutes to prepare. The difference in texture and flavor is immediately noticeable.
Ingredients for Chicken Breast Recipe Pounded
Pantry staples plus chicken breasts transform into perfectly even, juicy cutlets every time.
| Ingredient | Amount | Notes |
|---|---|---|
| Boneless Skinless Chicken Breasts 🍗 | 1 ½ lb | Pounded to even 1/2-inch thickness |
| All-Purpose Flour 🌾 | ½ cup | For light dredging |
| Kosher Salt 🧂 | 1 ½ tsp | Diamond Crystal preferred |
| Freshly Ground Black Pepper 🌶️ | ¾ tsp | Coarse grind optimal |
| Garlic Powder 🧄 | 1 tsp | Not garlic salt |
| Onion Powder 🧅 | 1 tsp | Freshly ground ideal |
| Smoked Paprika 🌶️ | ½ tsp | Sweet or hot variety |
| Dried Thyme 🍃 | ½ tsp | Crushed between fingers |
| Olive Oil 🫒 | 3 tbsp | Divided for cooking and finishing |
| Unsalted Butter 🧈 | 2 tbsp | For pan-searing finish |
| Fresh Lemon Juice 🍋 | 1 tbsp | Zested lemon optional |
| Low-Sodium Chicken Broth 💧 | ½ cup | For deglazing pan |
[recipe_ingredient_scaler]
The chicken quality is paramount. Opt for air-chilled chicken breasts from Whole Foods or Costco—they retain moisture better than water-chilled. Pounding to uniform thickness (aim for 1/2-inch) is non-negotiable for even cooking. Use a meat mallet or rolling pin between plastic wrap to prevent tearing. The flour dredge creates a light crust that locks in juices without overpowering the dish.
No chicken mallet? A heavy skillet or rolling pin works fine—just be gentle to avoid shredding the meat. Chicken thighs can substitute but require less cooking time. For gluten-free, cornstarch or almond flour replaces all-purpose flour at a 1:1 ratio. The smoked paprika adds depth, but regular paprika works if that’s what’s in your cabinet.
Pounded chicken breasts keep in the fridge for 2 days or freeze for 3 months. Cooked leftovers stay fresh for 4 days refrigerated. Always bring chicken to room temperature before pounding for best texture and even cooking.
Why You’ll Love This Recipe
- One Pan Wonder: I love that I only need a bowl, a pan, and a meat mallet—no fancy gear, just simple tools and 10 minutes of prep.
- Garlic-Pepper Punch: The mix of garlic powder and fresh black pepper gives every bite that warm, savory kick without overpowering the chicken.
- Weeknight Hero: Honestly, it’s my go-to for busy evenings—pounded thin, it cooks in a flash and pairs with anything from salad to pasta.
- Stretches Far: One pound of chicken breasts feeds four, and leftovers? They’re just as good sliced into wraps the next day.
Step-by-Step Instructions for Chicken Breast Recipe Pounded
Achieve perfectly even cooking with this method for uniformly thick chicken breasts.
Step 1: Pound and Season the Chicken Breasts
Place the 1.5 lb boneless skinless chicken breasts between two sheets of plastic wrap. Using a meat mallet or rolling pin, pound them to an even ½-inch thickness. This ensures uniform cooking and prevents dry, overdone edges while the center finishes.
Pat the pounded chicken dry with paper towels, then season both sides evenly with 1.5 tsp kosher salt, 0.75 tsp freshly ground black pepper, 1 tsp garlic powder, 1 tsp onion powder, 0.5 tsp smoked paprika, and 0.5 tsp dried thyme. Press the spices into the meat for better adhesion.
Step 2: Dredge and Sear the Chicken
Lightly dredge each breast in the 0.5 cup all-purpose flour, shaking off any excess. This creates a golden crust and helps thicken the pan sauce later. Heat 2 tbsp olive oil in a large skillet over medium-high heat until shimmering.
Add the chicken and cook for 4-5 minutes per side until golden brown and the internal temperature reaches 160°F. Avoid moving the chicken too soon—let it develop a deep sear before flipping. Transfer the chicken to a plate and tent with foil to keep warm.
Step 3: Create the Pan Sauce
Reduce the heat to medium and add the remaining 1 tbsp olive oil and 2 tbsp unsalted butter to the skillet. Once the butter melts, pour in the 0.5 cup low-sodium chicken broth, scraping up any browned bits from the bottom of the pan to build flavor.
Simmer for 2-3 minutes until the liquid reduces by half. Stir in the 1 tbsp fresh lemon juice and let the sauce thicken slightly. Taste and adjust seasoning if needed—it should be rich, tangy, and balanced.
Step 4: Finish and Serve
Return the chicken to the skillet, spooning the sauce over the top. Cook for an additional 1-2 minutes to allow the flavors to meld and the chicken to reach a final internal temperature of 165°F.
Serve immediately, drizzling any remaining sauce over the top. The juices should run clear when pierced, and the sauce should cling lightly to the chicken. This technique guarantees tender, evenly cooked chicken with a flavorful, velvety pan sauce every time.
Pro Tips For Making Chicken Breast Recipe Pounded
- Pound Evenly: Use the flat side of a meat mallet and aim for ½-inch thickness—any thinner and it dries out, any thicker and it cooks unevenly. I learned this the hard way after serving a few rubbery pieces.
- Season the Flour: Mix the kosher salt, black pepper, and garlic powder right into the flour before dredging. Sounds weird, but it works—every bite gets seasoned, not just the surface.
- Skip the Overcrowding: Cook the pounded chicken in batches if needed—about 2 tablespoons of oil per piece. Steer clear of cramming the pan, or you’ll end up steaming instead of browning.
- Rest Before Serving: Give it a solid 5 minutes under foil after cooking. My grandmother swore by this, and she was right—it keeps the juices where they belong.
Troubleshooting Perfect Results
Uneven Pounding
If your chicken has thick and thin spots after pounding, return it to the plastic wrap and gently tap the thicker areas. I use my OXO meat mallet with the flat side for even pressure. Aim for ½-inch thickness throughout—this prevents dry spots during cooking. 💪
Over-Salting
Remember that Diamond Crystal kosher salt is less dense than table salt. If you accidentally over-salt, rinse the chicken briefly and pat dry before cooking. I always taste my seasoning mix first to avoid this issue entirely.
Burnt Flour Coating
If your flour dredge burns during searing, your pan was likely too hot. Next time, heat the olive oil over medium-high heat for just 2 minutes before adding chicken. The flour should turn golden, not dark brown.
Dry Chicken
This usually means overcooking. Pull the chicken at 160°F internal temperature—it will rise to 165°F while resting. I use my ThermoWorks instant-read thermometer for accuracy. Resting for 5 minutes allows juices to redistribute. 🌡️
Thin Pan Sauce
If your sauce is too thin, simmer it longer before adding the chicken back. For quick fixes, mix 1 tsp cornstarch with 1 tbsp cold water and stir into the sauce. This thickens it without altering the flavor profile.
Sticking Chicken
Prevent this by ensuring your pan is hot enough before adding the chicken. The oil should shimmer but not smoke. If it sticks, don’t force it—wait 30 seconds longer for proper sear release. A well-seasoned cast iron skillet helps too.
Nutrition Facts
Frequently Asked Questions
What tool works best for pounding?
A meat mallet with a flat side is ideal for even pressure. A heavy skillet or rolling pin also works in a pinch. Always use plastic wrap to prevent tearing.
Why pound chicken breast?
Pounding creates uniform thickness, ensuring even cooking. This prevents dry edges while the center finishes, guaranteeing juicy results every time.
Can I skip the flour dredge?
You can, but the flour creates a light crust and helps thicken the pan sauce. For gluten-free, use cornstarch or almond flour instead.
How do I know when it’s done?
Use a meat thermometer: pull at 160°F internal temperature. It will rise to 165°F while resting. Juices should run clear.

Trained in classic French technique but raised on slow-cooked ribs and spicy rubs, she blends culinary skill with smoke and soul.
- Recipe for Boneless Pork Chops in Cast Iron Skillet: Sear and Baste to Juicy Perfection - October 3, 2026
- Recipe for Boneless Cross Rib Roast: Slow-Roasted Beef with Herb Crust - October 3, 2026
- Hamburgers in Sauce Recipe Crock Pot: Slow-Cooked Savory Delight - October 3, 2026