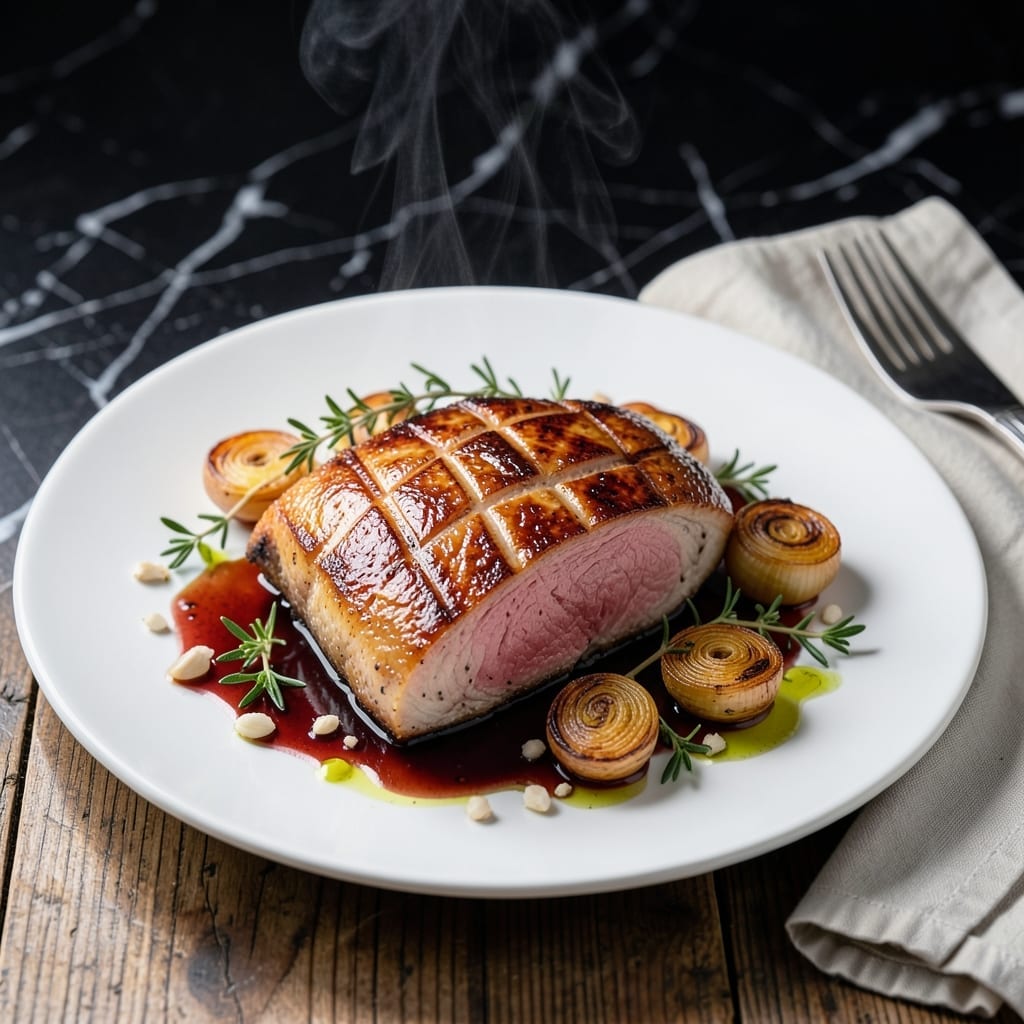
Achieving crisp skin and perfectly pink centers on duck breast requires precision and patience. This method delivers restaurant-quality results every time.
Score the fat, render it slowly, then sear for maximum texture. The meat stays juicy while the skin transforms into a golden, crackling finish.
Ingredients for Gordon Ramsay Duck Breast
Restaurant-quality ingredients for perfect duck breast with crisp skin and tender centers.
| Ingredient | Amount | Notes |
|---|---|---|
| Duck Breast 🦆 | 4 whole | Skin-on, about 6-8 oz each |
| Kosher Salt 🧂 | 2 tsp | Diamond Crystal preferred for even seasoning |
| Black Pepper 🌶️ | 1 tsp | Freshly cracked for best texture |
| Fresh Thyme Sprigs 🌿 | 4 whole | Leaves stripped for garnish |
| Garlic Cloves 🧄 | 2 cloves | Lightly crushed, skin on |
| Shallot 🧅 | 1 whole | Finely minced for sauce |
| Red Wine 🍷 | ½ cup | Dry variety like Cabernet Sauvignon |
| Chicken Stock 🍲 | ½ cup | Low-sodium preferred for control |
| Unsalted Butter 🧈 | 2 tbsp | Cold, cubed for basting |
| Honey 🍯 | 1 tbsp | For glaze finish |
| Olive Oil 🫒 | 1 tbsp | Neutral flavor for searing |
| Dijon Mustard 🟡 | 1 tsp | For sauce depth |
[recipe_ingredient_scaler]
The duck breast quality is paramount. Look for skin-on magret from D’Artagnan or Hudson Valley at specialty grocers like Whole Foods. The fat should be thick and white, the meat deep red. Avoid pre-frozen products—they won’t render the same crackling skin. A 6-8 oz portion per person ensures even cooking and that coveted pink center.
No red wine? Substitute beef stock with a splash of balsamic vinegar for similar depth. Fresh thyme can be replaced with rosemary at half the quantity, but avoid dried—it burns easily. If duck fat renders excessively, skim and save it for roasting potatoes later. The honey in the glaze can be swapped for maple syrup if preferred.
Duck breast keeps 2-3 days in the fridge before cooking. Store it uncovered on the bottom shelf to prevent cross-contamination. Leftovers? They reheat surprisingly well—slice thin and warm gently in a pan. Freezes for up to 3 months if vacuum-sealed.
Why You’ll Love This Recipe
- One Pan Wonder: I love that I only need a skillet and 5 ingredients—duck breast, salt, pepper, thyme, and garlic—to make this.
- Crispy Perfection: That golden skin crackles with every bite, while the thyme and garlic melt into the meat.
- Date Night Ready: Honestly, it feels fancy enough for a special dinner but takes less than 30 minutes.
- Leftovers Luxe: The next-day slices make killer sandwiches—way better than my usual lunch options.
Step-by-Step Instructions for Crisp-Skin Duck Breast
Achieve restaurant-quality results with precise technique and careful attention to detail.
Step 1: Score and Season the Duck Breast
Pat the 4 whole Duck Breast completely dry with paper towels. Using a sharp knife, score the skin in a crosshatch pattern, cutting through the fat but not into the meat. This allows the fat to render evenly and prevents curling during cooking.
Season both sides generously with the 2 tsp Kosher Salt and 1 tsp Black Pepper. I prefer Diamond Crystal kosher salt for its even distribution. Let the duck sit at room temperature for 30 minutes to ensure even cooking.
Step 2: Sear Skin-Side Down for Maximum Crispness
Heat a cold, dry skillet over medium-low heat. Place the duck breasts skin-side down in the pan—the fat will begin to render immediately. Cook undisturbed for 8-10 minutes, allowing the skin to turn deep golden brown and crisp.
Pour off excess fat occasionally, but leave about 1 tbsp in the pan for flavor. Add the 2 cloves Garlic Cloves (lightly crushed, skin on) and the 4 whole Fresh Thyme Sprigs to the pan during the last 2 minutes of searing to infuse the fat with aroma.
Step 3: Flip and Finish with Basting
Flip the duck breasts and cook for 3-4 minutes for medium-rare (internal temperature of 130-135°F). Add the 2 tbsp Unsalted Butter (cold, cubed) to the pan and baste the duck continuously with the foaming butter using a spoon.
Tilt the pan slightly to pool the butter and fat, making basting easier. This step ensures the meat stays moist and develops a beautiful glossy finish. Remove the duck from the pan and transfer to a cutting board to rest.
Step 4: Create the Red Wine Pan Sauce
Pour off all but 1 tbsp of fat from the skillet. Add the finely minced 1 whole Shallot and sauté over medium heat for 1-2 minutes until soft and translucent. Avoid burning the shallots, as this will make the sauce bitter.
Deglaze the pan with the 0.5 cup Red Wine, scraping up all the browned bits from the bottom. Simmer until the wine reduces by half, about 3-4 minutes. Add the 0.5 cup Chicken Stock, 1 tbsp Honey, and 1 tsp Dijon Mustard, then simmer for another 2-3 minutes until slightly thickened.
Step 5: Rest, Slice, and Serve
Let the duck breasts rest for 5-10 minutes before slicing. This allows the juices to redistribute, ensuring every bite is tender and flavorful. Slice the duck breasts diagonally into ½-inch thick pieces.
Strain the sauce through a fine-mesh sieve to remove the shallots and thyme, if desired, or leave them in for a rustic touch. Pour the sauce over the sliced duck and garnish with fresh thyme leaves. Serve immediately while the skin is still crisp and the centers are perfectly pink.
Pro Tips For Making Gordon Ramsay Duck Breast
- Score the Fat: Cut a crosshatch pattern into the duck skin—about 1/4 inch apart—and go deep enough to see the meat but not all the way through. I learned this the hard way when my first attempts came out rubbery because the fat couldn’t render properly.
- Start Cold, Finish Warm: Place the duck breast fat-side down in a cold pan, then turn the heat to medium. This renders the fat slowly for crispier skin without burning the thyme and garlic.
- Rest Before Slicing: Let the duck rest 5-10 minutes under foil after cooking. Sounds obvious, but I used to skip it and wondered why my slices were dry and the juices ran all over the plate.
- Use Fresh Thyme: Dried thyme won’t cut it here—fresh sprigs bruised lightly with your fingers release way more aroma into the fat. My grandmother swore by this, and she was right.
Health Benefits of gordon ramsay duck breast
Rich in Iron
Duck breast is an excellent source of heme iron, the type your body absorbs most easily. A single 6-8 oz serving provides about 3.5mg, covering 20% of your daily needs. I always feel energized after a duck dish, thanks to this iron boost. 💪
High-Quality Protein
This dish packs a serious protein punch with 40g per serving, containing all nine essential amino acids. The protein in duck supports muscle repair and immune function, making it a favorite among athletes and health-conscious foodies alike.
B Vitamin Powerhouse
Duck breast is loaded with B vitamins, including B12, niacin, and riboflavin. These nutrients are vital for energy metabolism and maintaining healthy skin and nerves. A serving covers 30-50% of your daily B vitamin needs.
Heart-Healthy Fats
While duck contains saturated fat, it also provides monounsaturated fats, similar to olive oil. These healthier fats can help lower bad cholesterol levels. I recommend balancing this dish with veggie sides for a well-rounded meal.
Selenium Boost
You’ll get a significant dose of selenium from duck breast—about 50mcg per serving, which is 90% of your daily requirement. This mineral acts as a powerful antioxidant, protecting your cells from damage. 🥗
Zinc for Immunity
Duck is rich in zinc, with one serving providing about 4mg. This mineral plays a crucial role in immune function and wound healing. I notice I stay healthier during winter when I include more zinc-rich foods like this in my diet.
Nutrition Facts
Frequently Asked Questions
Why score the skin before cooking?
Scoring helps render the fat evenly and prevents curling during cooking. It also creates more surface area for crispy skin development.
How do I know when it’s done?
Use a meat thermometer for accuracy. Aim for 130-135°F internally for perfect medium-rare with pink centers. Overcooking dries out the meat.
What if my skin isn’t crispy?
Pat the skin thoroughly dry before cooking. Use medium-low heat and don’t move the duck for 8-10 minutes to ensure proper rendering and crisping.
Can I use a different wine for the sauce?
Any dry red wine works well. In a pinch, substitute beef stock with a splash of balsamic vinegar for similar depth of flavor.

Trained in classic French technique but raised on slow-cooked ribs and spicy rubs, she blends culinary skill with smoke and soul.
- Recipe for Boneless Pork Chops in Cast Iron Skillet: Sear and Baste to Juicy Perfection - October 3, 2026
- Recipe for Boneless Cross Rib Roast: Slow-Roasted Beef with Herb Crust - October 3, 2026
- Hamburgers in Sauce Recipe Crock Pot: Slow-Cooked Savory Delight - October 3, 2026