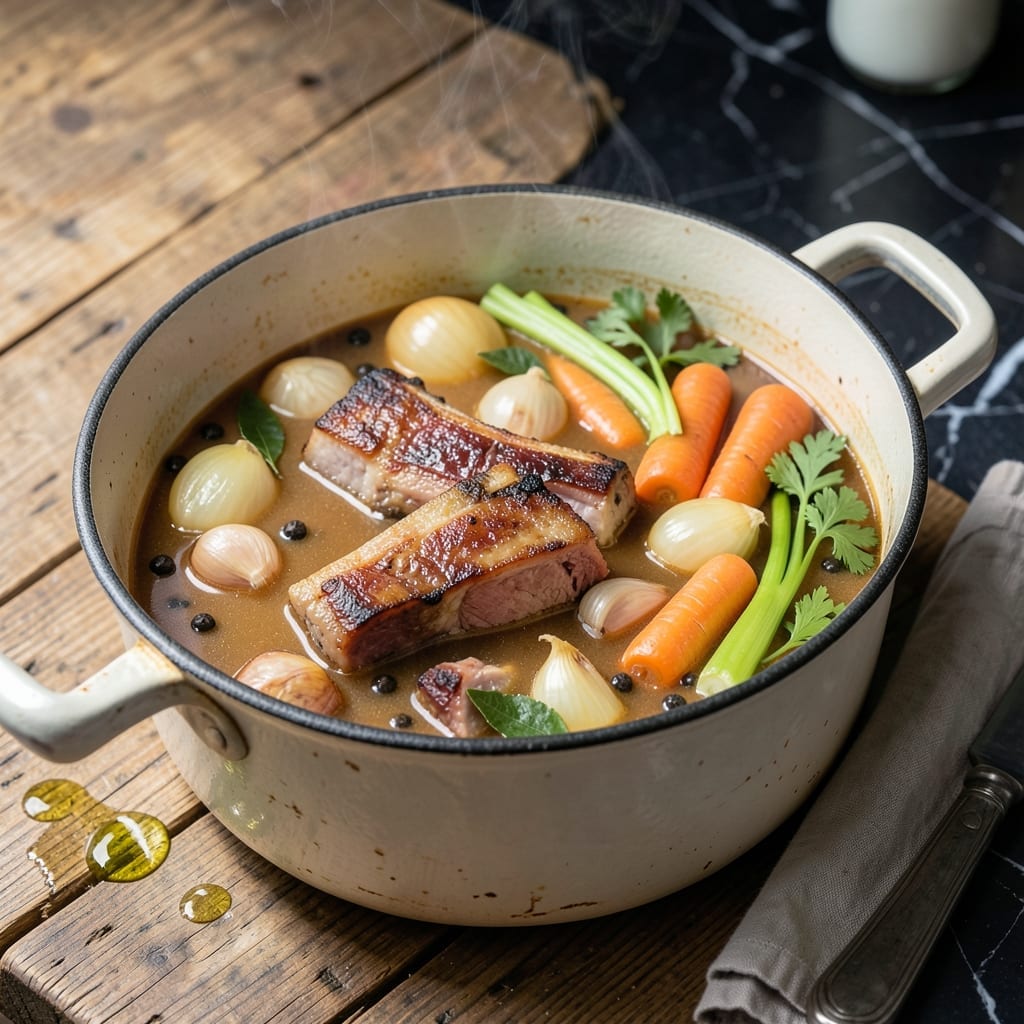
Every good soup and sauce starts with a solid foundation, and this rich ham stock delivers depth that store-bought can’t match. I’ve relied on this technique for years to transform leftovers into liquid gold.
Simmering ham bones with aromatic vegetables extracts maximum flavor, creating a versatile base for beans, risottos, or gravies. The process is simple but requires patience to develop that deep, savory character.
Ingredients for Ham Stock
Transform leftover ham bones into a rich, savory foundation for any dish.
| Ingredient | Amount | Notes |
|---|---|---|
| Ham Bones 🍖 | 2 lb | Meaty bones preferred for flavor |
| Yellow Onions 🧅 | 2 whole | Quartered, skins on for color |
| Carrots 🥕 | 3 whole | Halved, unpeeled for depth |
| Celery Stalks 🥬 | 3 whole | Including leafy tops |
| Garlic Cloves 🧄 | 6 cloves | Smashed, skins on |
| Bay Leaves 🍃 | 2 whole | Dried, for aromatic base |
| Black Peppercorns 🌶️ | 1 tbsp | Whole, for subtle heat |
| Cold Water 💧 | 4 cups | Enough to cover bones fully |
| Apple Cider Vinegar 🍎 | 2 tbsp | Helps extract calcium from bones |
[recipe_ingredient_scaler]
The bones are everything here. Meaty ham bones from a baked ham yield the richest stock—avoid overly salty or smoked bones which can overpower. Most butchers will save bones for free if you ask ahead. Whole Foods or local farms often have high-quality options. Look for bones with plenty of cartilage and connective tissue, as these break down into gelatin for that luxurious mouthfeel.
No ham bones? Pork neck bones or hocks work in a pinch, though the flavor profile shifts slightly. The vegetables are flexible—parsnips or leeks can replace carrots or celery if that’s what’s on hand. Skip the salt entirely; ham bones are salty enough. If you want extra depth, add a splash of white wine with the vinegar.
Stock keeps 5 days refrigerated or 6 months frozen. Strain and cool quickly before storing—divide into portions for easy use. Freeze in ice cube trays for small batches, or use quart-size containers for larger recipes. The fat will solidify on top; skim it off before using.
Why You’ll Love This Recipe
- Dump and Simmer: I just toss the ham bone, onion, carrots, celery, and garlic in a pot, cover with water, and let it do its thing—no babysitting required.
- Rich, Deep Flavor: The ham bone infuses the stock with this incredible savory depth that store-bought just can’t touch.
- Soup’s Best Friend: I use this as a base for beans, soups, or risotto—it’s my secret to making everything taste homemade.
- Pennywise Perfection: Honestly, it’s like getting a second meal from that holiday ham. Zero waste, all flavor.
Step-by-Step Instructions for Ham Stock
This method ensures maximum flavor extraction and a rich, aromatic base for your culinary creations.
Step 1: Prepare the Bones and Vegetables
Start by placing the 2 lb Ham Bones in a large stockpot. I prefer meaty bones as they provide superior depth of flavor. Add the 2 whole Yellow Onions (quartered with skins on for color), 3 whole Carrots (halved and unpeeled for depth), and 3 whole Celery Stalks (including leafy tops).
The vegetable skins and leafy tops contribute essential nutrients and a beautiful golden hue to the finished stock. This step ensures a well-rounded, savory foundation.
Step 2: Add Aromatics and Liquid
Add the 6 cloves Garlic Cloves (smashed with skins on), 2 whole Bay Leaves, and 1 tbsp Black Peppercorns to the pot. These aromatics infuse the stock with subtle, complex layers of flavor. Pour in the 4 cups Cold Water, ensuring it fully covers the bones and vegetables.
Cold water is crucial here—it allows for a slow, even extraction of flavors and gelatin from the bones. Stir in the 2 tbsp Apple Cider Vinegar, which helps draw out calcium and other minerals from the bones, enriching the stock’s nutritional profile.
Step 3: Simmer Gently for Depth of Flavor
Bring the mixture to a boil over medium-high heat, then immediately reduce to a gentle simmer. Partially cover the pot and let it cook for 4-6 hours. The low and slow approach ensures the bones release their collagen, creating a stock that’s rich in body and flavor.
Skimming off any foam or impurities that rise to the surface during the first 30 minutes keeps the stock clear and clean. Avoid boiling vigorously, as this can make the stock cloudy and break down the ingredients too quickly.
Step 4: Strain and Store
After simmering, remove the pot from heat and let it cool slightly. Strain the stock through a fine-mesh sieve into a large bowl or another pot, pressing gently on the solids to extract every bit of liquid. Discard the solids—they’ve given all their flavor to the stock.
Allow the stock to cool to room temperature before transferring it to airtight containers. It will keep in the refrigerator for up to 5 days or in the freezer for 3 months. The stock should have a deep amber color and a rich, savory aroma, ready to elevate any dish.
Pro Tips For Making Ham Stock
- Simmer, Don’t Boil: Keep the stock at a gentle simmer—big rolling boils make the broth cloudy and can turn the flavor bitter. I learned this the hard way after ruining a batch with aggressive heat.
- Roast the Bones First: Toss the ham bones in a 400°F oven for 20 minutes before simmering. It deepens the flavor way more than just dumping them in cold water.
- Skip the Salt: Ham bones are already salty, so hold off on adding extra salt until you taste the finished stock. After over-salting my first few batches, I now wait until the end.
- Use Cold Water: Start the bones in cold water and bring it up slowly—it pulls out more gelatin and flavor than dropping them into already-hot water. Sounds weird, but it works.
Common Mistakes When Making Great ham stock
Boiling Too Vigorously
A rolling boil breaks down ingredients too quickly, making your stock cloudy and bitter. Keep it at a gentle simmer—just a few bubbles breaking the surface. I learned this the hard way after my first batch turned murky and harsh. 🌡️
Skipping the Skim
During the first 30 minutes, foam and impurities rise to the top. Skim these off with a fine-mesh strainer or spoon for a cleaner, clearer stock. Ignoring this step can leave your stock with an off-putting scum layer.
Using Salty Bones
Overly cured or smoked ham bones can make your stock unpleasantly salty. Stick to meaty, lightly seasoned bones for the best results. My local butcher saves these for me when I ask ahead.
Short Simmer Time
Less than 4 hours won’t extract enough gelatin and flavor from the bones. I aim for 5-6 hours for maximum richness. Patience is key—this isn’t a quick process, but the payoff is worth every minute.
Overcrowding the Pot
Use a large enough pot so bones and vegetables are fully submerged with 2 inches of water above them. Crowding leads to uneven cooking and weak flavor. My 8-quart stockpot handles 2 lb of bones perfectly.
Adding Salt Early
Ham bones release plenty of salt as they simmer. Taste your stock before adding any extra seasoning. I adjust with a pinch of salt only after straining, if needed at all. 💡
Nutrition Facts
Frequently Asked Questions
Can I use a slow cooker instead of a stockpot?
Yes! A slow cooker works perfectly for 4-6 hours on high or 8-10 hours on low. Just ensure bones and vegetables are fully submerged in water.
Why include apple cider vinegar?
The vinegar helps extract calcium and minerals from the bones, creating a more nutrient-rich stock. It won’t make your stock taste vinegary.
How do I reduce the saltiness if my stock turns out too salty?
Dilute with water or unsalted chicken stock. For future batches, use less salty ham bones or avoid adding any extra salt.
Can I reuse the bones for a second batch?
Yes, but the second batch will be less rich. Simmer for 2-3 hours and combine with the first batch for extra depth.

Trained in classic French technique but raised on slow-cooked ribs and spicy rubs, she blends culinary skill with smoke and soul.
- Recipe for Boneless Pork Chops in Cast Iron Skillet: Sear and Baste to Juicy Perfection - October 3, 2026
- Recipe for Boneless Cross Rib Roast: Slow-Roasted Beef with Herb Crust - October 3, 2026
- Hamburgers in Sauce Recipe Crock Pot: Slow-Cooked Savory Delight - October 3, 2026