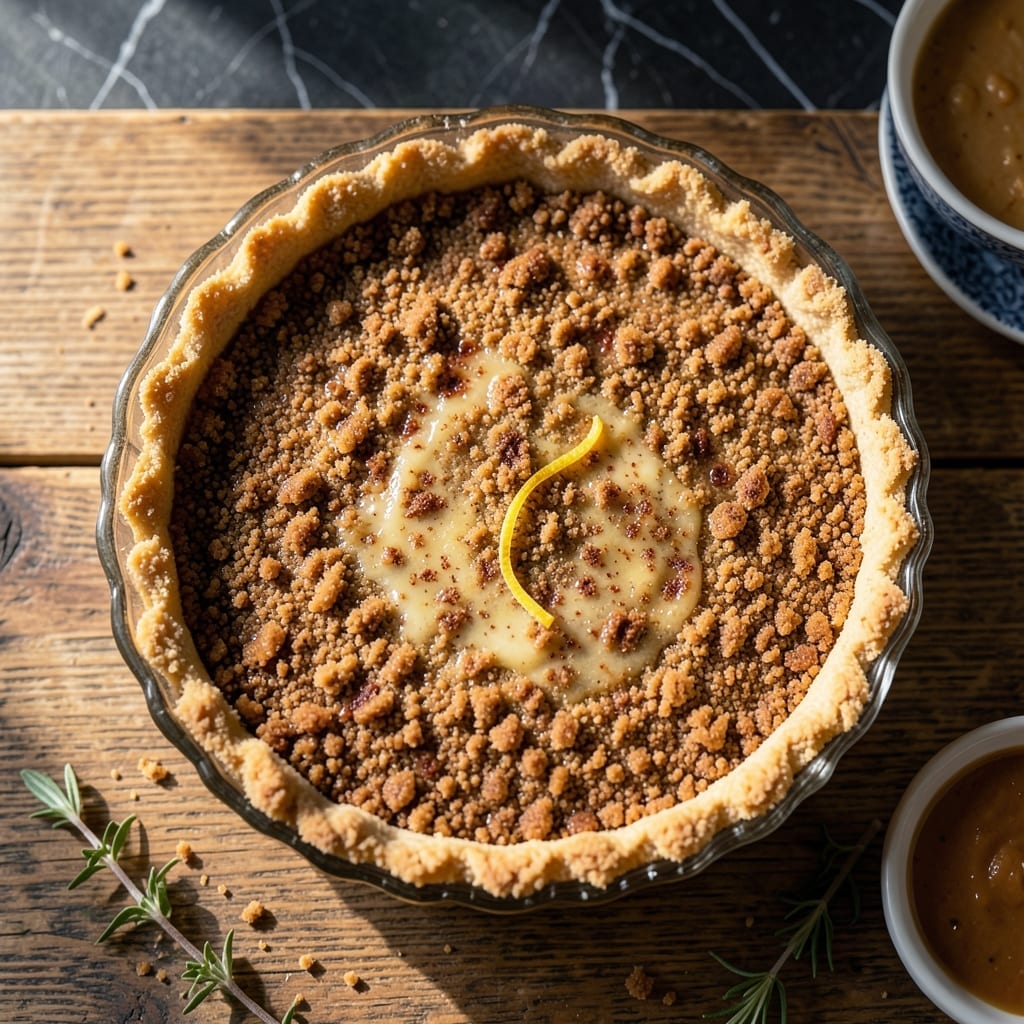
This buttery crust creates the ideal foundation for any creamy cheesecake, with a perfect balance of sweetness and crunch.
Using just a few simple ingredients, this foolproof method delivers a sturdy base that holds up to even the richest fillings.
Ingredients for Graham Cracker Crust Recipe for Cheesecake
A buttery, crunchy foundation with just a handful of pantry staples for your dessert.
| Ingredient | Amount | Notes |
|---|---|---|
| Graham Crackers 🍪 | 2 cups | Crushed into fine crumbs |
| Unsalted Butter 🧈 | ½ cup | Melted and cooled slightly |
| Granulated Sugar 🍚 | ¼ cup | Optional for added sweetness |
| Ground Cinnamon 🌿 | ½ tsp | For warmth and depth |
| Vanilla Extract 🌿 | ½ tsp | Pure extract preferred |
| Salt 🧂 | 0.125 tsp | Balances sweetness |
| Light Brown Sugar 🍚 | 2 tbsp | Packed, for depth of flavor |
[recipe_ingredient_scaler]
The graham crackers are the backbone here. Honey Maid or Annie’s brands offer consistent texture and flavor. For best results, pulse them in a food processor until they reach fine, even crumbs—avoid powdery consistency. The butter should be unsalted to control the sodium level; Kerrygold or Plugrá are excellent choices for rich, creamy flavor.
No graham crackers? Digestive biscuits or vanilla wafers work in a pinch (adjust sugar to taste). For a gluten-free version, gluten-free graham crackers or almond flour can be substituted. The cinnamon adds warmth but can be omitted if you prefer a neutral base. Brown sugar can replace granulated for a deeper molasses note.
The crust can be made 1-2 days ahead and stored covered at room temperature. Once filled, the entire cheesecake keeps in the fridge for up to 5 days. Freeze the crust alone for up to 1 month if needed.
Why You’ll Love This Recipe
- No-Fuss Base: I crush the graham crackers in a bag with a rolling pin—no food processor, no mess, just 5 minutes of effort.
- Warm Spiced Sweetness: The cinnamon and vanilla in the crust taste like a cozy hug, and that buttery crunch against creamy cheesecake? Unbeatable.
- Holiday or Tuesday: Between us, I’ve used this for Thanksgiving pies, birthday cheesecakes, and yes, even on a Tuesday night when I needed a treat.
- Pantry Hero: Graham crackers and butter are always in my kitchen, and this crust costs pennies compared to store-bought. Honestly, I save the leftovers for ice cream topping.
Step-by-Step Instructions for Graham Cracker Crust
This method ensures a firm, buttery foundation that holds up to your creamiest fillings.
Step 1: Crush the Graham Crackers to Fine Crumbs
Place the 2 cups Graham Crackers in a food processor and pulse until they’re reduced to fine, even crumbs. You want the texture to resemble coarse sand—any larger pieces will create an uneven base that’s prone to crumbling when sliced.
If you don’t have a food processor, seal the graham crackers in a zip-top bag and crush them with a rolling pin. It’s a bit more labor-intensive, but the result is just as effective. Check for any stubborn chunks and keep crushing until you achieve uniform fine crumbs.
Step 2: Melt and Cool the Butter
Melt the 0.5 cup Unsalted Butter in a microwave-safe bowl or small saucepan over low heat. Stop just before it reaches a full boil—you want it melted but not hot enough to sizzle when combined with the other ingredients.
Let the melted butter cool for 5 minutes at room temperature. This prevents it from melting the sugars or making the crust greasy. The butter should be liquid but cool enough that you can comfortably dip your finger in it without discomfort.
Step 3: Mix the Dry and Wet Ingredients
In a large bowl, combine the graham cracker crumbs, 0.25 cup Granulated Sugar, 2 tbsp Light Brown Sugar, 0.5 tsp Ground Cinnamon, and 0.125 tsp Salt. Stir with a fork until the sugars and spice are evenly distributed throughout the crumbs.
Pour the cooled melted butter and 0.5 tsp Vanilla Extract over the dry mixture. Use a spatula or fork to mix until every crumb is evenly moistened and the mixture resembles wet sand. Press a small handful together—it should hold its shape when squeezed, which means it’s ready for the pan.
Step 4: Press and Compact the Crust
Transfer the mixture to a 9-inch springform pan or pie dish. Use the bottom of a measuring cup or a flat-bottomed glass to press the crumbs firmly and evenly into the bottom of the pan. Apply steady, even pressure to create a solid, compact layer.
Pay special attention to the edges if making a pie crust—press the crumbs about ½ inch up the sides of the pan, creating a slight lip to contain the filling. The more compact the crust, the better it will hold together when sliced. Chill for 15 minutes to set before adding the filling.
For a cheesecake, bake the crust at 350°F for 8-10 minutes until the edges are just beginning to turn light golden brown. Let it cool completely before adding the filling to prevent sogginess.
Pro Tips For Making Graham Cracker Crust Recipe For Cheesecake
- Chill the Crust: Press the crust into the pan and refrigerate for at least 30 minutes before adding the filling—I learned this the hard way after my first cheesecake filling seeped into the base.
- Melt Butter Slowly: Use low heat when melting the butter to prevent it from separating or burning, which can give your crust an off flavor.
- Crush Evenly: Pulse the graham crackers in a food processor until you get fine, uniform crumbs—coarse pieces make the crust harder to press and eat.
- Add Vanilla Last: Stir in the vanilla extract after mixing the other ingredients to preserve its delicate flavor, which can evaporate if exposed to heat too early.
Serving Suggestions for Leftovers
Plating Techniques
For a polished look, run a warm knife around the edge of the springform pan before releasing the crust. This creates clean lines and prevents cracks. I always wipe the knife between cuts for sharp, professional slices. 🌟
Garnish Ideas
Dust the crust with powdered sugar or a light drizzle of caramel sauce before adding the cheesecake filling. Fresh berries like raspberries or strawberries add a pop of color and natural sweetness.
Serving Temperature
This crust tastes best at room temperature. If you’ve chilled the entire cheesecake, let it sit for 15-20 minutes before serving to allow the flavors to come alive. The buttery crunch is most pronounced when not ice-cold.
Portion Sizes
For individual servings, use a 3-inch round cutter to create mini crusts in muffin tins. Press ¼ cup of mixture into each tin and bake at 350°F for 6-8 minutes. These are perfect for cheesecake bites.
Pairing Suggestions
A scoop of vanilla ice cream or a dollop of whipped cream complements the crust beautifully. For contrast, serve with tart fruit compotes like lemon curd or cherry topping. 🍒
Storage Tips
Once sliced, cover individual pieces with plastic wrap. The crust will keep its texture for 2-3 days in the fridge. For longer storage, freeze the crust alone before adding the filling.
Nutrition Facts
Frequently Asked Questions
Can I make this ahead of time?
Yes! Prepare the crust up to 2 days in advance and store it covered at room temperature. For longer storage, freeze the unbaked crust for up to 1 month and thaw before baking.
What if my crust crumbles when sliced?
This usually means it wasn’t compacted enough. Press firmly with a measuring cup and chill for 15 minutes before adding filling. Also, let the cheesecake cool completely before slicing.
Can I use salted butter instead?
It’s best to use unsalted to control the flavor. If using salted, omit the added ⅛ tsp salt in the recipe. The crust may taste slightly different but will still hold together.
Do I need to bake the crust?
For cheesecake, baking at 350°F for 8-10 minutes helps firm it up. Skip baking for no-bake desserts, but always chill the crust first to set the butter.

Trained in classic French technique but raised on slow-cooked ribs and spicy rubs, she blends culinary skill with smoke and soul.
- Recipe for Boneless Pork Chops in Cast Iron Skillet: Sear and Baste to Juicy Perfection - October 3, 2026
- Recipe for Boneless Cross Rib Roast: Slow-Roasted Beef with Herb Crust - October 3, 2026
- Hamburgers in Sauce Recipe Crock Pot: Slow-Cooked Savory Delight - October 3, 2026