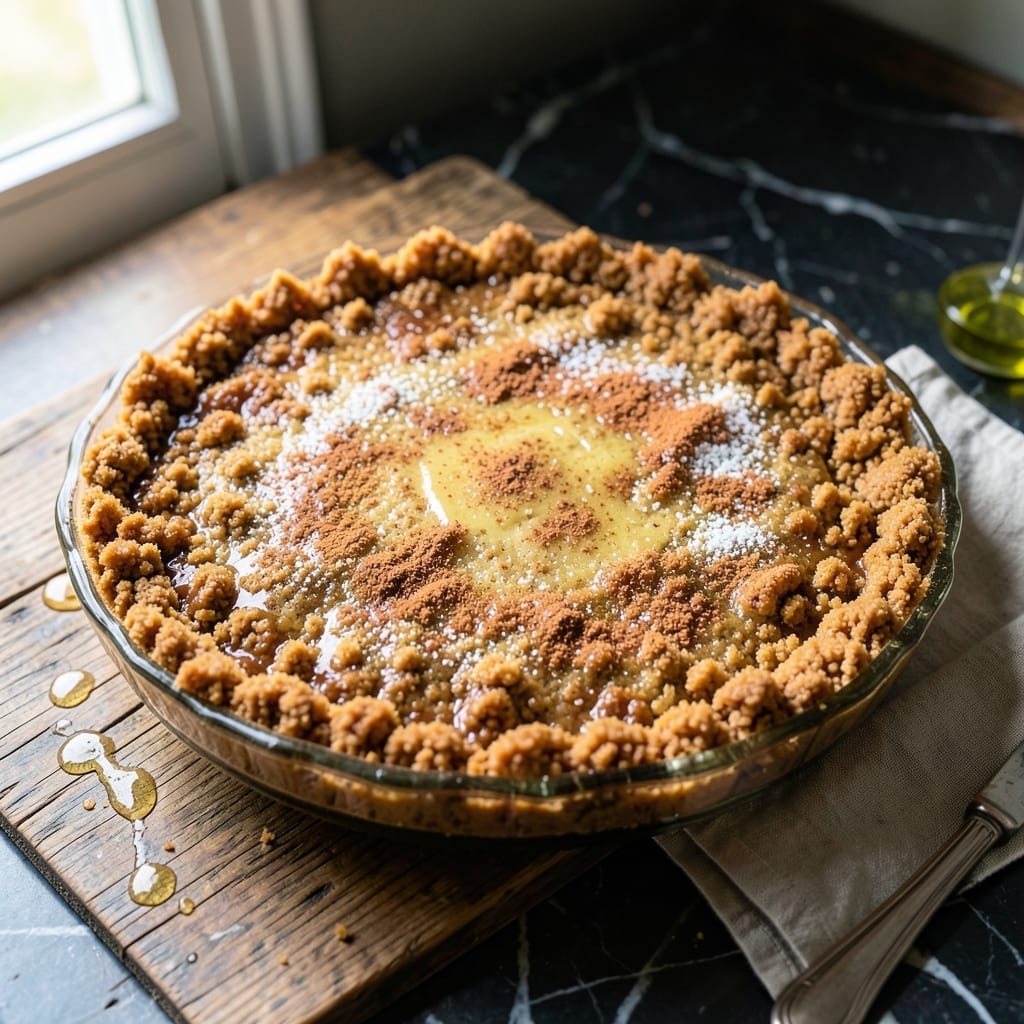
This no-bake graham cracker crust comes together in 10 minutes with just a few pantry staples. I perfected this recipe after realizing how often store-bought crusts fall short on texture and flavor.
The secret lies in the right ratio of crushed crackers to melted butter, creating a base that holds its shape without baking. A touch of sugar enhances the natural sweetness while a pinch of salt balances the flavors perfectly.
Once pressed into your pan and chilled, this crust becomes the ideal foundation for cheesecakes, pies, or any creamy filling. Its firm yet crumbly texture provides the perfect contrast to soft desserts.
Between you and me, this has saved me from more than one last-minute dessert emergency. The kitchen always becomes the gathering place when this crust is involved.
Ingredients for Graham Cracker Crust Recipe No Bake
Just five pantry staples create this buttery, crumbly base for desserts.
| Ingredient | Amount | Notes |
|---|---|---|
| Graham Crackers 🍪 | 2 ½ cups | Finely crushed, about 20 full sheets |
| Unsalted Butter 🧈 | ½ cup | Melted and slightly cooled |
| Granulated Sugar 🍚 | ¼ cup | Adjust to taste preference |
| Salt 🧂 | ¼ tsp | Fine grain preferred |
| Ground Cinnamon 🌿 | ½ tsp | Optional for warmth |
[recipe_ingredient_scaler]
Graham crackers are the foundation here—Honey Maid or Annie’s are my go-to brands (the cinnamon-flavored ones add a nice touch). Crushed too finely? No problem, the texture still works. I always buy the boxed kind and crush them myself in a ziptop bag with a rolling pin (easier cleanup than a food processor).
No graham crackers? Digestive biscuits or vanilla wafers work in a pinch. Swap the granulated sugar for brown sugar if you want a deeper flavor. The butter can be salted if that’s what you have—just skip the added salt. For a gluten-free version, gluten-free graham-style crackers from Schar or Mi-Del do the trick.
This crust keeps beautifully in the fridge for 3-4 days or freezes for 2 months. Press it into the pan, wrap tightly, and store flat. Perfect for making ahead—just thaw before filling (or don’t, it bakes up fine either way).
Why You’ll Love This Recipe
- No Oven Needed: I just crush, mix, and press—no baking, no waiting, no stress.
- Warm Cinnamon Hug: The butter and cinnamon make it taste like a cozy campfire s’more.
- Endless Pie Potential: Honestly, it’s my base for cheesecakes, puddings, even ice cream pies.
- Budget-Friendly Crunch: Graham crackers and basic pantry staples keep my wallet happy.
Step-by-Step Instructions for Graham Cracker Crust No Bake
Here’s how to create a buttery, crisp crust with minimal effort and maximum flavor.
Step 1: Crush the Graham Crackers to Fine Crumbs
Place the 2.5 cups Graham Crackers in a food processor or large zip-top bag. Pulse or crush until you achieve fine, even crumbs with no large pieces remaining. I always check by pressing a small amount between my fingers—it should feel like wet sand when done right.
If you don’t have a food processor, a rolling pin works just as well. Seal the crackers in a bag and roll back and forth until finely crushed. This step ensures your crust holds together properly without any crunchy bits.
Step 2: Mix Crumbs with Sugar, Cinnamon, and Salt
Transfer the crushed graham crackers to a medium bowl. Add the 0.25 cup Granulated Sugar, 0.5 tsp Ground Cinnamon, and 0.25 tsp Salt. Stir with a fork until everything is evenly distributed—the mixture should look uniform with no visible streaks of sugar or spice.
Here’s the thing—the cinnamon adds a warm, cozy note that pairs beautifully with the sweetness. If you prefer a more neutral crust, you can omit it, but I find it elevates the flavor without overpowering it.
Step 3: Incorporate the Melted Butter
Pour the 0.5 cup Unsalted Butter (melted and slightly cooled) over the crumb mixture. Use a fork or spatula to stir until every crumb is evenly moistened. The texture should resemble wet sand that holds together when pressed between your fingers.
If the mixture seems too dry, let it sit for 1-2 minutes to allow the butter to fully absorb. If it’s still crumbly, add a tiny bit more melted butter, but don’t overdo it—too much butter can make the crust soggy rather than crisp.
Step 4: Press the Mixture into the Pan
Dump the crumb mixture into a 9-inch pie dish or springform pan. Use the bottom of a measuring cup or glass to press the crumbs firmly and evenly into the bottom and up the sides of the pan. The key here is pressure—press hard so the crust holds together when sliced.
Pay special attention to the edges where the bottom and sides meet. These areas tend to crumble if not packed tightly. For a cleaner edge, use your fingers to gently press and shape the crust along the rim.
Step 5: Chill and Set
Place the pan in the refrigerator and let the crust chill for at least 1 hour, or up to 24 hours if preparing ahead. This step is non-negotiable—the butter needs time to solidify so the crust holds its shape when filled.
Once chilled, your crust is ready for any no-bake filling. If you’re in a hurry, you can freeze it for 20-30 minutes, but the texture won’t be quite as firm as with a full hour in the fridge. Serve and enjoy the crisp, buttery base!
Pro Tips For Making Graham Cracker Crust Recipe No Bake
- Press Firmly: Use the bottom of a glass to compact the crust into the pan—this prevents crumbly edges and gives that solid, pie-slice-worthy base I learned this the hard way after too many loose crusts.
- Melt Butter Slowly: Heat the butter on low until just melted, not hot, or it’ll make the crumbs greasy instead of binding them together.
- Chill 30 Minutes: Don’t rush the fridge time—less than 30 minutes and the crust may not hold when you add the filling.
- Crush Evenly: Pulse the graham crackers into fine, uniform crumbs (about 1 ½ cups per 10 crackers) so the texture is consistent, not chunky in some bites and powdery in others.
Perfect Pairings for graham cracker crust recipe no bake
Cheesecake Classics
This crust pairs perfectly with classic New York-style cheesecake. I love the contrast between the buttery base and the dense, creamy filling. Add a berry compote topping for a touch of freshness that cuts through the richness. 🍰
No-Bake Pies
For a quick dessert, fill it with chocolate pudding or lemon curd and top with whipped cream. The crumbly texture holds up beautifully against the smooth fillings. My grandmother used to make this with vanilla pudding and fresh strawberries.
Ice Cream Sundaes
Break the chilled crust into chunks and serve as a topping for vanilla ice cream. The buttery crunch adds a delightful contrast to the creamy coldness. Drizzle with caramel sauce and sprinkle with sea salt for an elevated treat.
Fruit Tarts
Spread a layer of pastry cream in the crust, then arrange fresh berries or sliced fruit on top. A glaze made from apricot jam keeps everything shiny and fresh-looking. This is my go-to for summer gatherings.
Mousse Fillings
Light and airy fillings like chocolate mousse or raspberry mousse work wonderfully. The crust adds a satisfying bite that complements the fluffy texture. Chill for at least 4 hours before serving for best results.
Parfait Layers
Crush the chilled crust and layer it with yogurt, fruit, and whipped cream in a glass. This no-fuss dessert looks elegant and lets everyone see the beautiful layers. Perfect for a quick make-ahead option. ✨
Nutrition Facts
Frequently Asked Questions
Can I use margarine instead of butter?
Yes, but butter gives the best flavor and texture. If using margarine, choose a high-fat version and ensure it’s fully melted. The crust may be slightly less rich but will still hold together well.
What if my crust won’t hold together?
This usually means it needs more butter or pressing. Add 1-2 tablespoons more melted butter and press firmly again. Chill for the full 1 hour to ensure it sets properly.
How long can I store the prepared crust?
It keeps in the fridge for 3-4 days or can be frozen for up to 2 months. Wrap tightly to prevent freezer burn. Thaw in the fridge before using.
Can I make this gluten-free?
Use gluten-free graham-style crackers. The texture and taste will be nearly identical. Just check that all ingredients, including butter, are certified gluten-free.

Trained in classic French technique but raised on slow-cooked ribs and spicy rubs, she blends culinary skill with smoke and soul.
- Recipe for Boneless Pork Chops in Cast Iron Skillet: Sear and Baste to Juicy Perfection - October 3, 2026
- Recipe for Boneless Cross Rib Roast: Slow-Roasted Beef with Herb Crust - October 3, 2026
- Hamburgers in Sauce Recipe Crock Pot: Slow-Cooked Savory Delight - October 3, 2026