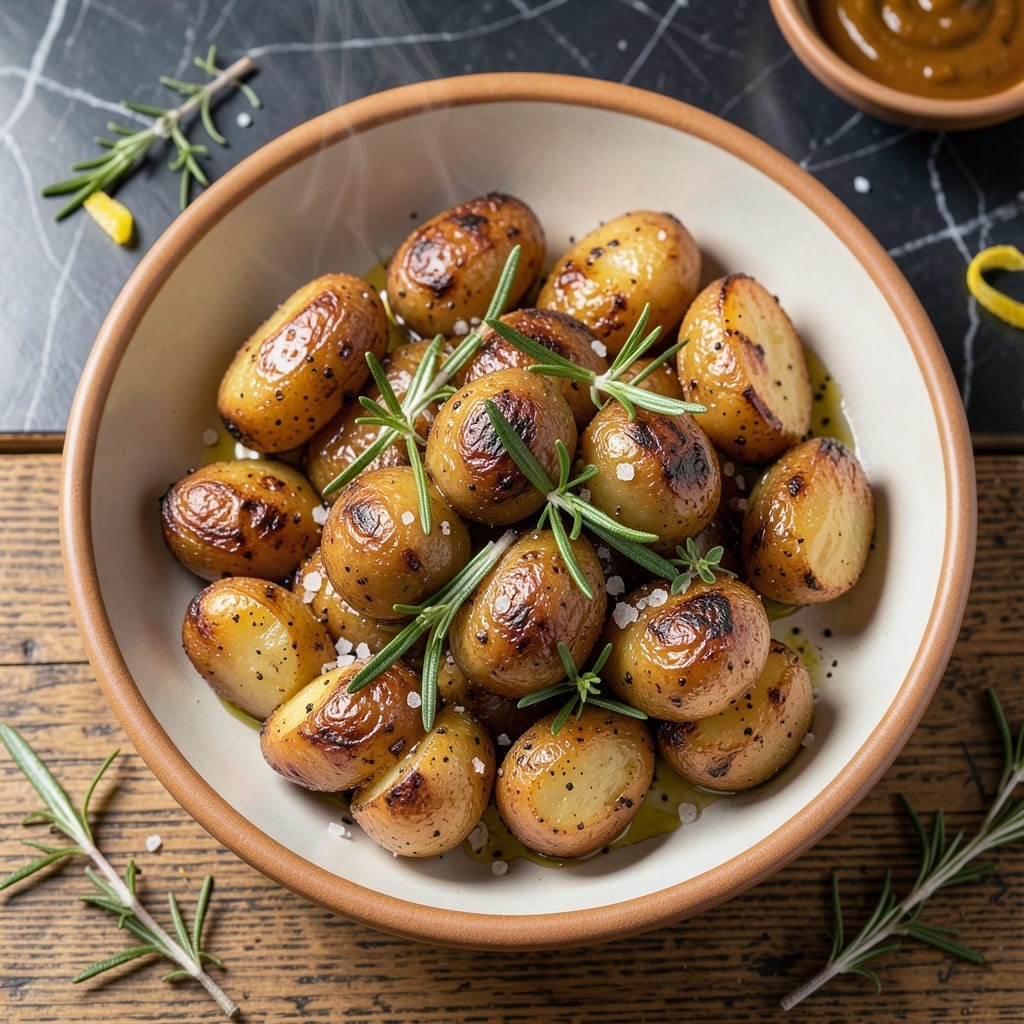
Fire-kissed gold potatoes deliver the perfect combination of charred crispness and tender centers every time. I developed this method after years of perfecting my grill technique, and it never fails to impress at cookouts.
The secret lies in parboiling the potatoes first, then finishing them on high heat to achieve that signature smoky crust. A simple oil and herb coating enhances the natural sweetness of gold potatoes without overpowering their flavor.
What emerges from the grill are beautifully marked wedges with a crisp exterior giving way to fluffy, golden interiors. The smoky aroma alone will have everyone gathering around the grill before the first batch is done.
Serve alongside grilled meats or as a standalone vegetarian option. This technique transforms humble potatoes into the star of any meal.
Ingredients for Grilled Gold Potatoes
Transform humble Yukon Golds into grill stars with this flavor-packed lineup.
| Ingredient | Amount | Notes |
|---|---|---|
| Gold Potatoes 🥔 | 2 lb | Yukon Gold, unpeeled, cut into wedges |
| Extra-Virgin Olive Oil 🫒 | 3 tbsp | Divided for boiling and coating |
| Kosher Salt 🧂 | 2 tsp | Diamond Crystal preferred, divided |
| Freshly Ground Black Pepper 🌶️ | 1 tsp | Coarse grind for texture |
| Fresh Rosemary 🌿 | 2 tbsp | Finely chopped, stems discarded |
| Fresh Thyme Leaves 🍃 | 1 tbsp | Stripped from stems |
| Garlic Cloves 🧄 | 4 cloves | Minced for maximum flavor |
| Smoked Paprika 🌶️ | 1 tsp | Enhances charred flavor |
| Lemon Zest 🍋 | 1 tsp | From 1 medium lemon |
| Red Pepper Flakes 🌶️ | ½ tsp | Optional for heat |
[recipe_ingredient_scaler]
The potatoes are the foundation here. Yukon Golds are non-negotiable—their natural sweetness and waxy texture hold up to parboiling and grilling without falling apart. Source them from Whole Foods or any grocery store with a good produce section. Look for firm potatoes with smooth, unblemished skin (no sprouting or green spots). The fresher, the better—they’ll have more natural moisture for that fluffy interior.
No fresh rosemary or thyme? Dried herbs at one-third the amount work in a pinch, but fresh is ideal for that vibrant, aromatic punch. Out of smoked paprika? Regular paprika plus a pinch of cayenne mimics the smoky depth. For the oil, avocado oil can substitute for olive oil if you prefer a higher smoke point. The lemon zest is optional but adds a bright contrast to the smoky char.
Parboiled potatoes can sit at room temperature for 1 hour before grilling (cover them to prevent drying). Leftovers keep in the fridge for up to 5 days—reheat in a dry skillet to revive the crispness. This dish is best served fresh off the grill, though.
Why You’ll Love This Recipe
- One Pan Grilled: I toss the gold potatoes with olive oil, rosemary, salt, and pepper, then grill—no pots, no mess, just flavor.
- Crispy & Creamy: That-charred-outside with the buttery center? Happens every time on the grill.
- Feeds a Crowd: I double the batch for BBQs, and honestly, they’re the first thing gone.
- Next-Day Magic: Cold grilled potatoes taste even better in salads or breakfast hashes.
Step-by-Step Instructions for Grilled Gold Potatoes
Master the technique for perfectly charred exteriors and tender, seasoned centers every time.
Step 1: Parboil the Gold Potatoes for Even Cooking
Place the 2 lb Gold Potatoes in a large pot and cover with cold water by 1 inch. Add 1 tbsp Extra-Virgin Olive Oil and 1 tsp Kosher Salt. Bring to a boil over high heat, then reduce to a simmer for 8-10 minutes until the potatoes are just fork-tender but not fully cooked.
This partial cooking ensures the wedges will finish on the grill without burning. Drain thoroughly and let them sit in the colander for 2 minutes to allow excess moisture to evaporate, which promotes better charring.
Step 2: Season the Potatoes with Aromatic Spice Blend
In a large bowl, combine the parboiled potatoes with 2 tbsp Extra-Virgin Olive Oil, 1 tsp Kosher Salt, 1 tsp Freshly Ground Black Pepper, 2 tbsp Fresh Rosemary, 1 tbsp Fresh Thyme Leaves, 4 cloves Garlic Cloves, 1 tsp Smoked Paprika, 1 tsp Lemon Zest, and 0.5 tsp Red Pepper Flakes.
Toss gently but thoroughly to coat every wedge evenly. I use my hands for this—it ensures the herbs and spices adhere to all surfaces. The smoked paprika and lemon zest create a complex flavor base that deepens during grilling.
Step 3: Grill Over Direct Heat for Optimal Char
Preheat your grill to medium-high heat (about 400°F). Clean the grates thoroughly with a brush to prevent sticking. Arrange the seasoned potatoes in a single layer on the grill, leaving space between each wedge for proper air circulation.
Cook for 12-15 minutes, turning every 3-4 minutes with tongs. You’re aiming for deep golden-brown char marks on all sides. Avoid overcrowding the grill—this causes steaming rather than the desired crispness. The potatoes are ready when they’re tender inside and have a crisp exterior.
Step 4: Rest and Serve Immediately
Transfer the grilled potatoes to a serving platter and let them rest for 3-5 minutes. This brief rest allows the juices to redistribute, ensuring every bite is flavorful and moist.
Garnish with any remaining fresh herbs from the bowl if desired. The combination of smoky char, aromatic herbs, and the bright note from the lemon zest makes these potatoes irresistible. Serve while hot for the best texture and flavor.
Pro Tips For Making Grilled Gold Potatoes
- Parboil First: Boil the gold potatoes for 8-10 minutes before grilling—just until slightly tender but still firm. I learned this the hard way after serving undercooked potatoes straight off the grill.
- Cut Evenly: Slice the potatoes into 1/2-inch thick rounds so they cook uniformly. Sounds obvious, but uneven pieces mean some burn while others stay raw.
- Oil the Grill: Brush the grill grates with olive oil before adding the potatoes to prevent sticking. After losing half a batch to the grill, I finally started doing this every time.
- Crush the Rosemary: Lightly crush the fresh rosemary between your fingers before sprinkling it on to release more flavor. My grandmother swore by this, and she was right: it actually changes the outcome.
Pro Cooking Tips for Perfect Results
Prevent Sticking
Always preheat your grill to 400°F and clean the grates with a stiff brush. I swear by my Grillaholics brush—it removes every bit of debris. Lightly oil the grates right before adding the potatoes to create a non-stick surface. 🔥
Even Char Marks
Don’t move the potatoes for the first 3-4 minutes of grilling. This allows a proper crust to form. Use long-handled tongs to turn them, never a fork, which pierces and causes sticking. Rotate each wedge 90 degrees halfway through for those perfect crosshatch marks.
Parboiling Precision
The potatoes should be just fork-tender after 8-10 minutes of simmering. Over-boiling makes them mushy on the grill. Test one wedge—it should slide off a fork with slight resistance. Drain well and let them dry in the colander for 2 minutes to remove excess moisture.
Herb Adhesion
Pat the parboiled potatoes completely dry before tossing with oil and herbs. I use paper towels for this. The drier the surface, the better the seasoning sticks. Massage the herbs into the potatoes with your hands for even distribution.
Grill Zone Control
If some wedges are charring too quickly, move them to a cooler part of the grill. My Weber kettle has hot spots near the coals. Keep a spray bottle of water handy for flare-ups, but avoid overspraying, which can cool the grill.
Resting Matters
Let the potatoes rest for 3-5 minutes after grilling. This allows the starches to set and the juices to redistribute. Serve them on a warm platter to maintain that perfect crispness. The aromas will have everyone gathered around before the first bite. 💛
Nutrition Facts
Frequently Asked Questions
Why parboil before grilling?
Parboiling ensures even cooking through the center before charring on the outside. Without it, the wedges may burn externally while staying raw inside. 8-10 minutes of simmering is the sweet spot.
Can I use red potatoes instead?
Red potatoes work, but their texture differs. Yukon Golds have a buttery quality and hold shape better. If using reds, reduce parboiling to 6-7 minutes to prevent mushiness.
How do I prevent burning?
Clean and oil the grates, then cook at 400°F. Avoid moving the wedges for the first 3-4 minutes to form a protective crust. Turn frequently after that.
What’s the best way to reheat leftovers?
Reheat in a dry skillet over medium-high heat for 3-4 minutes per side to restore crispness. Microwaving makes them soggy.

Trained in classic French technique but raised on slow-cooked ribs and spicy rubs, she blends culinary skill with smoke and soul.
- Octopus Recipe Pan Fried: Crispy Edges With Tender Bites - October 3, 2026
- Recipe For Fried Pork Chops In An Iron Skillet: Crispy Crust With Juicy Centers - October 3, 2026
- Recipe for Fully Cooked Spiral Ham: Sweet Glaze and Effortless Elegance - October 3, 2026