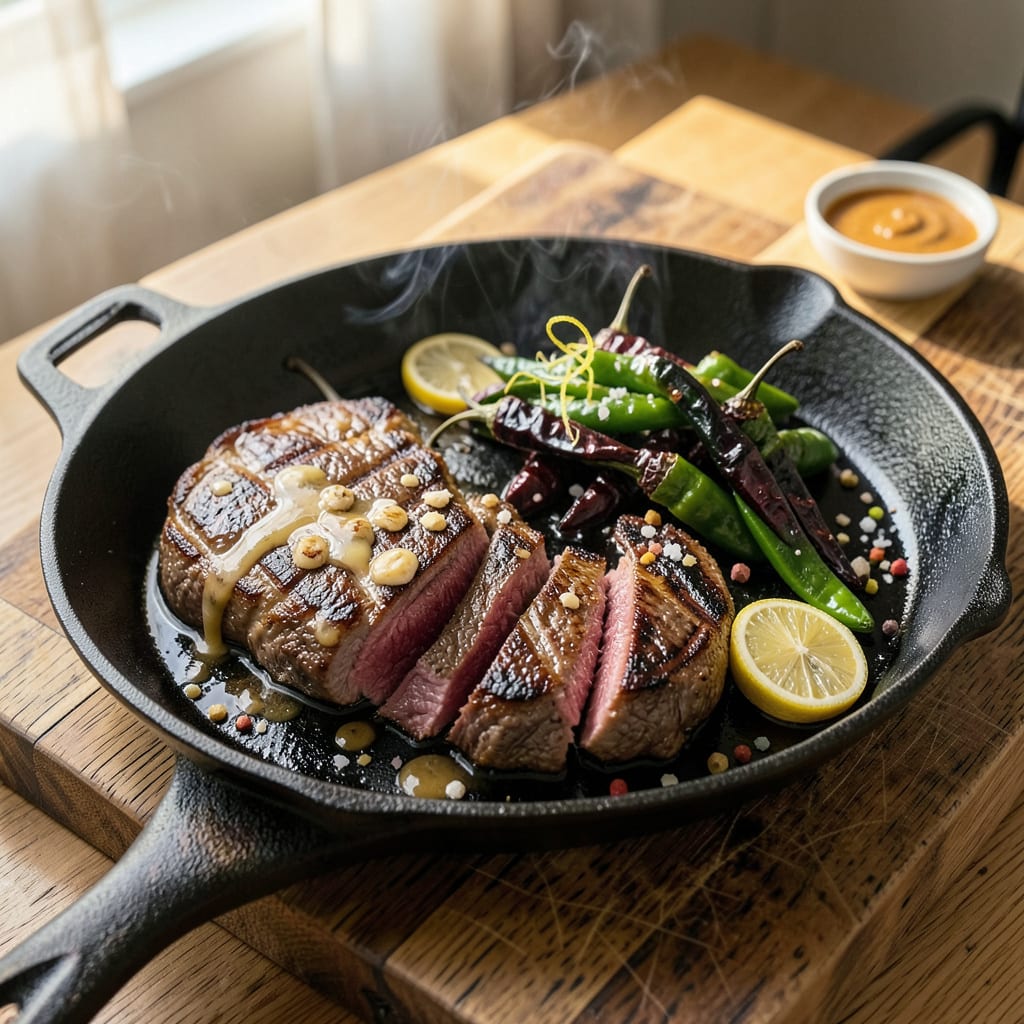
I’ll be real with you—I didn’t own a grill for years, but that never stopped me from getting those smoky, charred flavors we all crave. Between you and me, some of my best “grilled” meals happened right on my stovetop and under the broiler. The secret? Understanding how to manipulate heat and timing to mimic that outdoor grill magic.
Whether you’re working with a cast-iron skillet, your oven’s broiler, or even an air fryer, the right technique can transform chicken, steak, or tofu into something with serious grill marks and deep flavor. I’ve perfected methods that deliver that coveted crust and smoky taste without stepping outside. And yes, vegetables get the same treatment—corn, zucchini, even peppers can take on that charred sweetness.
The game-changer is in the details: preheating your pan until it’s screaming hot, using smoky spices in your rubs, and knowing exactly when to flip for those perfect crosshatch marks. I’ve burned through my fair share of experiments (literally) to nail down what works. Now, you get to skip the trial-and-error and go straight to the good stuff.
From juicy burgers to crispy tofu and everything in between, I’m sharing the no-grill methods that’ll have you serving up plated meals with all the flavor of summer cookouts—any time of year, rain or shine. Let’s get that smoky char going, no backyard required.
📚 In This Guide
- What You’ll Need
- Instructions
- Tips and Common Mistakes
What Youll Need
- ● Heat Source (Pick One): 1 cast-iron skillet (10–12 inches, pre-seasoned) or grill pan (with ridges for grill marks)
- ● 1 broiler pan (for oven “grilling”)
- ● 1 portable butane stove (for balconies/picnics) + 1 fuel canister
- ● 1 fireproof baking sheet (for stovetop smoking)
- ● Smoke Flavor Boosters: 1–2 tbsp liquid smoke (hickory or mesquite)
- ● 1 cup wood chips (soaked in water for 30 mins; apple, cherry, or hickory) + aluminum foil (to make a pouch)
- ● 1 tsp smoked paprika or chipotle powder (for rubs/marinades)
- ● Tools & Extras: 1 tongs (12+ inches for safety)
- ● 1 meat thermometer (instant-read for precision)
- ● 1 basting brush (silicone-tipped)
- ○ Optional: 1 cooling rack (to elevate food for even heat)
- ● Safety Must-Haves: 1 fire extinguisher (rated for grease fires) or baking soda
- ● 1 ventilation fan or open window (for indoor methods)
Instructions for Grilling Without a Grill
You don’t need a grill to get that smoky, charred flavor—here’s exactly how to do it with what you already have.
Choose Your Heat Source
For indoor grilling, a cast iron skillet or grill pan works best. Heat it over medium-high heat until it’s smoking hot—this mimics the intense heat of a grill. You’ll know it’s ready when water droplets dance across the surface and evaporate instantly.
If you’re cooking outdoors without a grill, use a heavy-duty metal grate placed over hot charcoal in a fire pit or even over a gas burner on your stovetop. The key is getting that metal extremely hot to create proper sear marks and caramelization.
Create Smoky Flavor Without Smoke
Here’s the thing—you can get that grilled flavor without actual smoke. For meats, rub them with smoked paprika or a pinch of liquid smoke (just ¼ teaspoon per pound) before cooking. The heat will activate these flavors and give you that backyard BBQ taste.
For vegetables, toss them with a little brown sugar before cooking—it caramelizes beautifully and adds depth. I also like to finish everything with a sprinkle of flaky sea salt right after cooking to enhance all those charred flavors.
Master the Sear and Char
Don’t move your food around too much—let it sit undisturbed for 2-3 minutes to develop a proper crust. You’ll see the edges start to brown and pull away from the pan slightly. That’s your signal that it’s building flavor.
For that classic crosshatch pattern, rotate your food 45 degrees after the first sear and cook for another 1-2 minutes. Press down gently with a spatula to ensure maximum contact with the hot surface. The goal is deep brown (not black) char marks and that distinctive grilled texture.
Control the Heat Like a Pro
Real talk: managing heat is everything. For thicker cuts of meat, start with high heat to sear, then reduce to medium to cook through without burning. I use the “hand test”—if you can hold your hand 3 inches above the pan for only 2-3 seconds, it’s at the right temperature.
For vegetables or delicate proteins like fish, keep the heat at medium the whole time. You want them to cook evenly without developing bitter, acrid flavors from burning. Remember that residual heat continues cooking after you remove food from the pan.
Rest and Serve for Maximum Flavor
Let meats rest for 5-10 minutes after cooking—this allows juices to redistribute so they stay moist when you cut into them. Tent them loosely with foil to keep warm without steaming the crispy exterior you worked so hard to create.
Serve everything immediately while still warm. The contrast between the charred exterior and tender interior is what makes grilled food so special. I like to finish with a drizzle of good olive oil or a squeeze of fresh lemon juice to brighten all those rich, smoky flavors.
Tips and Common Mistakes
Getting that perfect char and smoky flavor without a grill is all about mastering a few key techniques. Here’s what I’ve learned from years of experimenting with indoor and outdoor grilling alternatives.
Heat Management: When working with medium-high heat in Step 1, don’t rush the preheating process. Your pan needs to be truly smoking hot before adding food—this is what creates those beautiful sear marks. I test mine by sprinkling a few drops of water; if they evaporate instantly, you’re ready. For thicker cuts, remember to start with high heat for searing, then reduce to medium as mentioned in Step 4 to prevent burning while ensuring even cooking.
The Technique That Changed Everything: Those 2-3 minutes of undisturbed cooking in Step 3 are critical. I know it’s tempting to peek or move things around, but resist! Let the food develop that crust before touching it. When you see the edges pulling away from the pan and turning golden brown, that’s your visual cue that the Maillard reaction is working its magic. For the crosshatch pattern, that additional 1-2 minutes after rotating makes all the difference in achieving professional-looking grill marks.
Flavor Boosting: The smoked paprika and liquid smoke quantities in Step 2 are perfectly balanced—just ¼ teaspoon of liquid smoke per pound is all you need. I’ve found that brown sugar on vegetables caramelizes best when applied right before cooking, not too far in advance. And don’t skip that final sprinkle of flaky sea salt; it elevates all the charred flavors you’ve worked so hard to create.
Resting Matters: Those 5-10 minutes of resting time in Step 5 aren’t optional. I learned this the hard way after serving dry meat too many times. The juices need that time to redistribute throughout the meat. Tenting with foil keeps it warm while preserving that crispy exterior you’ve created. Trust me, your patience will be rewarded with perfectly juicy results every time.
Pro Tips for Grilling Without A Grill
- Getting that perfect char and smoky flavor without a grill is all about mastering a few key techniques. Here’s what I…
- Heat Management: When working with medium-high heat in Step 1, don’t rush the preheating process. Your pan needs to b…
- The Technique That Changed Everything: Those 2-3 minutes of undisturbed cooking in Step 3 are critical. I know it’s t…
Frequently Asked Questions
Can I really get that smoky grill flavor without an actual grill?
Use techniques like broiling (high-heat oven cooking), smoke-infused spices (liquid smoke or smoked paprika), or a stovetop grill pan with ridges to mimic char marks. A cast-iron skillet also works wonders for searing and locking in juices.
What’s the fastest way to grill indoors when I’m short on time?
Opt for broiling—it’s the closest to outdoor grilling. Preheat your broiler for 5–10 minutes, place food on a wire rack (for airflow), and cook 3–6 inches from the heat. Thin cuts (like chicken breasts or veggies) cook in under 10 minutes!
What are the best grill alternatives for small apartments or dorms?
Try an electric grill pan (compact and smokeless), a countertop grill (like a George Foreman), or even a toaster oven with a broil setting. For no-cook options, use pre-smoked meats or a torch (like a culinary blowtorch) for quick charring.
How do I prevent my food from drying out when grilling indoors?
Marinate proteins for at least 30 minutes (acidic ingredients like lemon or vinegar help tenderize). Baste with oil or butter during cooking, and avoid overcrowding the pan. For extra moisture, cover food with foil for the last few minutes or use a water pan in the oven.
Is it safe to grill indoors with methods like broiling or stovetop grilling?
Yes, but ventilation is key! Turn on your hood fan or open windows to reduce smoke. Avoid flammable oils (like aerosol sprays) near high heat, and never leave cooking unattended. For electric grills, follow manufacturer guidelines to prevent overheating.
Who says you need a grill to enjoy that bold, smoky flavor? 🍳 With a few clever tools and techniques—like broilers, stovetop pans, or even a trusty toaster oven—you can bring the magic of grilling indoors or outdoors, no fancy setup required.
Now that you’re armed with these tricks, pick your favorite method and fire it up! Start with something simple, like grilled veggies or chicken, and let your taste buds do the talking. Happy “grilling”—without the grill! 🔥

Trained in classic French technique but raised on slow-cooked ribs and spicy rubs, she blends culinary skill with smoke and soul.
- Recipe for Boneless Pork Chops in Cast Iron Skillet: Sear and Baste to Juicy Perfection - October 3, 2026
- Recipe for Boneless Cross Rib Roast: Slow-Roasted Beef with Herb Crust - October 3, 2026
- Hamburgers in Sauce Recipe Crock Pot: Slow-Cooked Savory Delight - October 3, 2026