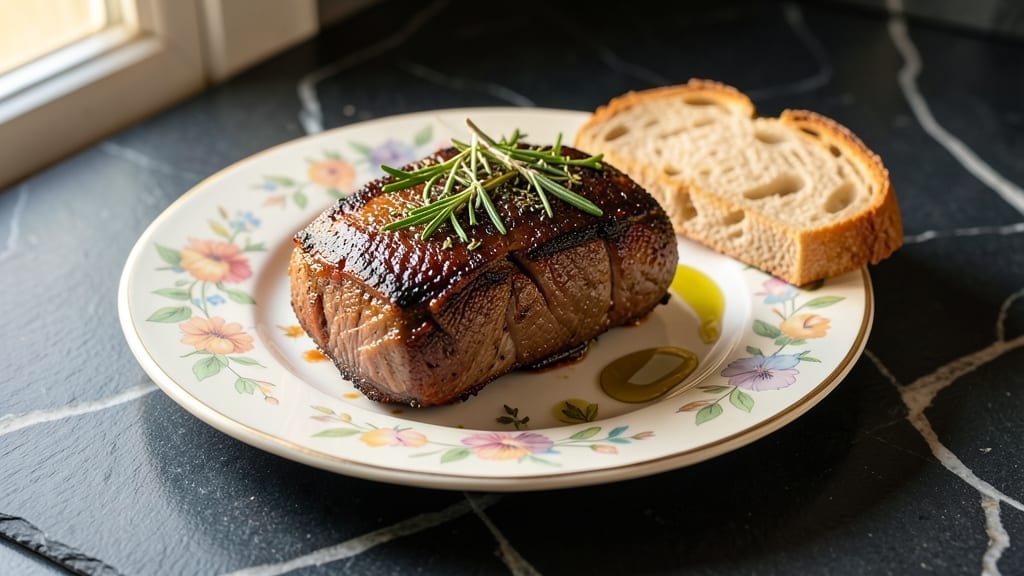
This healthy beef brisket recipe transforms a traditionally rich cut into a lean, flavor-packed masterpiece without sacrificing depth. The secret lies in selecting a leaner cut, trimming excess fat, and slow-cooking with aromatic herbs and vegetables to naturally enhance flavor while keeping it light.
I developed this method after realizing traditional brisket recipes often rely on heavy sauces or fatty cuts—this version delivers restaurant-quality satisfaction with a fraction of the calories.
What sets this recipe apart is the foolproof slow-cooking technique that preserves moisture and tenderness while reducing unnecessary fat. We’ll use a combination of garlic, rosemary, and black pepper for a robust flavor profile, paired with carrots and onions that infuse the meat as it cooks.
The result? A brisket that’s rich in protein, packed with natural flavors, and surprisingly light for a slow-cooked dish. No heavy marinades or sugary rubs—just clean, bold taste.
By the time you’re done, you’ll have perfectly tender slices of brisket that pair beautifully with roasted vegetables or a simple side salad. The cooking process is hands-off, allowing the meat to develop deep, complex flavors while staying moist and easy to slice.
This isn’t just a healthier version of brisket—it’s a complete meal experience that proves nutritious eating can still be indulgent.
Serve with steamed green beans or a quinoa pilaf to round out the plate while keeping the meal balanced. The brisket’s natural juices and herbs shine without needing extra calories, making this the perfect centerpiece for a wholesome dinner.
Let’s get started on creating a dish that’s as good for you as it is delicious.
Ingredients for healthy beef brisket
Lean beef brisket, aromatic vegetables, and bold herbs—just what you need for a healthy yet indulgent centerpiece.
| Ingredient | Amount | Notes |
|---|---|---|
| Lean Beef Brisket 🥩 | 2 ½ lb | Trimmed of excess fat, cut into 1-inch cubes |
| Carrots 🥕 | 4 whole | Medium size, peeled and halved lengthwise |
| Yellow Onions 🧅 | 2 whole | Medium size, quartered |
| Garlic Cloves 🧄 | 8 cloves | Peeled and lightly crushed |
| Fresh Rosemary 🌿 | ½ oz | Fresh sprigs, stems removed |
| Black Peppercorns 🌶️ | 1 ½ tsp | Freshly cracked |
| Kosher Salt 🧂 | 1 tbsp | Diamond Crystal preferred |
| Extra-Virgin Olive Oil 🫒 | 2 tbsp | For searing |
| Low-Sodium Beef Broth 💧 | 2 cups | Homemade or high-quality store-bought |
| Red Wine Vinegar 🍷 | 1 tbsp | For brightness |
| Fresh Thyme Leaves 🌿 | ¼ cup | Chopped, stems removed |
| Low-Fat Greek Yogurt 🥛 | ¼ cup | For finishing, full-fat optional |
| Fresh Parsley 🌿 | ⅛ cup | Chopped, for garnish |
[recipe_ingredient_scaler]
The brisket cut matters most here. Look for leaner sections at your butcher counter or pre-cut brisket blends at Whole Foods—avoid anything with visible marbling or excess fat. I always ask for the flat cut when possible, as it’s more uniform. For the vegetables, organic carrots and onions from the grocery store’s produce section work perfectly—they hold up well during slow cooking. Fresh herbs? Trader Joe’s has the best selection of rosemary and thyme in small sprigs, which keeps them fresher longer than those sad little plastic containers.
No fresh rosemary? Dried works at one-third the amount, but the flavor won’t be as bright. Running low on red wine vinegar? Apple cider vinegar gives a slightly sweeter but still effective tang. The Greek yogurt finish is key for that creamy texture without adding much fat—Fage or Siggi’s are my go-tos, but any plain nonfat yogurt will do. For the broth, homemade is ideal, but Pacific Foods or Imagine low-sodium brands are solid store-bought options. If you’re using dried thyme, make sure it’s labeled as culinary—not ornamental—it’s a game-changer for flavor.
This brisket reheats beautifully—just add a splash of broth and warm through. Keeps in the fridge for 4-5 days sealed tightly, or freeze portions for up to 3 months. I always make double batches because the leftovers are perfect for sandwiches or salads the next day. For storage, glass containers with airtight lids preserve the flavors best. The herbs can be chopped ahead and stored in the fridge for up to 3 days in a sealed container with a paper towel to absorb moisture.
Why You’ll Love This Recipe
- One-Pot Magic: I love that this recipe turns one Dutch oven into your entire meal—no extra pans, no cleanup chaos. The brisket sears first, then simmers with onions, carrots, and garlic, so everything cooks together in that deep, savory broth. Honestly, the only prep you’ll hate is chopping the veggies, but honestly, that’s worth it for the effortless dinner that smells like a restaurant.
- Herb-Infused Richness: That rosemary and thyme? They’re the secret. The rosemary adds piney brightness while the thyme deepens the broth, and the red wine vinegar cuts through the richness just enough to keep it from feeling heavy. The Greek yogurt at the end? It’s what makes the whole dish feel luxurious without being greasy. Trust me, the first bite will make you forget you’re eating “healthy.”
- Feeds a Crowd (Without the Guilt): This recipe is my secret weapon for game days or family dinners—it serves six easily, but the lean beef keeps it from feeling like a carb overload. Plus, the leftovers? They’re even better the next day, reheated with a splash of broth to keep it moist. I’ve taken this to potlucks, and my daughter always picks out the brisket first (yes, even on a Tuesday night).
- Budget-Friendly Powerhouse: Lean brisket might sound fancy, but it’s one of the most affordable cuts out there, and the veggies stretch it into a full meal. The low-sodium broth and Greek yogurt keep costs down, and because it freezes like a dream, I make a double batch and freeze half for those “I don’t know what to cook” nights. Twenty bucks’ worth of ingredients turns into a meal that feels special without breaking the bank.
Step-by-step instructions for healthy beef brisket
Here’s the method you need for tender, lean brisket that stays moist and flavorful.
Sear the Brisket for Deep Flavor
Heat a large Dutch oven over medium-high heat and add 2 tablespoons extra-virgin olive oil. Once shimmering, add the 2½ lb lean beef brisket cut into 1-inch cubes, working in batches if needed to avoid crowding. Sear for 4-5 minutes per side until deeply browned and caramelized.
This step creates the Maillard reaction that builds flavor without adding excess fat. I press down gently on the cubes during searing to ensure even contact with the pan. Remove the brisket and set aside—you’ll add it back later.
Build the Aromatic Base
In the same Dutch oven, add 2 tablespoons extra-virgin olive oil if needed, then sauté 2 yellow onions and 4 carrots (peeled and halved) for 5 minutes until softened. Add 8 garlic cloves and ½ oz fresh rosemary (stems removed), cooking for 1 minute until fragrant.
Here’s where the herbs come alive—don’t skip this step. The rosemary and thyme will infuse the broth with their bright, earthy notes. Sprinkle in 1½ teaspoons black peppercorns and 1 tablespoon kosher salt, stirring to toast them briefly for 30 seconds until aromatic.
Slow-Cook Until Fork-Tender
Pour in 2 cups low-sodium beef broth and 1 tablespoon red wine vinegar, scraping up any browned bits from the bottom. Return the seared brisket to the pot, then add ¼ cup chopped fresh thyme leaves. Bring to a gentle simmer, cover, and transfer to a 325°F oven.
Cook for 3-4 hours until the brisket is fork-tender and easily pulls apart. The liquid should reduce to a rich, velvety sauce. I check for doneness by piercing the thickest piece—it should shred easily with minimal resistance.
Finish with Yogurt for Creaminess
Remove the brisket and strain the cooking liquid through a fine-mesh sieve into a clean saucepan. Return the liquid to medium heat and simmer until slightly thickened. Stir in ¼ cup low-fat Greek yogurt and ⅛ cup chopped fresh parsley, warming through for 1-2 minutes—just enough to blend the flavors without curdling.
This yogurt finish adds a velvety texture while keeping the dish light. The parsley brightens the dish with freshness. Return the brisket to the sauce and let it soak up those flavors for 5 minutes before serving.
Pro Tips For Making Healthy Beef Brisket
- Press for Crust: When searing the brisket cubes, press down firmly with a spatula—this guarantees even browning and that coveted caramelized crust. I used to rush this, and the edges stayed pale. Two minutes of patience here makes a real difference in flavor.
- Toast the Peppercorns: Those 1.5 teaspoons of cracked black peppercorns need 30 seconds in the pot with the onions—don’t just toss them in. The toasted aroma deepens the whole dish, and skipping this step means missing out on that subtle, warm spice kick.
- Strain the Sauce: After simmering, strain the cooking liquid through a fine-mesh sieve before adding the yogurt. This removes any herb stems or carrot bits that’ll make the finish look unappealing. Trust me, your plate will look (and taste) more polished.
- Prep Herbs Early: Chop the thyme and parsley ahead of time and store them in the fridge with a paper towel to absorb moisture. That way, you’re not scrambling during Step 4—just grab and stir. The herbs stay fresher this way, too.
Storing and reheating your healthy beef brisket
Refrigerator Storage
After cooking, let your brisket cool for 30 minutes before transferring it to an airtight glass container—I swear by Le Creuset for its durability. Store the remaining sauce separately in a smaller container to keep flavors distinct.
This keeps everything fresh for 4-5 days at 40°F or below. The brisket actually tastes better the next day as the flavors meld. ❄️
Freezer Preservation
For longer storage, portion the brisket into quart-sized freezer bags (like Rubbermaid), leaving 1 inch of headspace. Squeeze out excess air before sealing—this prevents freezer burn and keeps texture perfect for up to 3 months.
I always label bags with the date so I don’t forget. Thaw overnight in the fridge for best results.
Reheating Methods
For stovetop reheating, use a heavy-bottomed pot and add 2 tablespoons low-sodium beef broth per cup of brisket. Warm over low-medium heat for 10-12 minutes, stirring occasionally, until reaching 165°F. This prevents drying out while maintaining that tender texture. Add a splash of water if it looks dry.
Microwave Revival
When short on time, microwave portions covered with a damp paper towel on 50% power for 2-3 minutes, stirring halfway. The damp towel prevents drying—this is my go-to for busy weeknights.
Always check internal temperature before eating to ensure safety. I add a spoonful of the yogurt sauce to help revive any lost moisture.
Leftovers Reinvented
Repurpose brisket into beef sandwiches with whole-grain bread and roasted veggies, or chop it into tacos with avocado and lime. The flavors work beautifully in quinoa bowls with a drizzle of the remaining sauce. This is how I use up every last bite without waste. 💡
Nutrition facts
Frequently asked questions
Why does this recipe use lean beef brisket instead of fatty cuts?
Lean beef brisket delivers all the rich flavor without the excess fat found in marbled cuts. The slow-cooking method and aromatic vegetables create deep, savory notes that keep the dish satisfying while maintaining a healthier profile. This approach also makes it easier to control sodium levels, as you’re not relying on fatty marbling to season the meat.
Can I substitute fresh herbs with dried ones in this recipe?
Yes, but use one-third the amount of dried herbs compared to fresh. For example, replace ½ oz fresh rosemary with just 1 teaspoon dried rosemary. Dried herbs lose potency during cooking, so the flavor won’t be as vibrant—but it’ll still work well in a pinch. Always check herb labels to confirm culinary-grade quality.
How do I know when the brisket is fully cooked?
Check doneness by piercing the thickest piece with a fork—it should shred easily with minimal resistance. The internal temperature should reach around 165°F when measured with a meat thermometer. If it pulls apart cleanly, it’s ready! The cooking liquid should also have reduced to a velvety consistency, indicating proper tenderness.
What’s the best way to serve this healthy brisket?
Pair it with roasted vegetables like green beans or asparagus, or serve over quinoa for a complete protein boost. The brisket’s natural flavors shine when balanced with fresh sides—try a simple arugula salad with lemon vinaigrette. The yogurt sauce adds creaminess without heaviness, making it perfect for a balanced meal.
Can I make this recipe ahead of time?
The brisket actually tastes better the next day as flavors meld. Store in an airtight container for up to 4-5 days in the fridge. For longer storage, freeze portions for up to 3 months. Reheat gently with a splash of broth to restore moisture—this prevents drying out while maintaining that tender texture you love.

Trained in classic French technique but raised on slow-cooked ribs and spicy rubs, she blends culinary skill with smoke and soul.
- Award-Winning Brisket Chili Recipe: Deep-Smoked Flavor That Wins Every Time - October 16, 2026
- Smoked Standing Rib Roast Recipe: Low-and-Slow Perfection for Crowds - October 16, 2026
- Slow Roast Brisket Recipe: Fall-Apart Tenderness with Maillard Crust Magic - October 16, 2026