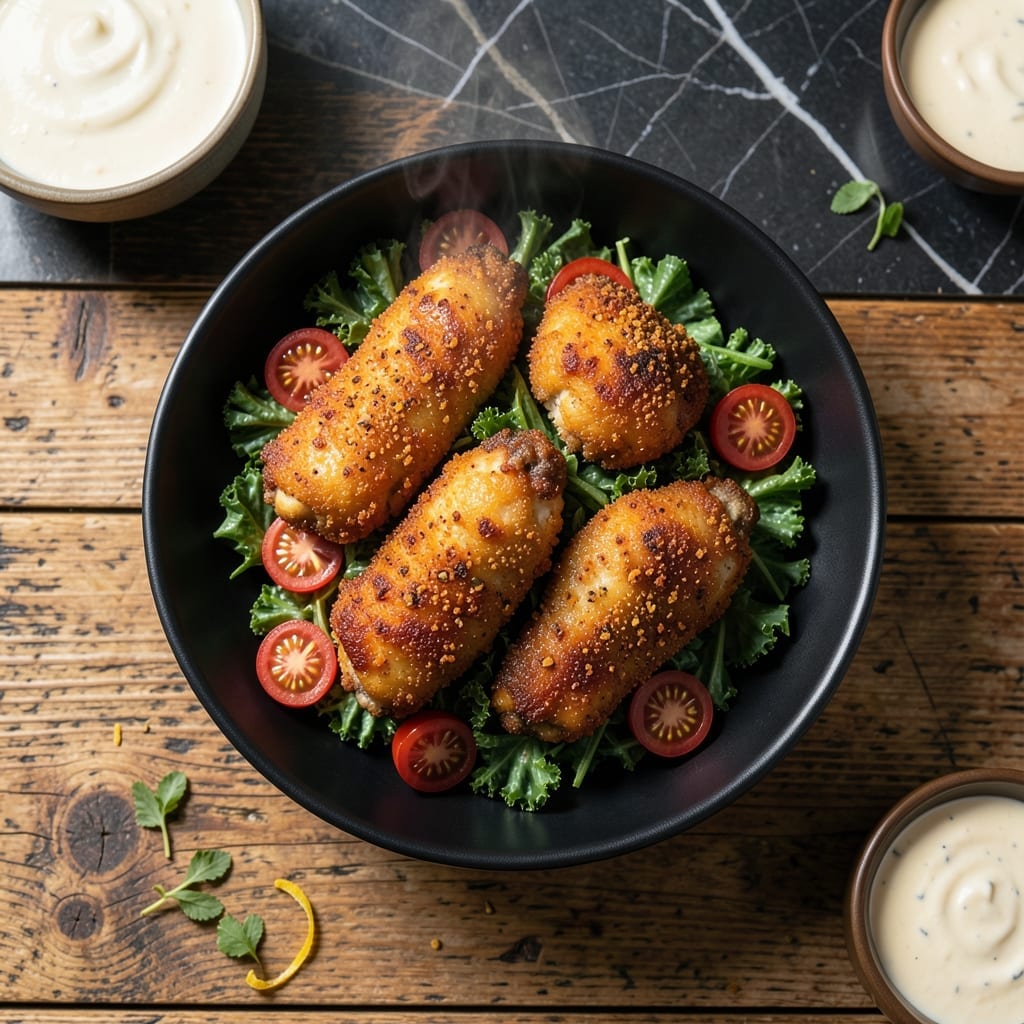
Achieving crispy fried chicken without the deep fryer is possible with an air fryer and the right technique. This method delivers all the flavor and texture you love, with far less oil.
I developed this recipe after years of testing, perfecting a coating that stays extra crispy while keeping the meat juicy. The secret is a two-step breading process and proper air fryer temperatures.
You’ll get golden, crunchy chicken that’s lightened up but never lacking in satisfaction. The air fryer circulates hot air for even cooking, producing results that rival traditional frying.
Serve hot for maximum crunch. Here’s how to make it.
Ingredients for Healthy Fried Chicken Recipe Air Fryer
Pantry staples plus chicken thighs. Nothing fancy, just crispy results.
| Ingredient | Amount | Notes |
|---|---|---|
| Boneless Skinless Chicken Thighs 🍗 | 1 ½ lb | Patted dry for crispiness |
| Buttermilk 🥛 | 1 cup | Low-fat works fine too |
| All-Purpose Flour 🌾 | 1 cup | For first breading layer |
| Cornstarch 🌽 | ¼ cup | Makes coating extra crispy |
| Panko Breadcrumbs 🍞 | 1 ½ cups | Japanese-style for crunch |
| Paprika 🌶️ | 1 tbsp | Sweet or smoked variety |
| Garlic Powder 🧄 | 1 tsp | Not garlic salt |
| Onion Powder 🧅 | 1 tsp | Adds depth of flavor |
| Salt 🧂 | 1 tsp | Kosher or sea salt |
| Black Pepper 🌶️ | ½ tsp | Freshly ground preferred |
| Cayenne Pepper 🔥 | ¼ tsp | Adjust for heat preference |
| Olive Oil 🫒 | 2 tbsp | For air fryer spraying |
| Large Egg 🥚 | 1 whole | Helps coating adhere |
[recipe_ingredient_scaler]
The chicken is everything here. Boneless, skinless thighs stay juicier than breasts—grab them from Costco for the best deal. Buttermilk is non-negotiable for that tangy crust (full-fat is ideal, but low-fat works too in a pinch). For the panko, Kikkoman is the gold standard, but any Japanese-style will do. Just don’t use regular breadcrumbs—they won’t give you that shatter.
No buttermilk? Milk plus 1 tbsp vinegar gets you close. Swap panko for crushed cornflakes if that’s what’s in the cabinet (weirdly good). Out of paprika? Cajun seasoning at half the amount adds a nice kick. The cayenne is optional—skip it if you’re sensitive to heat. The cornstarch is the secret weapon though (don’t skip this part).
Bread the chicken right before cooking—it’ll lose crispiness if it sits. Leftovers keep 3-4 days in the fridge, but reheat in the air fryer to revive the crunch. Freezes well for 2 months if you’re meal prepping.
Why You’ll Love This Recipe
- Set It and Forget It: I toss the chicken in buttermilk, coat it in panko, and let the air fryer do the rest—no babysitting required.
- That Crunch Though: The cornstarch and panko combo gives it a shatteringly crisp crust while the inside stays juicy from the buttermilk soak.
- Weeknight MVP: I’ve served this for quick dinners, packed it for lunches, and even set it out at game day—always disappears first.
- Budget-Friendly Feast: Boneless thighs are cheap, and a little panko goes a long way, so I’m feeding four for the price of takeout.
Step-by-Step Instructions for Healthy Air Fryer Fried Chicken
Here’s how to get that perfect crisp without the deep fryer mess.
Step 1: Prep and Marinate the Chicken
Pat the 1.5 lb Boneless Skinless Chicken Thighs completely dry with paper towels—this is crucial for the coating to stick. I always press down firmly to remove every bit of moisture.
In a large bowl, combine the 1 cup Buttermilk with the 1 whole Large Egg, then add the chicken. Make sure each piece is fully submerged. Cover and refrigerate for at least 1 hour or up to 4 hours. The buttermilk tenderizes the chicken while the egg helps the breading cling later.
Step 2: Set Up Your Breading Station
In a shallow bowl, whisk together the 1 cup All-Purpose Flour, 0.25 cup Cornstarch, 1 tbsp Paprika, 1 tsp Garlic Powder, 1 tsp Onion Powder, 1 tsp Salt, 0.5 tsp Black Pepper, and 0.25 tsp Cayenne Pepper. This spice blend gives the chicken that classic fried flavor with a subtle kick.
In another shallow bowl, add the 1.5 cups Panko Breadcrumbs. The cornstarch in the flour mix makes the coating extra crispy, while the panko adds texture. Keep these bowls separate—you’ll use them in order.
Step 3: Coat the Chicken Thoroughly
Remove the chicken from the buttermilk, letting any excess drip off. Dredge each piece in the flour mixture, pressing firmly so the coating adheres completely. Shake off any excess flour—you want a thin, even layer, not clumps.
Next, dip the floured chicken into the panko breadcrumbs, again pressing gently to ensure full coverage. Place each piece on a plate or wire rack. This double-coating technique creates that signature crispy exterior.
Step 4: Air Fry to Golden Perfection
Preheat your air fryer to 375°F for 3 minutes. Lightly spray the basket with the 2 tbsp Olive Oil or use an oil mister to prevent sticking. Arrange the chicken in a single layer, leaving space between pieces so air can circulate.
Air fry for 12 minutes, then flip each piece and spray lightly with more olive oil. Cook for another 8-10 minutes until the coating is deep golden brown and the internal temperature reaches 165°F. The panko should be crispy and the chicken juicy inside.
If any spots aren’t browning evenly, air fry for an additional 2-3 minutes and check again. Every air fryer runs slightly differently, so keep an eye on it.
Pro Tips For Making Healthy Fried Chicken Recipe Air Fryer
- Preheat the Air Fryer: I learned this the hard way—skip this and your chicken will steam instead of crisp. 375°F for 5 minutes before adding the chicken guarantees that golden crust.
- Double-Dredge the Thighs: Dip in buttermilk, then flour mix, then buttermilk again, then panko. Sounds tedious, but it creates that thick, craggy coating that actually stays put in the air fryer.
- Skip the Overcrowding: After burning three batches, I finally figured out that the pieces need space—at least an inch apart—so hot air can circulate. Work in batches if you have to.
- Spray with Oil: My grandmother swore by this, and she was right: a quick spritz of oil on the breaded thighs before air frying makes them extra crispy without deep frying.
Make-Ahead Tips for healthy fried chicken recipe air fryer
Prep Ahead Strategy
You can prep the chicken in buttermilk marinade up to 24 hours ahead. I often do this the night before, storing it in the fridge in a sealed container. The longer it marinates, the more tender and flavorful your meat will be. 💡
Breading Station Setup
Mix your dry ingredients the night before and store in airtight containers. The flour-spice mix and panko keep beautifully at room temperature. Just whisk the flour mixture again before using to redistribute the spices.
Day-Of Coating
Bread the chicken no more than 30 minutes before air frying. If it sits longer, the coating absorbs moisture and loses crispiness. I set up my breading station while the air fryer preheats to streamline the process.
Freezing Uncooked
For true make-ahead, bread the chicken completely and freeze on a parchment-lined tray for 1 hour. Transfer to a freezer bag with parchment between layers. Cook from frozen, adding 5-7 minutes to the cooking time. ❄️
Reheating Leftovers
Store cooked chicken in the fridge for up to 4 days. Reheat in the air fryer at 375°F for 4-5 minutes to restore crispiness. Microwaving works in a pinch but will soften the coating.
Meal Prep Tip
Double the batch and freeze half after cooking. Reheat straight from frozen in the air fryer at 375°F for 8-10 minutes. This is my go-to for busy weeks when I need a quick, healthy meal.
Nutrition Facts
Frequently Asked Questions
Can I use chicken breasts instead of thighs?
Yes, but thighs stay juicier. If using breasts, reduce cooking time by 2-3 minutes to prevent dryness.
Why does the coating stay crispy without deep frying?
The air fryer’s hot air circulation mimics frying while using minimal oil. Cornstarch and panko create a crunchy texture with just a light spray of olive oil.
How do I prevent the breading from falling off?
Pat the chicken completely dry first, then ensure each piece is fully coated in both flour and panko. Press firmly when breading.
What’s the best way to check doneness?
Use a meat thermometer to verify the internal temperature reaches 165°F. The coating should be deep golden brown and crisp to the touch.

Trained in classic French technique but raised on slow-cooked ribs and spicy rubs, she blends culinary skill with smoke and soul.
- Recipe for Boneless Pork Chops in Cast Iron Skillet: Sear and Baste to Juicy Perfection - October 3, 2026
- Recipe for Boneless Cross Rib Roast: Slow-Roasted Beef with Herb Crust - October 3, 2026
- Hamburgers in Sauce Recipe Crock Pot: Slow-Cooked Savory Delight - October 3, 2026