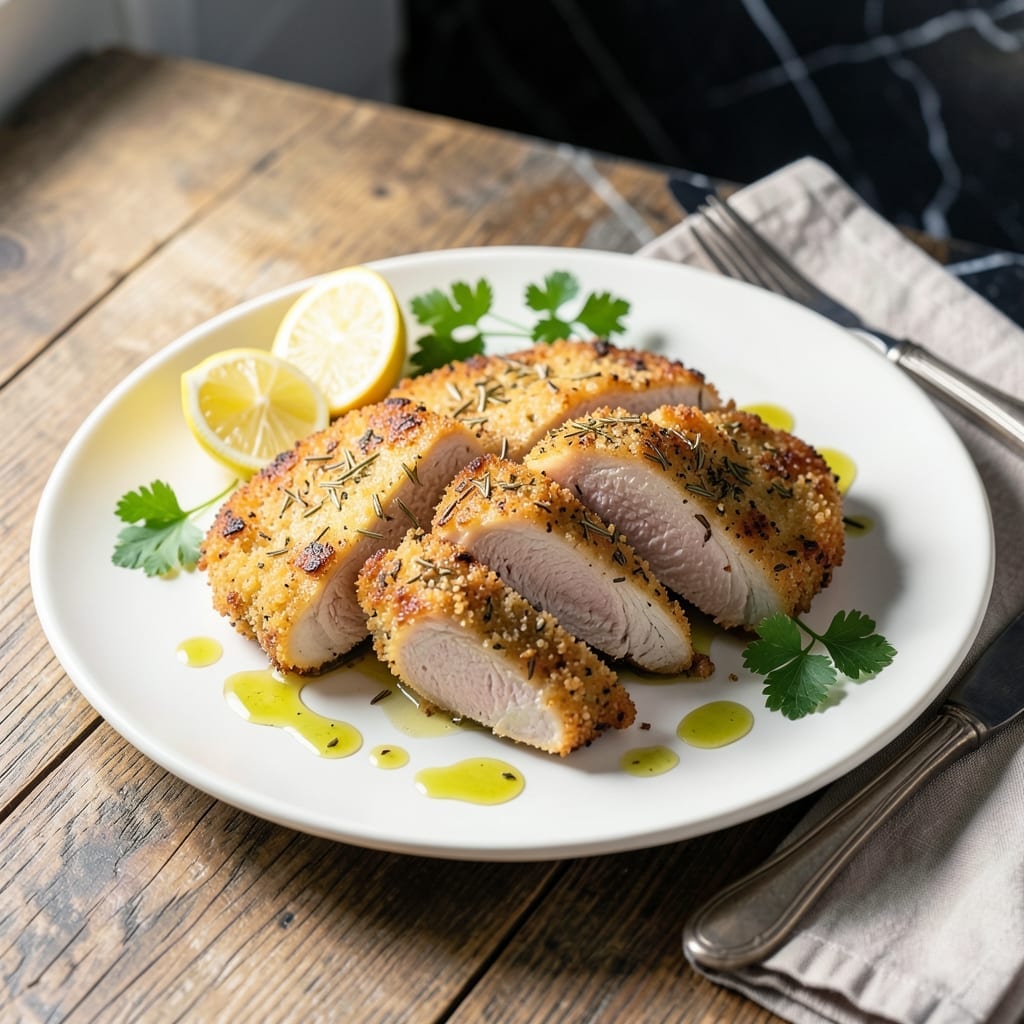
This lean protein dish delivers crispy results without sacrificing health. I developed this method while working in Asheville, where farm-fresh turkey needed simple, flavorful preparation.
The secret lies in a light herb coating and precise cooking temperature. Turkey cutlets cook quickly, making this a 30-minute meal that doesn’t compromise on taste or nutrition.
You’ll achieve golden, herb-crusted cutlets with juicy interiors. Each bite offers the satisfaction of fried food with none of the guilt.
Perfect for weeknight dinners when you want something nourishing yet indulgent. Here’s how to make it right every time.
Ingredients for Healthy Recipe for Turkey Cutlets
Lean protein and herb-crusted goodness with a quick grocery stop. Simple, flavorful, done right.
| Ingredient | Amount | Notes |
|---|---|---|
| Turkey Cutlets 🦃 | 1 ½ lb | Boneless, skinless, pounded to 1/4-inch thickness |
| All-Purpose Flour 🌾 | ½ cup | For light dredging |
| Large Egg 🥚 | 1 whole | Beaten for egg wash |
| Panko Breadcrumbs 🍞 | 1 cup | For crispy coating |
| Dried Thyme 🌿 | 1 tsp | Crushed between fingers |
| Dried Rosemary 🍃 | 1 tsp | Finely chopped |
| Garlic Powder 🧄 | 1 tsp | Not garlic salt |
| Paprika 🌶️ | ½ tsp | Sweet or smoked variety |
| Sea Salt 🧂 | 1 tsp | Fine grain preferred |
| Black Pepper 🌶️ | ½ tsp | Freshly ground preferred |
| Olive Oil 🫒 | ¼ cup | For pan-searing cutlets |
| Unsalted Butter 🧈 | 2 tbsp | For finishing pan sauce |
| Fresh Lemon Juice 🍋 | 1 tbsp | For brightness |
| Low-Sodium Chicken Broth 💧 | ½ cup | For deglazing pan |
| Fresh Parsley 🌿 | 2 tbsp | Chopped, for garnish |
[recipe_ingredient_scaler]
Turkey cutlets are the star here—look for farm-fresh from Whole Foods or Harris Teeter if you’re in the South. The breast meat should be pale pink, not gray, with no strong odor (that’s a freshness red flag). I always grab extra Panko from the Asian aisle—it’s lighter and crispier than regular breadcrumbs. For the herbs, Penzeys has fantastic dried options if you want to level up.
No Panko? Crushed cornflakes or plain breadcrumbs work in a pinch, though the texture won’t be as crisp. Swap the dried herbs for fresh at one-third the amount (so about 1 tsp total mixed fresh). If you’re avoiding gluten, almond flour plus crushed rice cereal makes a great coating. The chicken broth can be swapped for vegetable broth—Trader Joe’s organic is my go-to.
Cooked cutlets keep 3-4 days in the fridge—store them on a rack so the coating stays crisp. Freeze uncooked, breaded cutlets for up to 2 months (thaw in the fridge overnight). Panko and spices? Airtight container, 6 months easy.
Why You’ll Love This Recipe
- One Pan Wonder: I love that this comes together on a single baking sheet—just dip, coat, bake, and clean up is a breeze.
- Crispy Perfection: The panko and thyme give these cutlets a golden, herb-speckled crunch that’s way more exciting than plain baked chicken.
- Meal Prep MVP: I make a double batch on Sunday and they reheat beautifully for lunches all week. No soggy leftovers here.
- Budget Stretcher: Turkey cutlets are lean and affordable, and a little goes a long way with that egg-and-panko coating.
Step-by-Step Instructions for Turkey Cutlets
This method ensures crispy, herbed cutlets with lean protein in every bite.
Step 1: Season and Bread the Turkey Cutlets
First, pat the 1.5 lb Turkey Cutlets dry with paper towels—this is crucial for achieving a crispy coating. Season both sides with the 1 tsp Sea Salt and 0.5 tsp Black Pepper, then set up a breading station.
In a shallow dish, combine the 0.5 cup All-Purpose Flour with the 1 tsp Dried Thyme, 1 tsp Dried Rosemary, 1 tsp Garlic Powder, and 0.5 tsp Paprika. This herb-infused flour creates the first flavorful layer. Dredge each cutlet lightly in the flour mixture, shaking off any excess.
Next, beat the 1 whole Large Egg in a second shallow dish. Dip each floured cutlet into the egg, allowing any excess to drip off, then press it into the 1 cup Panko Breadcrumbs in a third dish. The panko ensures an extra-crispy finish. Press gently so the crumbs adhere evenly.
Step 2: Pan-Sear the Cutlets to Golden Perfection
Heat the 0.25 cup Olive Oil in a large skillet over medium-high heat until it shimmers—this indicates it’s hot enough for searing. Add the breaded cutlets in a single layer, being careful not to overcrowd the pan. You’ll need to work in batches if your skillet isn’t large enough.
Cook for 3-4 minutes per side until the cutlets are golden brown and the coating is crisp. Avoid moving them too soon; let them develop a deep golden crust before flipping. The internal temperature should reach 165°F when fully cooked.
Transfer the cooked cutlets to a paper towel-lined plate to drain any excess oil. Keep them warm while you finish the sauce.
Step 3: Create a Bright Pan Sauce
Reduce the heat to medium and add the 2 tbsp Unsalted Butter to the same skillet. Once melted, pour in the 0.5 cup Low-Sodium Chicken Broth and 1 tbsp Fresh Lemon Juice. Use a wooden spoon to scrape up any browned bits from the bottom of the pan—this adds depth to the sauce.
Let the sauce simmer for 2-3 minutes until it thickens slightly and reduces by about half. Taste and adjust seasoning if needed, though the cutlets are already well-seasoned. The sauce should be glossy and coat the back of a spoon.
Step 4: Serve with Fresh Garnish
Return the cutlets to the skillet and spoon the sauce over them, letting them warm through for 1 minute. This step ensures the cutlets absorb some of the flavorful sauce.
Transfer the cutlets to a serving platter and drizzle with the remaining sauce. Garnish with the 2 tbsp Fresh Parsley for a pop of color and freshness. Serve immediately while the coating is still crisp. The parsley not only adds visual appeal but also a bright, herby note that complements the dish perfectly.
Pro Tips For Making Healthy Recipe For Turkey Cutlets
- Pound the Cutlets: Use a meat mallet to flatten the turkey cutlets to an even ¼-inch thickness—this guarantees even cooking and prevents chewy, dry spots.
- Dry the Turkey: Pat the cutlets completely dry with paper towels before dredging; any moisture makes the breading slide right off.
- Skip Cold Egg: I learned this the hard way—let the egg sit at room temperature for 10 minutes so it adheres better to the flour and panko.
- Toast the Panko: Toss the panko with a tiny bit of olive oil and toast in a dry pan for 2 minutes—it adds crunch without extra oil in the final dish.
Storing and Reheating Leftovers
Refrigerator Storage
Let your cutlets cool completely before storing—I like using Pyrex glass containers with snap-tight lids. They’ll keep in the fridge at 40°F or below for 3-4 days without losing much crispness. 💡
Freezer Storage
For longer storage, freeze uncooked breaded cutlets on a parchment-lined baking sheet first. Once frozen, transfer to heavy-duty freezer bags with all air squeezed out. They’ll stay fresh for up to 2 months at 0°F.
Oven Reheating
Preheat your oven to 375°F and place cutlets on a wire rack over a baking sheet. Heat for 10-12 minutes until they reach 165°F internally. This method helps maintain that crispy coating we worked so hard to achieve.
Stovetop Reheating
For quick reheating, use a nonstick skillet over medium heat with a splash of Olive Oil. Cook for 2-3 minutes per side until crisp and heated through. David swears this brings them closest to fresh-made.
Sauce Storage
Store any leftover pan sauce separately in a small airtight container. It’ll keep in the fridge for 3-4 days or can be frozen for up to 1 month. Reheat gently in a small saucepan.
Crispiness Tip
To revive the coating’s crunch after storage, broil for 1-2 minutes on high after reheating. Watch closely as Panko can burn quickly. This trick saved many a meal in my Asheville kitchen. ✨
Nutrition Facts
Frequently Asked Questions
What’s the best oil for cooking?
Use olive oil or avocado oil for best results. Both have high smoke points that prevent burning at medium-high heat. Avoid butter for searing—it burns too easily.
How do I prevent the coating from falling off?
Pat the cutlets completely dry first and press the crumbs firmly into the egg wash. Let them rest 5 minutes before cooking. Don’t move them in the pan until ready to flip.
Can I bake instead of pan-frying?
Yes! Bake at 400°F for 12-15 minutes, flipping halfway. Use a wire rack on a baking sheet for even crispiness. The texture will be slightly different but still delicious.
What sides pair well with this dish?
Try roasted vegetables, a fresh salad, or quinoa. The lemon sauce works beautifully with broccoli or asparagus. For a heartier meal, serve with mashed sweet potatoes.

Trained in classic French technique but raised on slow-cooked ribs and spicy rubs, she blends culinary skill with smoke and soul.
- Recipe for Boneless Pork Chops in Cast Iron Skillet: Sear and Baste to Juicy Perfection - October 3, 2026
- Recipe for Boneless Cross Rib Roast: Slow-Roasted Beef with Herb Crust - October 3, 2026
- Hamburgers in Sauce Recipe Crock Pot: Slow-Cooked Savory Delight - October 3, 2026