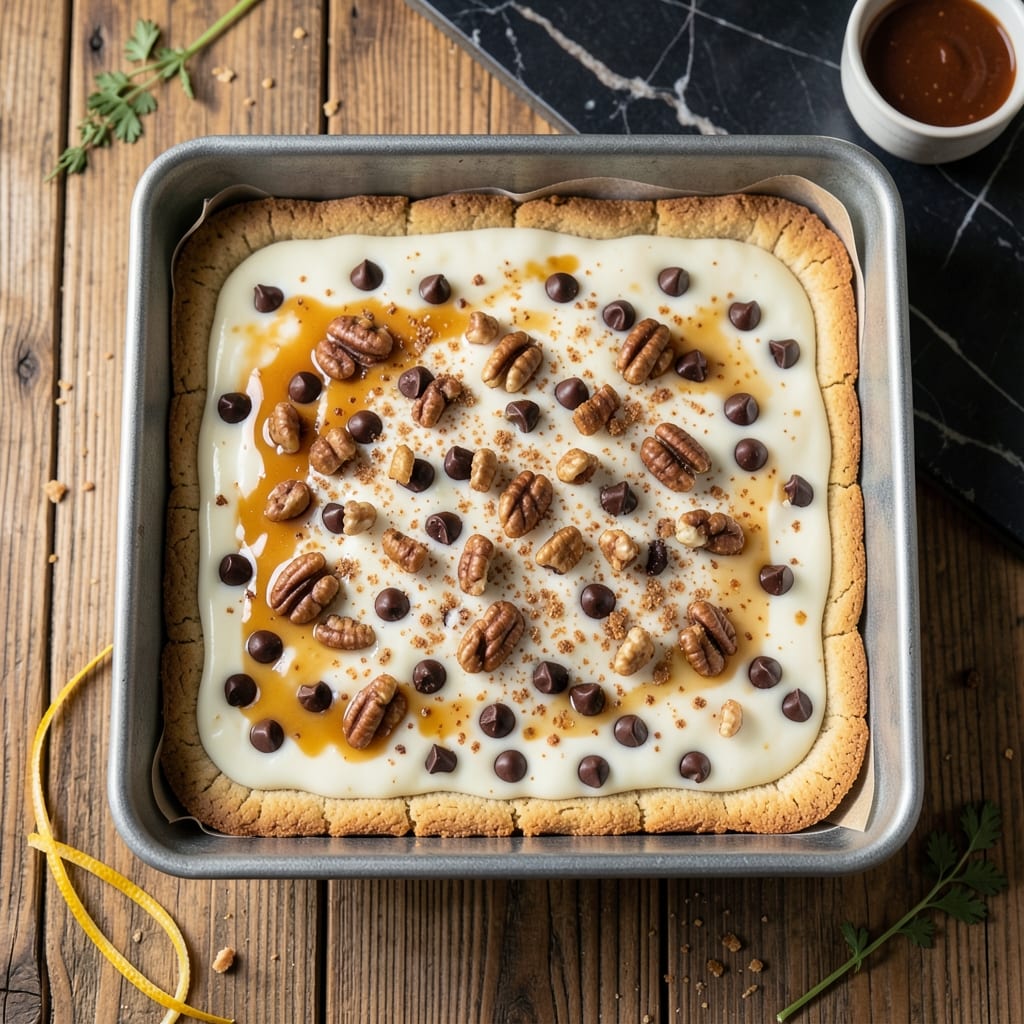
I first discovered these layered bars at Nana Mae’s diner, where the scent of baking coconut and pecans would draw customers in from Peachtree Street. This version uses sweetened condensed milk to create that signature gooey texture.
Each layer builds upon the last—crust, chocolate, coconut, and pecans—all held together by the condensed milk that caramelizes as it bakes. The result is a bar that’s crisp on top, chewy in the middle, and rich throughout.
The baking process transforms simple ingredients into something extraordinary. At 350°F for 25-30 minutes, the milk creates a golden, crackly top that gives way to a soft, decadent center.
These bars keep well for days, though they rarely last that long in my house. David always requests a double batch.
Ingredients for Hello Dolly Bars Recipe with Condensed Milk
Layered goodness starts with pantry staples and a can of condensed milk.
| Ingredient | Amount | Notes |
|---|---|---|
| All-Purpose Flour 🌾 | 1 ½ cups | Sifted for even texture |
| Unsalted Butter 🧈 | ¾ cup | Melted and cooled slightly |
| Granulated Sugar 🍚 | ½ cup | Fine grain preferred |
| Light Brown Sugar 🍚 | ½ cup | Packed for moisture |
| Sweetened Condensed Milk 🥛 | 1 can | 14 oz standard size |
| Semi-Sweet Chocolate Chips 🍫 | 1 ½ cups | Divided for layering |
| Shredded Coconut 🥥 | 1 ½ cups | Sweetened or unsweetened |
| Chopped Pecans 🌰 | 1 ½ cups | Toasted for extra flavor |
| Vanilla Extract 🌿 | 1 tsp | Pure extract preferred |
| Salt 🧂 | ¼ tsp | Fine sea salt |
| Baking Powder 🧂 | ¼ tsp | For slight lift |
[recipe_ingredient_scaler]
The condensed milk is non-negotiable—Eagle Brand is the gold standard (14 oz can, no substitutions). Pecans should be fresh, not the stale ones from last Thanksgiving. Costco has great prices on bulk pecans, or grab a bag from Publix if you’re in the South. For the chocolate, Ghirardelli or Guittard chips melt beautifully. The coconut? Sweetened flaked is classic, but unsweetened works if you’re watching sugar.
No pecans? Walnuts or almonds work just as well—just chop them to similar size. Swap chocolate chips for white chocolate or butterscotch if you’re feeling adventurous. The crust can handle a little flexibility too—half the flour replaced with graham cracker crumbs adds a nice crunch. Freshly toasted coconut makes a difference (5 minutes in a dry pan, watch closely).
These bars keep at room temperature for 5 days in an airtight container. They freeze beautifully for up to 3 months—just thaw overnight. The flavors actually deepen after a day, so don’t stress if they don’t disappear immediately.
Why You’ll Love This Recipe
- No Fuss Mixing: I just dump the flour, butter, and sugars into one bowl—no fancy steps, just stir and press.
- Caramel Magic: The condensed milk turns into this golden, gooey layer that makes every bite taste like a candy bar.
- Potluck Hero: I bring these to parties and they’re the first thing gone—no one guesses how simple they are.
- Stays Fresh: Honestly, they taste even better the next day, if they last that long.
Step-by-Step Instructions for Hello Dolly Bars
Here’s my no-fail method for perfectly layered, gooey bars every time.
Step 1: Prepare the Buttery Shortbread Base
Preheat your oven to 350°F and line a 9×13-inch baking pan with parchment paper, leaving an overhang for easy removal. In a bowl, whisk together the 1.5 cups all-purpose flour, 0.25 tsp salt, and 0.25 tsp baking powder to ensure even distribution.
Add the 0.75 cup unsalted butter (melted and cooled slightly) along with the 0.5 cup granulated sugar and 0.5 cup light brown sugar. Mix until a soft, crumbly dough forms—it should hold together when pressed. This base needs to be sturdy enough to support all those rich layers on top.
Press the dough evenly into the prepared pan, using your fingers or a spatula to create a smooth layer. Bake for 15-18 minutes until the edges are just starting to turn light golden brown. Don’t overbake, or the base will be too hard to cut through later.
Step 2: Layer Chocolate Chips, Pecans, and Coconut
While the base is still hot from the oven, sprinkle the 1.5 cups semi-sweet chocolate chips evenly over the crust. The heat will start to soften them slightly, which helps them meld into the next layers. Use the full amount—this isn’t the time to skimp.
Next, add the 1.5 cups chopped pecans in an even layer. I like to press them down lightly so they stick to the chocolate chips. Then sprinkle the 1.5 cups shredded coconut on top, again pressing gently. You should have three distinct layers that will bake together into a chewy, nutty, chocolatey delight.
Step 3: Pour the Condensed Milk Mixture
In a small bowl, combine the 1 can sweetened condensed milk with the 1 tsp vanilla extract. Stir well to distribute the vanilla evenly. This mixture is what creates the signature gooey texture of these bars, so don’t skip the vanilla—it adds depth to the sweetness.
Pour this mixture evenly over the layered chocolate, pecans, and coconut. Use a spatula to spread it gently if needed, but don’t press down—you want the layers to stay distinct. The condensed milk will seep into all the crevices, binding everything together as it bakes.
Step 4: Bake Until Golden and Bubbly
Return the pan to the 350°F oven and bake for 25-30 minutes. You’re looking for the top to turn a deep golden brown with the coconut slightly toasted. The edges should be bubbling, and the center should look set but still slightly jiggly—it will firm up as it cools.
Resist the urge to pull it out too early. The condensed milk needs this time to caramelize and create that perfect chewy texture. If the top starts browning too quickly, tent the pan with foil for the remaining bake time.
Step 5: Cool Completely Before Cutting
Let the bars cool in the pan for at least 2 hours before attempting to cut them. This is non-negotiable—cutting too soon will result in a gooey mess instead of clean, defined layers. The cooling time allows everything to set properly.
Once completely cool, use the parchment paper overhang to lift the entire batch out of the pan. Place it on a cutting board and slice into 16 squares using a sharp knife. Wipe the knife between cuts for clean edges. Each square should reveal all the beautiful layers you worked so hard to create.
Pro Tips For Making Hello Dolly Bars Recipe With Condensed Milk
- Pre-Bake the Crust: Bake the flour-butter-sugar base for 10-12 minutes before adding toppings—this prevents a soggy bottom. I learned this the hard way after my first batch turned into a gooey mess.
- Warm the Milk: Microwave the sweetened condensed milk for 20-30 seconds to loosen it before drizzling. It spreads more evenly and blends better with the other layers.
- Skip the Overmixing: Press the crust mixture into the pan just until combined—overworking it makes the base tough. Sounds weird, but it works.
- Cool Completely: Let the bars set for at least 2 hours before cutting (yes, even if you’re impatient like me). Slicing too soon turns them into a sticky, uneven disaster.
Essential Equipment for This Recipe
Baking Pan Essentials
You absolutely need a 9×13-inch baking pan for this recipe—I use my USA Pan with a non-stick coating. The straight sides help contain all those gooey layers, and the light color prevents over-browning. David swears by his glass Pyrex pan, which lets him monitor the crust through the sides. 💡
Parchment Paper
Line your pan with parchment paper, leaving a 2-inch overhang on all sides. This makes removal a breeze and prevents sticking. I buy Reynolds Kitchens pre-cut sheets at Central Market—they fit perfectly. The overhang acts as handles for lifting the entire batch out after cooling.
Mixing Bowls
A set of nested mixing bowls in various sizes is key. I use a medium bowl for the crust and a small bowl for the condensed milk mixture. My OXO Good Grips set has lasted me over a decade. The non-slip bases keep them steady while I whisk the dry ingredients.
Measuring Tools
Accurate measurements matter here. I keep a set of stainless steel measuring cups and spoons from Cuisinox in my drawer. For the brown sugar, pack it firmly into the cup—this ensures the right moisture level in your crust. A kitchen scale helps too if you prefer weighing ingredients.
Don’t forget a measuring spoon for the vanilla—1 tsp makes all the difference. 💛
Cooling Rack
After baking, transfer the pan to a wire cooling rack. This allows air to circulate underneath, preventing the crust from getting soggy. My Wilton rack folds flat for easy storage. The bars need that 2-hour cooling time to set properly before cutting.
Nutrition Facts
Frequently Asked Questions
Can I use evaporated milk instead of condensed?
No, they’re not interchangeable. Condensed milk is sweetened and thick, while evaporated milk lacks sugar and won’t create the same caramelized texture. Stick with the can of sweetened condensed milk for best results.
Why do my bars turn out runny?
This usually means they weren’t baked long enough or cooled properly. Ensure the top is deep golden brown and bubbly, then let them cool for the full 2 hours before cutting. Patience is key!
Can I make these gluten-free?
Yes! Swap the all-purpose flour for a 1:1 gluten-free baking flour. The texture will be slightly different but still delicious. Ensure all other ingredients, like chocolate chips, are certified gluten-free.

Trained in classic French technique but raised on slow-cooked ribs and spicy rubs, she blends culinary skill with smoke and soul.
- Recipe for Boneless Pork Chops in Cast Iron Skillet: Sear and Baste to Juicy Perfection - October 3, 2026
- Recipe for Boneless Cross Rib Roast: Slow-Roasted Beef with Herb Crust - October 3, 2026
- Hamburgers in Sauce Recipe Crock Pot: Slow-Cooked Savory Delight - October 3, 2026