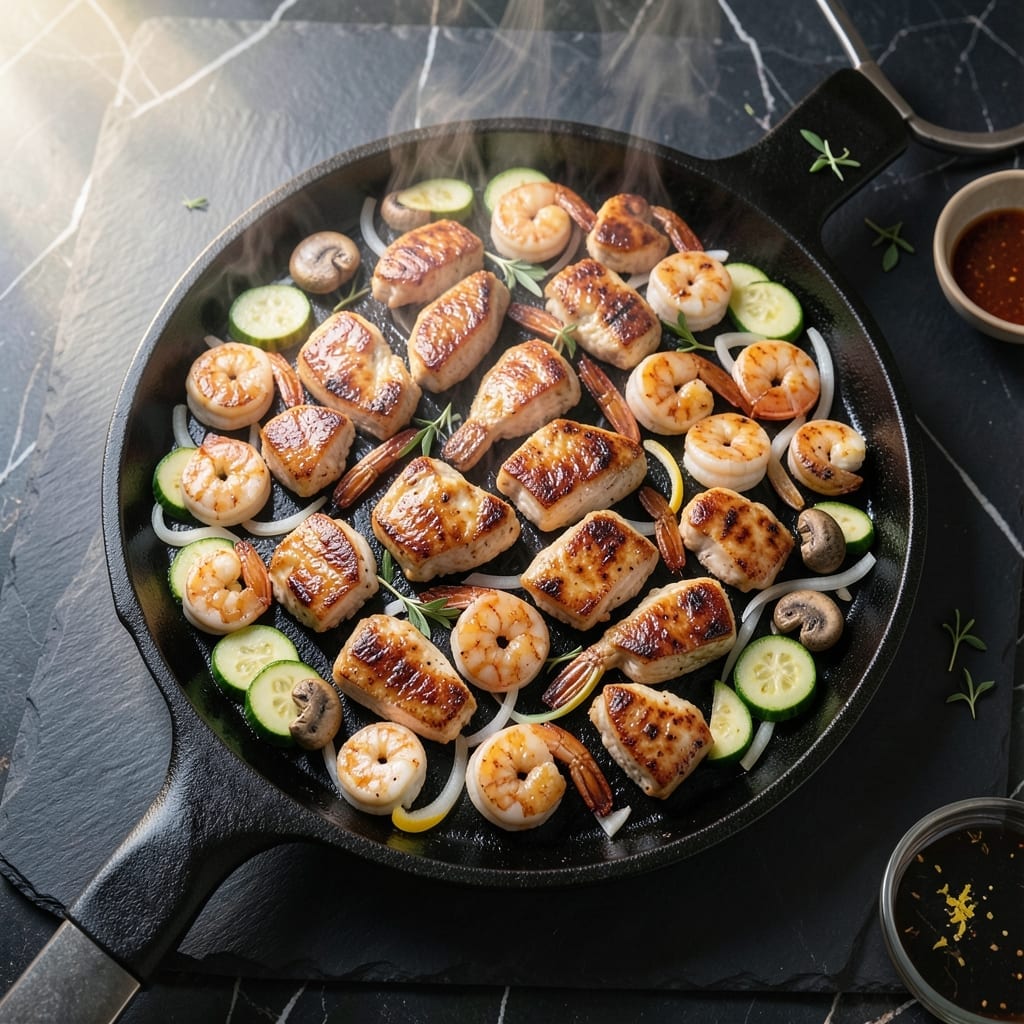
Bringing the sizzle of teppanyaki home has never been more achievable. This recipe captures the authentic flavors and theatrical presentation of hibachi-style cooking right in your kitchen.
Using simple ingredients and a hot skillet, you’ll create tender chicken and shrimp with that signature smoky char. The key lies in high heat and precise timing to lock in moisture and flavor.
What emerges is a dish that rivals your favorite Japanese steakhouse—juicy proteins, crisp vegetables, and a savory sauce that ties everything together. The aroma alone will transport you tableside.
Perfect for impressing guests or turning a weeknight into something special. Here’s how to master this at home.
Ingredients for Hibachi Recipe Chicken and Shrimp
Simple proteins and crisp veggies meet a savory sauce for that signature hibachi experience.
| Ingredient | Amount | Notes |
|---|---|---|
| Boneless Skinless Chicken Breast 🍗 | 1 ½ lb | Cut into bite-sized pieces |
| Large Shrimp 🍤 | 1 lb | Peeled, deveined, tails on |
| Zucchini 🥒 | 2 whole | Sliced into half-moons |
| White Onion 🧅 | 1 whole | Sliced into thin strips |
| Mushrooms 🍄 | 8 oz | White or cremini, sliced |
| Garlic Cloves 🧄 | 4 cloves | Minced for sauce |
| Soy Sauce 🫒 | ½ cup | Low-sodium preferred |
| Sesame Oil 🫒 | 2 tbsp | Toasted for depth |
| Rice Wine Vinegar 💧 | 2 tbsp | For tangy balance |
| Brown Sugar 🍚 | 2 tbsp | Light or dark works |
| Fresh Ginger 🌿 | 1 tbsp | Grated, peeled first |
| Vegetable Oil 🫒 | ¼ cup | High smoke point for searing |
| Butter 🧈 | 4 tbsp | Unsalted, for finishing |
| Green Onions 🌱 | 4 whole | Thinly sliced for garnish |
| Sesame Seeds 🌰 | 1 tbsp | Toasted for garnish |
[recipe_ingredient_scaler]
The chicken and shrimp need to be fresh—Whole Foods or a trusted seafood counter for the shrimp (look for wild-caught if possible). For chicken, air-chilled breasts stay juicier. The veggies are flexible: zucchini and mushrooms absorb the smoky char well, but asparagus or bell peppers work too. Costco has great pre-sliced options if you’re short on prep time.
No soy sauce? Coconut aminos work in a pinch (use the same amount). Out of sesame oil? Toasted peanut oil adds a similar depth. Shrimp allergies? Swap in scallops or extra chicken. The brown sugar can be honey or maple syrup, but the flavor profile will shift slightly. Fresh ginger is ideal, but ground ginger at half the amount gets you close.
Leftovers reheat well in a skillet—just add a splash of water to refresh. Keeps 3-4 days in the fridge, but honestly it’s best fresh. The sauce can be made ahead and stored for up to 1 week. Always toast your sesame seeds (dry pan, 2 minutes) for maximum crunch.
Why You’ll Love This Recipe
- One Pan Magic: I toss chicken, shrimp, and veggies on a single sheet and let the hibachi sauce do the work—minimal cleanup, maximum flavor.
- Umami Bomb: The soy-garlic butter makes the shrimp and chicken so ridiculously good I sneak bites straight from the pan.
- Weeknight Hero: Between us, this feeds my picky teen and my veggie-loving spouse without complaint.
- Leftovers? Yes Please: Honestly, the chicken and zucchini taste even better the next day in my lunch wrap.
Step-by-Step Instructions for Hibachi Chicken and Shrimp
Master the teppanyaki technique at home with these straightforward, foolproof steps.
Step 1: Prep and Season the Proteins
Cut the 1.5 lb boneless skinless chicken breast into bite-sized pieces and pat them dry with paper towels. In a bowl, toss the chicken with 2 tbsp soy sauce, 1 tbsp sesame oil, and 1 tbsp rice wine vinegar. This marinade infuses flavor and tenderizes the meat.
For the 1 lb large shrimp, peel, devein, and leave the tails on for presentation. Toss them with the remaining 2 tbsp soy sauce, 1 tbsp sesame oil, and 1 tbsp rice wine vinegar. Let both proteins marinate for 15 minutes while you prep the vegetables.
Step 2: Cook Vegetables on High Heat
Heat 2 tbsp vegetable oil in a large skillet or griddle over high heat until shimmering. Add the sliced zucchini, sliced white onion, and 8 oz mushrooms. Cook for 4-5 minutes, stirring occasionally, until the vegetables are tender but still crisp and slightly charred.
Push the vegetables to one side of the pan and add 2 tbsp butter, 4 cloves minced garlic, and 1 tbsp grated ginger. Sauté for 1 minute until fragrant, then mix everything together. The butter adds richness while the garlic and ginger build depth.
Step 3: Sear the Chicken and Shrimp
Add the remaining 2 tbsp vegetable oil to the pan and increase the heat to maximum. Working in batches if needed, add the chicken in a single layer. Sear for 3-4 minutes per side until golden brown and cooked through. Transfer to a plate and cover to keep warm.
In the same pan, add the shrimp and sear for 2-3 minutes per side until they turn opaque and pink. Avoid overcrowding the pan—this ensures a proper sear. The shrimp should curl into a C-shape when done.
Step 4: Combine and Finish with Sauce
Return all the cooked chicken and shrimp to the pan with the vegetables. Stir in the remaining 2 tbsp soy sauce, 2 tbsp brown sugar, and 2 tbsp butter. Toss everything together and cook for 2 minutes until the sauce thickens slightly and coats the ingredients evenly.
The brown sugar caramelizes slightly, creating that signature hibachi glaze. Taste and adjust seasoning if needed—add a splash of water if the sauce is too thick.
Step 5: Garnish and Serve Immediately
Transfer everything to a serving platter and garnish with thinly sliced green onions and toasted sesame seeds. The green onions add a fresh, sharp contrast while the sesame seeds provide a nutty crunch.
Serve immediately while sizzling hot, with steamed rice to soak up every last bit of the savory sauce. The key is the high heat and quick cooking—this keeps the proteins tender and the vegetables vibrant.
Pro Tips For Making Hibachi Recipe Chicken And Shrimp
- Dry Your Protein: Pat the chicken and shrimp completely dry with paper towels before cooking—this prevents steaming and guarantees a proper sear on your hibachi grill or skillet.
- Cut Evenly: Slice the chicken breast into uniform 1-inch cubes and keep shrimp whole but peeled; this ensures everything cooks at the same rate without over or underdone bites.
- Skip the Crowding: Cook the chicken and shrimp in separate batches if needed—overloading the pan drops the temperature and turns your stir-fry into a sad, soggy mess.
- Salt the Veggies: Toss the zucchini, onion, and mushrooms with a pinch of salt and let them sit for 10 minutes before cooking; it draws out excess moisture so they caramelize instead of steaming.
Pro Cooking Tips for hibachi recipe chicken and shrimp
Heat Control is Key
Your skillet must reach smoking hot before adding proteins—I test with a flick of water that should dance and evaporate instantly. Cast iron retains heat best, but stainless steel works too. Keep the flame on maximum throughout cooking. 🔥
Marinade Timing
Don’t over-marinate the shrimp—15 minutes max or the acid in vinegar will make them mushy. Chicken can handle up to 30 minutes if you want deeper flavor. I learned this the hard way at my first local BBQ competition.
Batch Cooking Strategy
Cook chicken first, then shrimp separately to avoid overcrowding. Use 2 tbsp oil per batch to maintain that perfect sear. Overcrowding drops the pan temp too fast, turning your sear into a steam.
Sauce Thickness Trick
If your sauce is too thin, let it reduce for 1-2 extra minutes off heat. The brown sugar caramelizes best at medium-high heat. I like to tilt the pan slightly to pool the sauce in one corner.
Rest Before Serving
Let proteins rest 2 minutes before combining with veggies. This keeps juices inside the meat. Meanwhile, toss your veggies with that last 2 tbsp butter for extra richness. 💡
Garnish Like a Pro
Toast sesame seeds in a dry pan for 2 minutes until golden. Slice green onions on a bias for that restaurant-style look. The contrast of colors makes the dish pop on the plate.
Nutrition Facts
Frequently Asked Questions
What’s the best pan for hibachi cooking?
Cast iron or stainless steel work best on high heat. Avoid nonstick as it can’t handle the extreme temperatures needed for that signature sear and sizzle.
Can I use frozen shrimp?
Thaw frozen shrimp completely first in cold water for 15-20 minutes. Pat dry thoroughly before cooking to prevent steaming instead of searing. Never cook from frozen.
How do I prevent the chicken from drying out?
Don’t overcook! Remove chicken at 165°F internal temp and let it rest 2 minutes. Cutting into bite-sized pieces ensures even cooking without toughness.
What if my sauce is too salty?
Balance with a touch of brown sugar or 1 tbsp water. The caramelization will mellow the saltiness as it reduces. Taste frequently while cooking.

Trained in classic French technique but raised on slow-cooked ribs and spicy rubs, she blends culinary skill with smoke and soul.
- Recipe for Boneless Pork Chops in Cast Iron Skillet: Sear and Baste to Juicy Perfection - October 3, 2026
- Recipe for Boneless Cross Rib Roast: Slow-Roasted Beef with Herb Crust - October 3, 2026
- Hamburgers in Sauce Recipe Crock Pot: Slow-Cooked Savory Delight - October 3, 2026