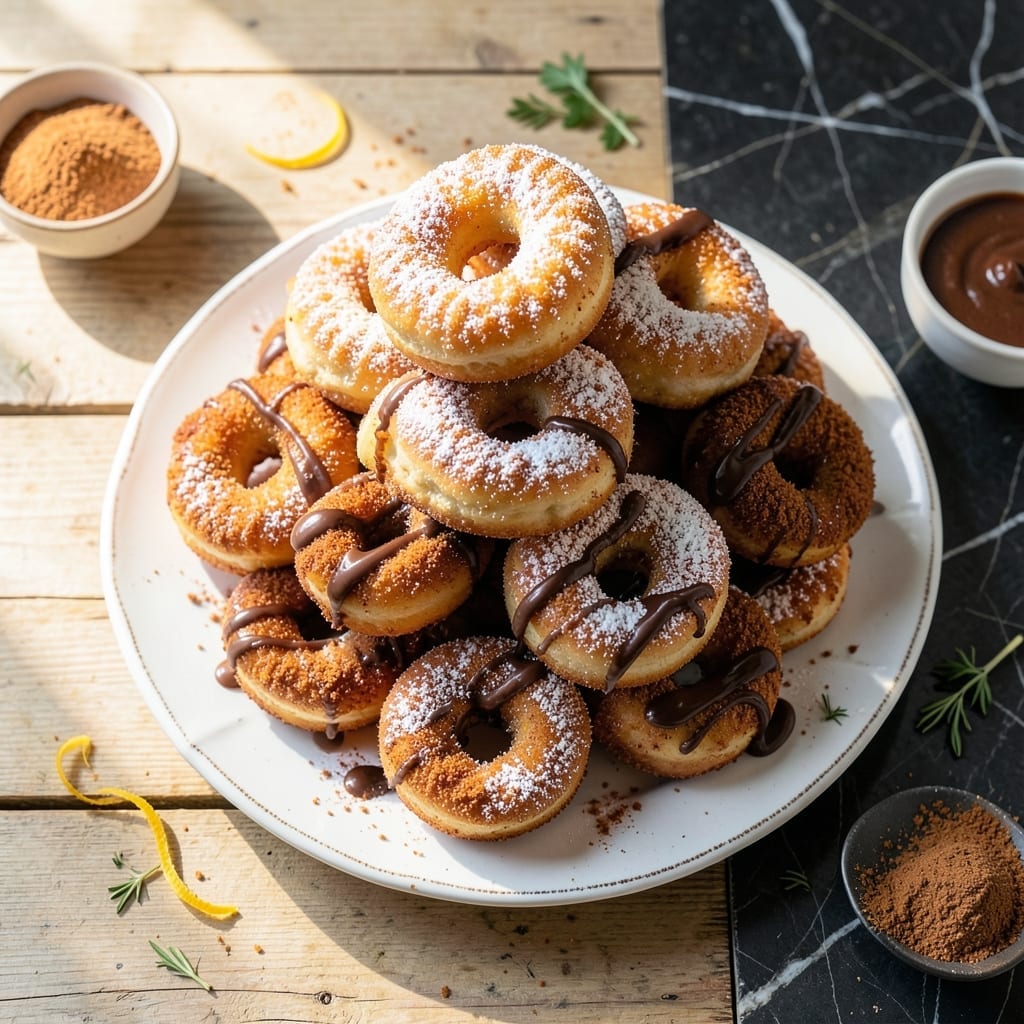
I developed this yeast-free doughnut recipe for those moments when you crave homemade pastries but don’t have hours to wait for dough to rise. The secret lies in a simple chemical leavening agent that creates pillowy soft results without the wait.
This method transforms basic pantry staples into golden, cake-like doughnuts with minimal effort. No special equipment required—just a mixing bowl and a hot pan. The texture rivals traditional versions, with a tender crumb that stays fresh for days.
You’ll achieve professional-quality results in under 30 minutes, from mixing to frying. Each bite delivers that nostalgic doughnut shop flavor, with the satisfaction of knowing it’s entirely homemade.
Perfect for weekend breakfasts or impromptu dessert cravings. The technique is foolproof and adaptable to various flavors and glazes.
Ingredients for Homemade Doughnut Recipe Without Yeast
Basic pantry staples transform into golden, cake-like doughnuts with this clever approach.
| Ingredient | Amount | Notes |
|---|---|---|
| All-Purpose Flour 🌾 | 2 ½ cups | Sifted for even texture |
| Granulated Sugar 🍚 | ½ cup | Fine grain for even distribution |
| Baking Powder 🧂 | 2 tsp | Chemical leavening agent |
| Salt 🧂 | ½ tsp | Balances sweetness |
| Ground Nutmeg 🌰 | ¼ tsp | Freshly ground preferred |
| Large Egg 🥚 | 1 whole | Room temperature for even mixing |
| Whole Milk 🥛 | ¾ cup | Full-fat for richness |
| Unsalted Butter 🧈 | 2 tbsp | Melted and cooled |
| Vegetable Oil 🫒 | 4 cups | For frying, neutral flavor |
| Vanilla Extract 🌿 | 1 tsp | Pure for best flavor |
| Powdered Sugar 🍬 | 1 cup | For dusting finished doughnuts |
[recipe_ingredient_scaler]
The chemical leavening is non-negotiable here. Baking powder provides the lift without yeast, so ensure yours is fresh and active—test it by dropping a bit in hot water; it should bubble vigorously. For flour, King Arthur or Gold Medal deliver consistent results. The nutmeg might seem subtle, but it’s the signature warmth in these doughnuts. Use a microplane for the freshest possible grind.
No buttermilk? Whole milk with a splash of lemon juice works in a pinch. Swap nutmeg for cinnamon or cardamom if you prefer a different spice profile. For a richer doughnut, replace 2 tbsp of milk with heavy cream. The oil for frying must have a high smoke point—peanut or canola oil are excellent alternatives to vegetable. Avoid olive oil; its low smoke point burns before achieving the right temperature.
Fry in batches to avoid crowding the pan—this keeps the oil temperature steady. Doughnuts stay fresh for 2 days at room temperature in an airtight container, though they’re best eaten warm. For longer storage, freeze unfrosted doughnuts for up to 1 month. Reheat in a 350°F oven for 5-10 minutes to revive.
Why You’ll Love This Recipe
- No Yeast Needed: I skip the waiting game—baking powder does all the rising, so I’m frying up fresh doughnuts in minutes.
- Warm Spice Hug: That hint of nutmeg in the dough makes every bite taste like a cozy weekend morning.
- Breakfast or Dessert: I’ve served these for Sunday brunch and midnight snacks—honestly, they fit anywhere.
- Pantry Staples Only: Flour, sugar, baking powder—stuff I already have, so I can make these on a whim.
Step-by-Step Instructions for Homemade Doughnuts Without Yeast
This method delivers light, airy doughnuts with minimal effort and no rising time required.
Step 1: Combine Dry Ingredients for Even Leavening
In a large mixing bowl, whisk together the 2.5 cups all-purpose flour, 2 tsp baking powder, 0.5 tsp salt, and 0.25 tsp ground nutmeg until fully incorporated. I sift the flour first—this prevents lumps and ensures the leavening agents distribute evenly throughout the batter.
The baking powder creates the lift in these doughnuts, so make sure it’s fresh. If your baking powder is older than six months, test it by dropping a spoonful into hot water—it should bubble vigorously. This step establishes the structural foundation for pillowy results.
Step 2: Mix Wet Ingredients for Rich, Smooth Batter
In a separate bowl, whisk the 1 whole large egg, 0.5 cup granulated sugar, 0.75 cup whole milk, 2 tbsp unsalted butter (melted and cooled), and 1 tsp vanilla extract until the mixture is smooth and the sugar begins to dissolve. The butter should be cool enough that it doesn’t cook the egg—lukewarm to the touch is ideal.
Using whole milk and real vanilla extract ensures a rich, authentic flavor. The sugar not only sweetens but also contributes to the golden-brown color during frying. Whisk vigorously for about 1 minute to incorporate air, which helps create a lighter texture in the final doughnuts.
Step 3: Form and Shape the Dough for Frying
Pour the wet ingredients into the dry ingredients and stir gently with a wooden spoon or spatula until just combined. The batter will be thick and slightly sticky—don’t overmix, as this develops gluten and makes the doughnuts tough. Let the batter rest for 5 minutes to hydrate the flour fully.
Turn the dough onto a lightly floured surface and pat it to about ½-inch thickness. Use a doughnut cutter or a 3-inch round cutter and a 1-inch round cutter for the holes to cut out shapes. Gather and re-roll scraps once to maximize yield, but avoid overworking the dough.
Step 4: Fry to Golden Perfection in Hot Oil
Heat the 4 cups vegetable oil in a deep, heavy-bottomed pot to 350-360°F. Use a candy or deep-fry thermometer for accuracy—oil that’s too cool will create greasy doughnuts, while oil that’s too hot will burn the outside before the inside cooks. Maintain the temperature by adjusting the heat as needed.
Carefully lower 2-3 doughnuts at a time into the hot oil, being cautious not to overcrowd the pot. Fry for 1-2 minutes per side until deep golden brown and cooked through. The doughnuts should float and turn easily when ready to flip. Transfer to a paper towel-lined plate to drain excess oil.
Step 5: Finish with Powdered Sugar for Classic Appeal
While the doughnuts are still warm, dust them generously with 1 cup powdered sugar. I like to place the sugar in a paper bag, add a few doughnuts at a time, and shake gently for even coating. The residual heat from frying helps the sugar adhere beautifully.
Serve immediately for the best texture—they’re at their peak when warm and fresh. These doughnuts are best enjoyed the same day, though leftovers can be warmed briefly in the oven or microwave. The absence of yeast means they stay tender without becoming dense.
Pro Tips For Making Homemade Doughnut Recipe Without Yeast
- Chill the Dough: After mixing, refrigerate the dough for at least 30 minutes—I learned this the hard way when my first batch spread like pancakes in the oil. The cold helps the baking powder activate properly for a fluffier texture.
- Measure Flour Right: Spoon the all-purpose flour into your measuring cup and level it off, or you’ll end up with dense, dry doughnuts. Packing the flour directly from the bag adds up to 20% more, and that’s the thing that matters most.
- Skip Overmixing: Stir the batter just until the flour disappears—about 12-15 strokes. After burning three batches of tough doughnuts, I finally figured out that overworking the gluten makes them chewy, not tender.
- Use Fresh Baking Powder: Test your baking powder by dropping a teaspoon into hot water—if it doesn’t bubble aggressively, it’s dead. My grandmother swore by this, and she was right: stale leavening means flat, sad doughnuts.
Storing and Reheating homemade doughnut recipe without yeast
Room Temperature Storage
Let your doughnuts cool completely before storing them in an airtight container at room temperature. They’ll stay fresh and tender for up to 2 days, though I find they’re best eaten within 24 hours for peak texture. Line the container with paper towels to absorb any excess moisture. ❄️
Freezing for Later
For longer storage, freeze unfrosted doughnuts in a single layer on a baking sheet first, then transfer to a freezer bag. They’ll keep for up to 1 month without losing quality. I always label the bag with the date—I’ve learned the hard way that forgotten doughnuts lose their charm. 💡
Oven Reheating
To revive room temperature or frozen doughnuts, preheat your oven to 350°F. Place them on a baking sheet and warm for 5-10 minutes until heated through. This method restores their soft texture better than a microwave, which can make them chewy.
Microwave Shortcut
For a quick fix, microwave individual doughnuts on 50% power for 15-20 seconds. Add a damp paper towel over them to retain moisture. Avoid high power—it dries them out faster than you’d expect.
Glazing After Storage
If you plan to glaze stored doughnuts, wait until after reheating. Warm doughnuts accept glaze better than cold ones. Dust with powdered sugar or drizzle with a simple vanilla glaze for that fresh-baked feel.
Nutrition Facts
Frequently Asked Questions
Why use baking powder instead of yeast?
Baking powder creates immediate lift without waiting for dough to rise. It gives these doughnuts their pillowy texture in minutes rather than hours, making it perfect for quick treats.
Can I bake these instead of frying?
Yes, but the texture differs. Bake at 375°F for 10-12 minutes for cake-like results. Frying achieves the classic crisp exterior and moist interior that defines traditional doughnuts.
What if my dough is too sticky?
Add 1-2 tablespoons flour gradually until manageable. Avoid overworking the dough, as this makes doughnuts tough. A light touch keeps them tender and airy.
How do I know when the oil is ready?
Use a thermometer for 350-360°F. Alternatively, drop a pinch of dough in—if it sizzles and rises immediately, the oil is hot enough. Maintain steady temperature for even cooking.

Trained in classic French technique but raised on slow-cooked ribs and spicy rubs, she blends culinary skill with smoke and soul.
- Recipe for Boneless Pork Chops in Cast Iron Skillet: Sear and Baste to Juicy Perfection - October 3, 2026
- Recipe for Boneless Cross Rib Roast: Slow-Roasted Beef with Herb Crust - October 3, 2026
- Hamburgers in Sauce Recipe Crock Pot: Slow-Cooked Savory Delight - October 3, 2026