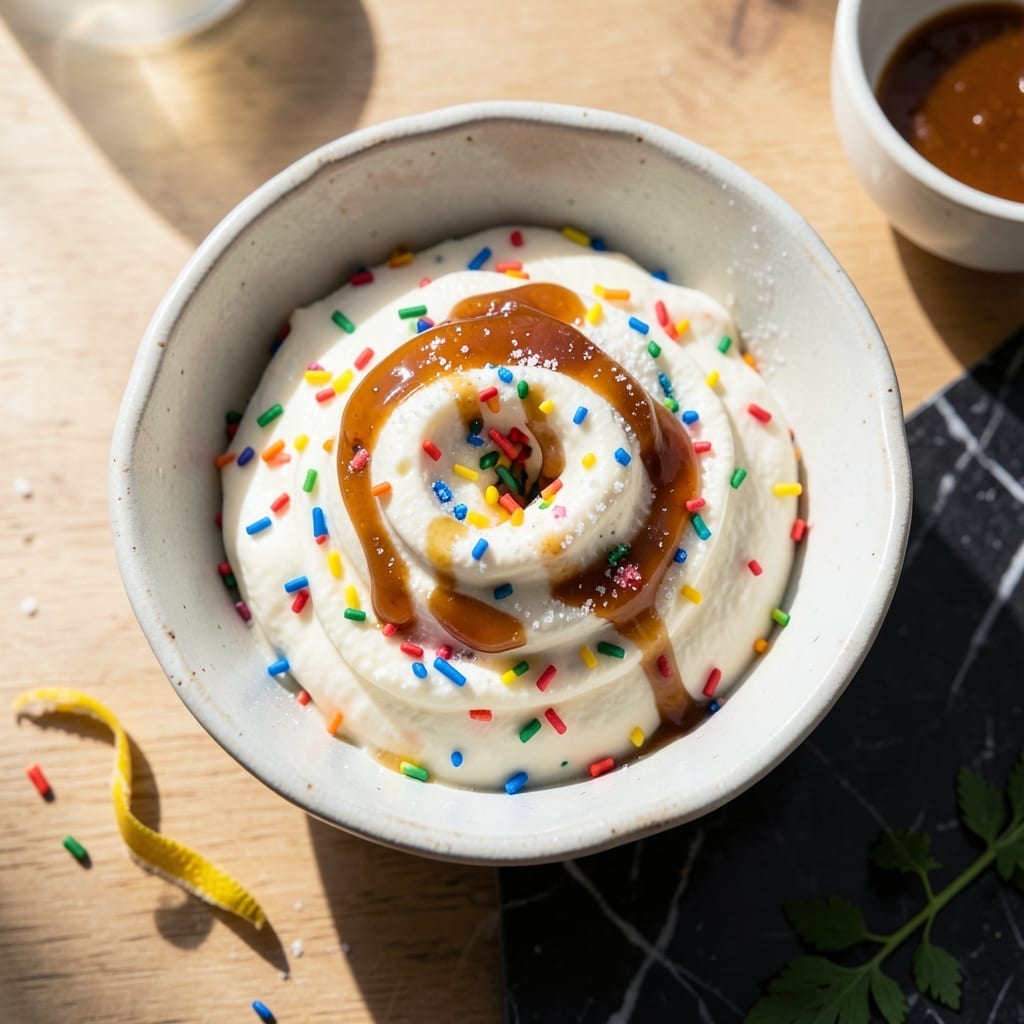
Making ice cream at home with kids transforms a simple dessert into a memorable family activity. This method delivers creamy, smooth results without special equipment or complicated steps.
I developed this approach after testing countless versions with my own children, Emma and Jack. The process is designed to be safe, engaging, and foolproof for little helpers while teaching basic kitchen skills.
What emerges from the freezer is a scoopable, dreamy ice cream loaded with vibrant sprinkles. The texture rivals any store-bought version, and the flavor options are limited only by imagination.
Perfect for summer afternoons, birthday parties, or any day that needs a sweet touch. The kids will beam with pride over their handcrafted creation.
Ingredients for Homemade Ice Cream Recipe for Kids
Simple pantry staples plus a splash of fun. Kids can handle most of these.
| Ingredient | Amount | Notes |
|---|---|---|
| Heavy Whipping Cream 🥛 | 2 cups | Cold, for best texture |
| Whole Milk 🥛 | 1 cup | Full-fat recommended |
| Granulated Sugar 🍚 | ¾ cup | Adjust to taste preference |
| Vanilla Extract 🌿 | 2 tsp | Pure extract preferred |
| Rainbow Sprinkles 🎨 | ½ cup | Plus extra for topping |
| Table Salt 🧂 | ¼ tsp | Enhances flavor balance |
| Large Egg Yolks 🥚 | 4 whole | Pasteurized for safety |
| Ice Cubes ❄️ | 4 cups | For ice cream maker |
| Rock Salt 🧂 | 1 cup | For ice cream maker |
| Food Coloring 🎨 | ½ tsp | Optional for colorful ice cream |
[recipe_ingredient_scaler]
The cream is non-negotiable for that ultra-smooth texture—look for heavy whipping cream with at least 36% fat. Most grocery stores carry it near the dairy, but Costco has the best deal if you’re making a big batch. The egg yolks add richness, but pasteurized eggs are safer for kids (and honestly, easier to find than you’d think at Whole Foods). Don’t skip the salt—it makes all the flavors pop.
No heavy cream? Half-and-half plus a splash of melted butter works in a pinch. Out of vanilla? Almond extract at half the amount gives a different but delicious twist. The sprinkles can be swapped for chocolate chips, crushed cookies, or fresh fruit. For dairy-free versions, coconut milk (full-fat, canned) is the best substitute for the cream.
This keeps 1 week in the freezer, but it’s best eaten within 3 days for the creamiest texture. Store in an airtight container with parchment paper pressed directly on the surface to prevent ice crystals. Let it sit at room temp for 5-10 minutes before scooping.
Why You’ll Love This Recipe
- I’ll be real: between my kids and me, the batch disappears before it even firms up completely.
- No Churn Needed: I just mix the cream, milk, sugar, and vanilla, then freeze—no fancy machine required.
- Pure Vanilla Joy: The real vanilla extract shines through, and those rainbow sprinkles make every bite fun.
- Party or Pajama Day: Honestly, it works for birthdays or a random Tuesday treat.
Step-by-Step Instructions for Homemade Ice Cream
This method delivers creamy, dreamy results that kids will absolutely love making and eating.
Step 1: Whisk Egg Yolks with Sugar Until Pale
In a medium bowl, whisk together the 4 whole Large Egg Yolks and 0.75 cup Granulated Sugar until the mixture turns pale yellow and thickens slightly. This process, called ribboning, should take about 3-4 minutes of vigorous whisking by hand.
You’re looking for the mixture to leave a visible trail when the whisk is lifted—that’s your sign it’s properly aerated. Don’t skimp on this step; it’s what gives your ice cream that silky-smooth texture. The sugar also begins dissolving, which prevents ice crystals from forming later.
Step 2: Heat Cream and Milk with Vanilla and Salt
In a saucepan over medium heat, combine the 2 cups Heavy Whipping Cream, 1 cup Whole Milk, 2 tsp Vanilla Extract, and 0.25 tsp Table Salt. Heat until small bubbles form at the edges and the mixture reaches about 170°F—this is just below a simmer.
Stir occasionally to prevent scorching at the bottom. The vanilla will become fragrant as it warms, and you’ll notice the edges of the pan getting slightly foamy. This is normal. Remove from heat just before it reaches a boil to prevent curdling when you add it to the eggs.
Step 3: Temper Eggs and Combine Custard Base
Slowly pour about 1 cup of the hot cream mixture into the egg yolk mixture while whisking constantly. This tempering process gradually raises the temperature of the eggs so they don’t scramble when combined with the remaining hot liquid.
Once incorporated, pour the egg mixture back into the saucepan with the remaining cream. Return to low heat and cook, stirring constantly, for 5-7 minutes until the custard thickens enough to coat the back of a spoon. Don’t let it boil.
Step 4: Chill Base and Add Food Coloring
Pour the custard into a heatproof bowl and let it cool to room temperature, stirring occasionally to release heat. Once cool, cover and refrigerate for at least 4 hours or overnight. This chilling step is crucial for achieving that ultra-creamy texture.
Before churning, stir in the 0.5 tsp Food Coloring if using. The color will deepen as it churns, so start with less—you can always add more. For pastel shades, use just a drop or two. The base should be very cold before the next step.
Step 5: Churn with Ice and Rock Salt
Pour the chilled custard into your ice cream maker. Pack the 4 cups Ice Cubes and 1 cup Rock Salt around the canister according to your machine’s instructions. The rock salt lowers the freezing point of the ice, allowing the mixture to freeze properly.
Churn for 20-25 minutes until thick and creamy. In the last 2 minutes, add the 0.5 cup Rainbow Sprinkles through the spout. The ice cream should look like soft-serve when done. Transfer to a freezer-safe container and freeze for at least 4 hours to firm up before serving.
Pro Tips For Making Homemade Ice Cream Recipe For Kids
- Chill the Base: Always refrigerate your cream-milk-sugar mixture for at least 4 hours before churning—I learned this the hard way when my first batch turned out soupy and took forever to freeze.
- Fold Sprinkles Last: Add rainbow sprinkles only after churning, right before freezing, to keep them from bleeding colors into your ice cream.
- Skip the Warm Vanilla: Let vanilla extract cool to room temperature before mixing it in, or it can cause the cream to curdle slightly—sounds weird, but it works.
- Use Cold Bowls: Place your mixing bowl and utensils in the freezer for 10 minutes before starting—this keeps the mixture colder longer during churning.
Perfect Pairings for homemade ice cream recipe for kids
Topping Bar Fun
Set up a DIY topping bar with crushed Oreos, mini M&Ms, and chopped nuts from Central Market. This lets kids customize their scoops. I use ¼ cup portions in small bowls for easy access. 🌈
Cookie Pairings
Fresh-baked chocolate chip cookies make perfect ice cream sandwiches. Use 2 cookies per sandwich with a scoop in between. Press gently so the ice cream doesn’t squish out the sides.
Hot Fudge Magic
Drizzle with warm chocolate fudge sauce—I heat ½ cup store-bought fudge with 1 tbsp milk for 20 seconds in the microwave. Stir until smooth and drizzle generously over each bowl.
Fresh Fruit Boost
Slice strawberries or bananas for a refreshing contrast to the sweetness. Toss with 1 tsp lemon juice to prevent browning. Emma loves adding blueberries straight from the Austin farmers market.
Waffle Cone Bowls
Turn waffle cones into edible bowls by pressing them into muffin tins and baking at 350°F for 5 minutes. Let cool completely before filling. David swears this is his favorite way to eat it. ❤️
Nutrition Facts
Frequently Asked Questions
Do I need an ice cream maker for this?
An ice cream maker gives the best texture, but you can use a freezer-safe container and stir vigorously every 30 minutes for 3-4 hours. It won’t be as smooth but still delicious!
Why use pasteurized egg yolks?
Pasteurized eggs eliminate salmonella risk, making them safer for kids. They’re available at most grocery stores and work just as well as raw eggs in custard bases.
Can I make this dairy-free?
Yes! Swap the cream and milk for full-fat coconut milk. The texture will be slightly different but still rich and creamy. Use dairy-free sprinkles if needed.
How long will it stay creamy in the freezer?
For best texture, enjoy within 3 days. After that, ice crystals may form. Press parchment paper on the surface to slow this down.

Trained in classic French technique but raised on slow-cooked ribs and spicy rubs, she blends culinary skill with smoke and soul.
- Recipe for Boneless Pork Chops in Cast Iron Skillet: Sear and Baste to Juicy Perfection - October 3, 2026
- Recipe for Boneless Cross Rib Roast: Slow-Roasted Beef with Herb Crust - October 3, 2026
- Hamburgers in Sauce Recipe Crock Pot: Slow-Cooked Savory Delight - October 3, 2026