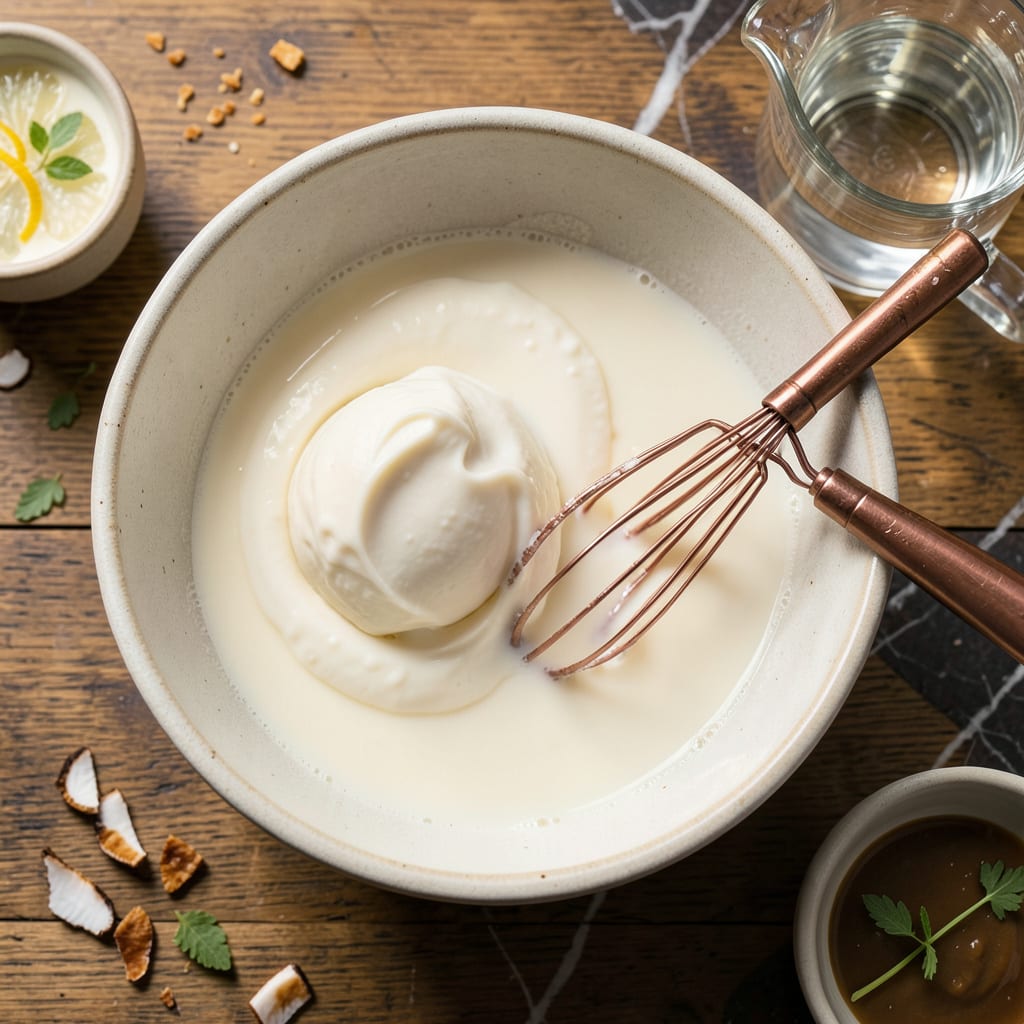
Here’s the thing—turning coconut cream into coconut milk is one of those kitchen tricks that saves you money and gives you total control over texture. No fancy equipment needed, just a can of coconut cream and a little know-how. I stumbled onto this method when I needed coconut milk for a curry but only had cream on hand, and honestly? The homemade version tastes richer and fresher than anything from a carton.
The process couldn’t be simpler: just dilute the cream with water in the right ratio, then whisk or blend until smooth. I prefer a 1:1 ratio for standard coconut milk, but you can adjust based on how rich you want it. Warm water blends easier, though cold works in a pinch if you’re patient. The result is silky smooth coconut milk that works perfectly in everything from Thai soups to dairy-free desserts.
What I love most is how versatile this becomes. Use it in curries for depth, blend into smoothies for creaminess, or even make vegan whipped cream by chilling it first. Store-bought versions often contain stabilizers, but this DIY method gives you pure coconut flavor without additives. Plus, you can make exactly the amount you need—no wasted half-cans sitting in your fridge.
Between you and me, once you try this, you’ll never buy coconut milk again. The texture is better, the flavor is cleaner, and you’ll always have it on hand when a recipe calls for it. Here’s exactly how to do it right every time.
📚 In This Guide
- What You’ll Need
- Instructions
- Tips and Common Mistakes
What Youll Need
- ● 1 can (13.5 oz) full-fat coconut cream – Unsweetened, unflavored (check for no additives like guar gum for best results 🌴).
- ● ½–¾ cup warm water (filtered or distilled preferred) – Adjust for desired thickness.
- ● Mixing bowl – Medium-sized, non-reactive (glass or stainless steel).
- ● Whisk or fork – For smooth blending (a hand mixer works too for extra creaminess!).
- ● Measuring cups/spoons – Precision matters for consistency.
- ● Airtight container – For storage (glass jars keep it fresh longest).
- ● Fine-mesh strainer – If you want ultra-smooth milk (strains out any tiny coconut bits).
- ● Vanilla extract or sweetener – ½ tsp for flavored milk (great for coffee or desserts!).
- ● Blender – For larger batches or extra frothiness.
Instructions
Making your own coconut milk from cream is simpler than you might think—just follow these easy steps.
Gather Your Ingredients and Tools
For this process, you’ll need just two things: coconut cream and warm water. I recommend using full-fat coconut cream for the best results—it gives you a richer, creamier milk. You’ll also want a mixing bowl, a whisk, and a container for storage.
Make sure your coconut cream is at room temperature before starting. Cold cream can separate unevenly when mixed with water, leading to a grainy texture. If your cream has been refrigerated, let it sit out for about 30 minutes to warm up slightly.
Determine Your Desired Consistency
Coconut milk comes in different thicknesses, so decide how rich you want yours to be. For thick coconut milk (similar to canned), use equal parts coconut cream and warm water. For light coconut milk (like the kind in cartons), use twice as much water as cream.
If you’re unsure, start with a 1:1 ratio—you can always add more water later to thin it out. Remember that the milk will thicken slightly when chilled, so if you plan to refrigerate it, you might want to make it a little thinner than your final desired consistency.
Mix the Coconut Cream and Water
Pour your room-temperature coconut cream into a mixing bowl. Slowly add the warm water while whisking continuously. The water should be warm but not hot—about 100°F is ideal. This helps the cream emulsify smoothly rather than clumping.
Whisk vigorously for 1-2 minutes until the mixture becomes completely smooth and uniform. You shouldn’t see any separation or graininess. If you do notice any lumps, keep whisking—they’ll eventually blend in. The mixture will appear slightly frothy at first, but this will settle as it rests.
Let the Mixture Rest and Emulsify
After mixing, let the coconut milk sit at room temperature for 10-15 minutes. This resting period allows the fats and liquids to fully combine, giving you that classic creamy texture. You’ll notice the mixture becomes slightly thicker and more uniform during this time.
If you’re making a large batch, you might want to transfer the mixture to a blender after whisking and pulse for 10-15 seconds to ensure complete emulsification. This step isn’t necessary for small batches, but it guarantees a perfectly smooth result for larger quantities.
Store and Use Your Homemade Coconut Milk
Transfer your freshly made coconut milk to a clean glass jar or airtight container. It will keep in the refrigerator for up to 5 days, though it’s best used within 3 days for optimal freshness. The milk may separate slightly when chilled—this is completely normal. Just give it a good shake before using.
Your homemade coconut milk is now ready to use in all your favorite recipes! It works beautifully in curries, smoothies, oatmeal, or even enjoyed by itself. The flavor will be noticeably fresher and more vibrant than store-bought versions, with a natural sweetness that comes from using pure coconut cream.
Tips and Common Mistakes
Turning coconut cream into perfect coconut milk is all about the little details. Here’s what I’ve learned through trial and error to get it right every time.
Temperature Control: The 30 minutes at room temperature for your coconut cream isn’t just a suggestion—it’s crucial. I’ve tried rushing this step, and cold cream creates stubborn lumps that won’t blend smoothly. If your kitchen is particularly cool, you might need to extend this slightly, but don’t exceed 45 minutes or the cream may start to separate. The same goes for your water temperature—those 100°F mentioned in Step 3 make all the difference between silky milk and a clumpy mess.
Consistency Secret: When determining your ratio in Step 2, remember that coconut milk thickens when chilled. I always make mine just slightly thinner than I want the final product to be. For example, if I’m aiming for canned coconut milk thickness, I’ll use about 10% more water than the 1:1 ratio suggests. This accounts for the natural thickening that happens during those 10-15 minutes of resting in Step 4 and when refrigerated.
Mixing Technique: During the 1-2 minutes of whisking in Step 3, don’t just stir in circles. Use a figure-eight motion to really incorporate air and help the fats emulsify properly. I’ve found this creates a noticeably creamier texture. If you’re making a large batch and opt for the blender pulse mentioned in Step 4, use the lowest setting—those 10-15 seconds should be just enough to smooth things out without overheating the mixture.
Storage Wisdom: While the instructions mention the 5-day refrigerator life, I’ve noticed the flavor is most vibrant in the first 3 days. If you won’t use it all quickly, consider freezing portions in ice cube trays. Each cube is about 1 ounce, perfect for single servings in smoothies or curries. Just thaw overnight in the fridge before using.
Pro Tips for Coconut Cream Into Coconut Milk
- Turning coconut cream into perfect coconut milk is all about the little details. Here’s what I’ve learned through tri…
- Temperature Control: The 30 minutes at room temperature for your coconut cream isn’t just a suggestion—it’s crucial. …
- Consistency Secret: When determining your ratio in Step 2, remember that coconut milk thickens when chilled. I always…
Frequently Asked Questions
Can I use coconut cream and water to make coconut milk?
Just mix 1 part coconut cream with 1-2 parts warm water (adjust for thickness). Whisk or blend until smooth. For best results, use full-fat coconut cream and filtered water to avoid off-flavors. Store-bought cream works, but check for additives like gum thickeners.
How long does homemade coconut milk last in the fridge?
Freshly made coconut milk stays good for 3-4 days in an airtight container. Shake well before use—separation is natural! For longer storage, freeze in ice cube trays (up to 3 months). Thaw overnight in the fridge and re-blend if needed.
What’s the best ratio for thick vs. thin coconut milk?
For thick milk (like canned): 1:1 (cream to water). For light milk (drinking/pouring): 1:2 or 1:3. Pro tip: Start with less water—you can always add more! Canned coconut milk is typically 1:1.5 for reference.
Why did my coconut milk turn lumpy or separate?
Separation is normal (just shake or blend!), but lumps mean: 1) Cold water was used—always use warm! 2) Over-blending (stick to 10-15 sec). 3) Old cream with stabilized additives. Fix it by straining through a cheesecloth or re-blending with a splash of hot water.
Can I substitute coconut cream for coconut milk in recipes?
Yes, but adjust! Replace 1 cup coconut milk with ½ cup cream + ½ cup water. For curries or soups, dilute further (1:2 ratio) to match consistency. Avoid swapping in whipped coconut cream—it’s too thick and may curdle when heated.
Turning coconut cream into coconut milk is easier than you think—just a splash of water and a quick whisk stand between you and creamy, homemade perfection! 🥥 Whether you’re whipping up curries, smoothies, or dairy-free desserts, this simple trick saves money and cuts down on waste.
Ready to put your new skill to use? Grab that can of coconut cream and experiment with ratios to find your ideal consistency. Your next culinary masterpiece is just a stir away! 🌟

Trained in classic French technique but raised on slow-cooked ribs and spicy rubs, she blends culinary skill with smoke and soul.
- Recipe for Boneless Pork Chops in Cast Iron Skillet: Sear and Baste to Juicy Perfection - October 3, 2026
- Recipe for Boneless Cross Rib Roast: Slow-Roasted Beef with Herb Crust - October 3, 2026
- Hamburgers in Sauce Recipe Crock Pot: Slow-Cooked Savory Delight - October 3, 2026