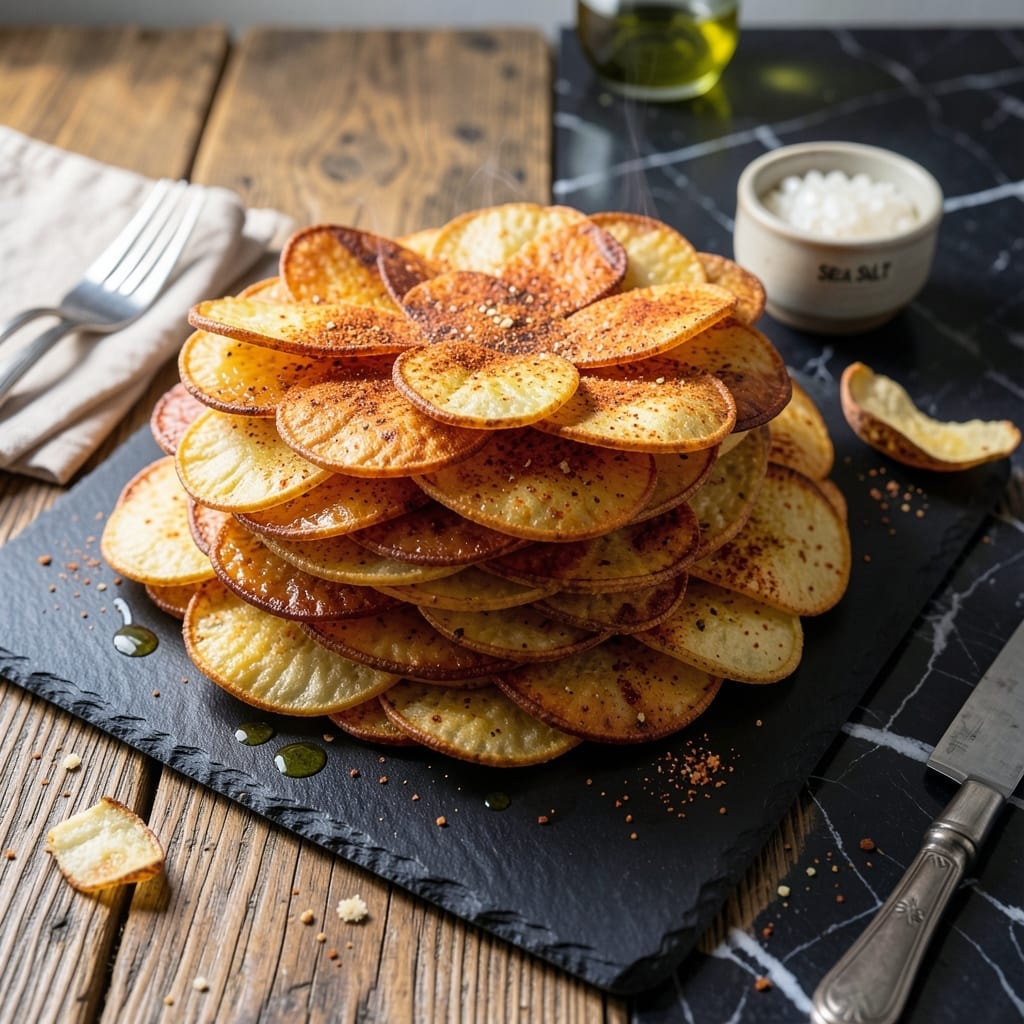
Creating perfect potato chips with those signature uniform curves at home is absolutely achievable with the right technique. This method transforms ordinary potatoes into crispy, golden snacks that rival any store-bought version.
The process requires precision in slicing and shaping, followed by a careful baking method that ensures even crispiness. Each chip emerges with that distinctive saddle shape and satisfying crunch we all know and love.
What sets this creation apart is the control over seasoning and thickness, allowing for a custom snack experience. The result is a batch of chips that are light, airy, and crispy from edge to edge.
This homemade approach puts you in command of every detail, from potato selection to final texture. The satisfaction of making these from scratch makes every bite taste even better.
Ingredients for Homemade Pringles
Simple ingredients transform into crispy, golden chips with signature curves and satisfying crunch.
| Ingredient | Amount | Notes |
|---|---|---|
| Russet Potatoes 🥔 | 2 whole | Large, uniformly shaped for even slices |
| Vegetable Oil 🫒 | 2 cups | For frying, high smoke point |
| All-Purpose Flour 🌾 | ¼ cup | For shaping dough consistency |
| Salt 🧂 | 1 tsp | Fine grain for even distribution |
| Paprika 🌶️ | ½ tsp | Sweet or smoked variety |
| Garlic Powder 🧄 | ½ tsp | Uniform flavor integration |
| Onion Powder 🧅 | ½ tsp | Complements potato base flavor |
| Cornstarch 🌾 | 1 tbsp | Ensures extra crispiness |
| Water 💧 | ¼ cup | For dough binding |
| Baking Powder 🧂 | 0.125 tsp | Minimal lift for texture |
[recipe_ingredient_scaler]
The potatoes are critical—Russet is ideal for its high starch content and low moisture, which yields the crispiest results. Select large, uniformly shaped potatoes to ensure consistent slicing and shaping. Most supermarkets carry these year-round. The vegetable oil must have a high smoke point; peanut or sunflower oil are excellent alternatives if you prefer a neutral flavor profile.
Substitutions are minimal here due to the precise nature of the recipe, but you can swap paprika for cayenne if a spicier chip is desired. Sweet paprika offers a milder flavor. If avoiding gluten, replace all-purpose flour with rice flour at a 1:1 ratio. The cornstarch is non-negotiable for that signature crisp—do not omit.
Store the potatoes in a cool, dark place for up to 2 weeks. Once fried, the chips keep in an airtight container at room temperature for 3-4 days, though they’re best enjoyed fresh. Freezing is not recommended as it compromises the texture.
Why You’ll Love This Recipe
- One Pan Magic: I slice the potatoes thin, toss them with flour and paprika, then fry—no fancy equipment, just a pot and some oil.
- Addictively Crispy: That first bite with the salt and paprika hit? I’ve been known to finish a batch before they cool down.
- Snack Time Hero: Between us, these disappear faster than store-bought at game nights, lunchboxes, or my solo Netflix marathons.
- Budget Friendly: Russet potatoes and pantry staples keep my wallet happy while delivering that same satisfying crunch.
Step-by-Step Instructions for Homemade Crispy Potato Chips
Achieve uniform curves and perfect crispiness with this precise method every single time.
Step 1: Prepare the Potato Dough
Peel the 2 whole Russet Potatoes and slice them into ¼-inch thick rounds. Boil these slices in salted water for 10-12 minutes until fork-tender but not falling apart. Drain thoroughly and return to the pot.
Mash the potatoes until completely smooth with no lumps. Add the 0.25 cup All-Purpose Flour, 1 tbsp Cornstarch, 0.125 tsp Baking Powder, 1 tsp Salt, 0.5 tsp Paprika, 0.5 tsp Garlic Powder, and 0.5 tsp Onion Powder. Mix until fully combined. The dough should hold together when pressed.
Gradually add the 0.25 cup Water, 1 tablespoon at a time, until the dough reaches a playdough-like consistency. It should be pliable but not sticky. This ensures the chips hold their shape during shaping and frying.
Step 2: Shape and Form the Curves
Divide the dough into 4 equal portions. Working with one portion at a time, roll it into a ¼-inch thick rectangle on a lightly floured surface. Using a 3-inch round cookie cutter, cut out circles from the dough. Save the scraps to reroll.
To create the signature curve, gently press each circle over the back of a spoon or small bowl. The edges should curl slightly upward. Place the shaped chips on a parchment-lined tray. Chill in the refrigerator for 20 minutes to firm up before frying.
Step 3: Heat the Oil to Optimal Temperature
Pour the 2 cups Vegetable Oil into a deep, heavy-bottomed pot. Heat over medium-high heat until the oil reaches 375°F on a deep-fry thermometer. Maintain this temperature consistently—too low and the chips will absorb oil and become greasy; too high and they’ll burn before cooking through.
Use a small piece of dough to test the oil. It should sizzle immediately and rise to the surface within 10 seconds. If it doesn’t, adjust the heat accordingly. Oil temperature is critical for achieving that perfect crisp texture.
Step 4: Fry to Golden Perfection
Working in batches to avoid crowding, carefully lower 3-4 shaped chips into the hot oil. Fry for 1-2 minutes per side until golden brown and crisp. The chips will puff slightly and develop a beautiful, uniform curve as they cook.
Use a slotted spoon to transfer the fried chips to a paper towel-lined plate. Sprinkle with a pinch of salt while still hot to enhance the flavor. Allow the oil to return to 375°F between batches to ensure even cooking.
Step 5: Cool and Serve Immediately
Let the chips cool for 2-3 minutes on the paper towels. They’ll crisp up further as they cool. Serve immediately while still warm for the best texture and flavor.
The finished chips should have a satisfying crunch with every bite, a uniform golden color, and that iconic curved shape. Store any leftovers in an airtight container, though they’re best enjoyed fresh.
Pro Tips For Making Homemade Pringles
- Slice Evenly: Use a mandoline for paper-thin, uniform slices—about 1/16 inch thick. I learned this the hard way after my first batch cooked unevenly and some burned while others stayed soggy.
- Dry the Potatoes: Pat the slices completely dry with a towel before frying. Even a little moisture makes them steam instead of crisp up, and nobody wants sad, floppy pringles.
- Heat the Oil: Get the oil to 375°F before adding the potatoes. After burning three batches, I finally figured out that low heat just soaks them in grease instead of making them crisp.
- Season While Hot: Toss the fried slices with salt and paprika right after draining. Sounds weird, but it works—the seasoning sticks better when the oil is still warm on the surface.
Pro Cooking Tips for Perfect Results
Dough Consistency Matters
If your dough feels too sticky, add 1 tsp All-Purpose Flour at a time until it reaches that playdough texture. Too dry? Spritz with 1 tsp Water and knead gently. I learned this trick during my French training—precision is key for holding those curves. 💡
Perfect Oil Temperature
Invest in a deep-fry thermometer—I use OXO’s stainless steel model. If your oil drops below 370°F, the chips will absorb grease. Above 380°F and they’ll brown too fast. Maintain steady heat by adjusting your burner slowly.
Shaping Shortcuts
For faster curves, use the back of a small ladle instead of a spoon. Press firmly but gently to avoid tearing. I also keep a 3-inch cookie cutter from Wilton for consistent sizing. Uniform shapes fry evenly.
Frying in Batches
Never overload your pot—3-4 chips max per batch. Crowding lowers oil temperature, creating soggy results. I use a spider strainer to safely lower and remove chips. Keep batches small for that perfect crunch. 🔥
Cooling Properly
Place fried chips on a wire rack instead of paper towels for even air circulation. This prevents steam buildup that can make them lose crispness. I let mine cool for 2 minutes before tasting.
Seasoning Timing
Always season chips immediately after frying while they’re still hot. The salt adheres better to the warm surface. I use fine sea salt for even distribution. Taste one first to adjust seasoning for subsequent batches.
Nutrition Facts
Frequently Asked Questions
Can I use a different type of potato?
Stick with Russets for best results. Their high starch content ensures maximum crispiness. Other potatoes contain more moisture, which can make your chips soggy instead of crunchy.
Why do my chips lose their curve after frying?
This happens if the dough is too wet or not chilled properly. Make sure your dough has a playdough-like consistency and chills for the full 20 minutes before frying. This helps maintain the shape.
Can I bake instead of fry?
Baking is possible at 400°F for 12-15 minutes, but the texture won’t be identical. You’ll get a lighter chip, but frying creates that signature airy crispness. Use parchment paper to prevent sticking.

Trained in classic French technique but raised on slow-cooked ribs and spicy rubs, she blends culinary skill with smoke and soul.
- Recipe for Boneless Pork Chops in Cast Iron Skillet: Sear and Baste to Juicy Perfection - October 3, 2026
- Recipe for Boneless Cross Rib Roast: Slow-Roasted Beef with Herb Crust - October 3, 2026
- Hamburgers in Sauce Recipe Crock Pot: Slow-Cooked Savory Delight - October 3, 2026