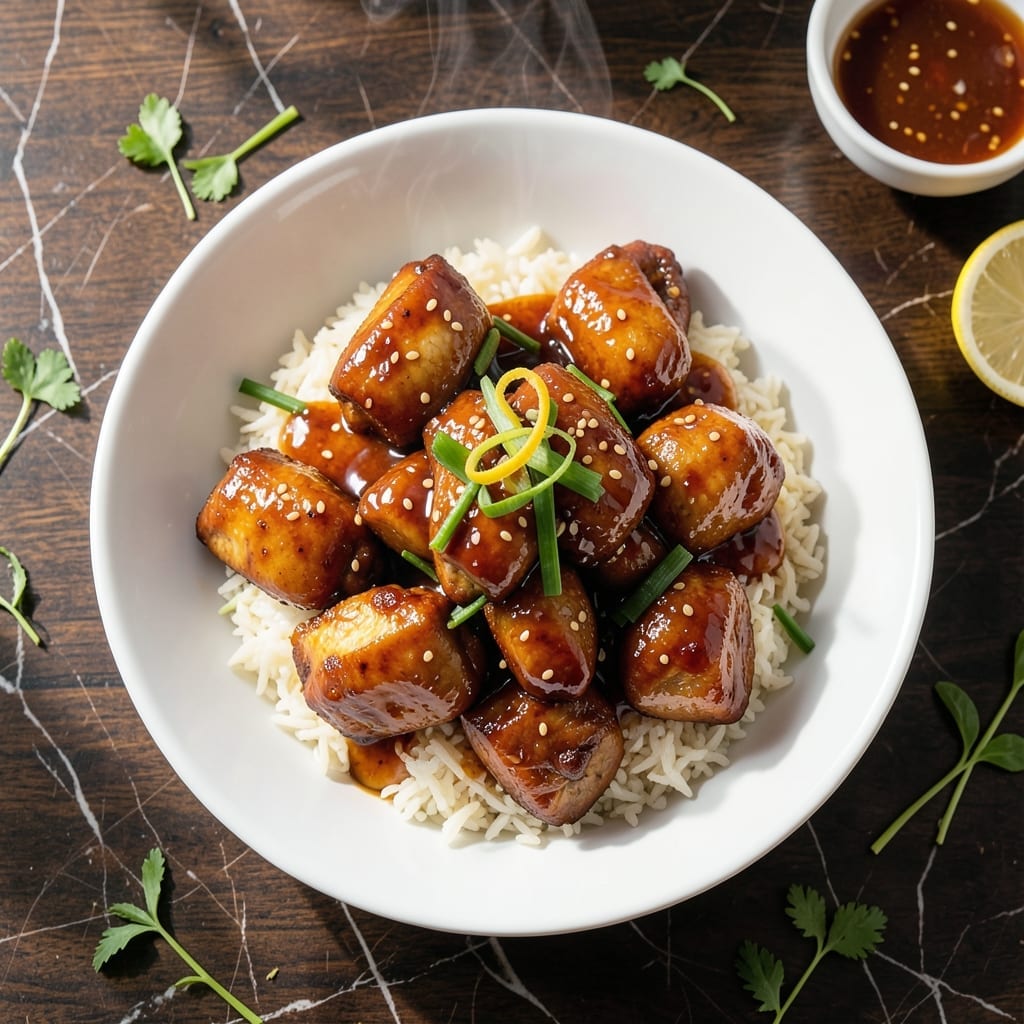
This Chinese honey chicken delivers the perfect balance of sweet and savory with a sticky, glossy finish. I developed this recipe after testing countless versions to achieve authentic takeout flavor at home.
The key is velveting the chicken first, which keeps it tender while the honey-based sauce creates that signature sticky coating. High heat and quick cooking mimic traditional wok techniques.
What you get is crispy-edged chicken pieces coated in a rich, caramelized sauce with subtle ginger and garlic notes. The aroma alone will have everyone gathering around the table.
Serve immediately over steamed rice to soak up every drop of that irresistible sauce. Here’s how to make it.
Ingredients for Honey Chicken Recipe Chinese
Pantry staples plus chicken meet wok heat for that takeout magic at home.
| Ingredient | Amount | Notes |
|---|---|---|
| Boneless Skinless Chicken Thighs 🍗 | 1 ½ lb | Cut into 1-inch pieces |
| Cornstarch 🌾 | ½ cup | For velveting chicken |
| Large Egg White 🥚 | 1 whole | Lightly beaten |
| Soy Sauce 🫒 | 3 tbsp | Low-sodium preferred |
| Honey 🍯 | ½ cup | Pure for best flavor |
| Rice Vinegar 🍚 | 2 tbsp | Balances sweetness |
| Minced Garlic 🧄 | 4 cloves | Freshly minced preferred |
| Fresh Ginger 🌿 | 1 tbsp | Finely grated |
| Vegetable Oil 🫒 | ½ cup | High smoke point for frying |
| Sesame Oil 🫒 | 1 tsp | For finishing aroma |
| Granulated Sugar 🧂 | 2 tbsp | Helps caramelization |
| Green Onions 🧅 | 4 whole | Thinly sliced for garnish |
| Sesame Seeds 🌾 | 1 tsp | Toasted for garnish |
| Steamed White Rice 🍚 | 2 cups | For serving |
[recipe_ingredient_scaler]
The chicken is everything here. Boneless, skinless thighs stay juicy through high-heat cooking—breasts dry out fast. Look for fresh, plump pieces at Whole Foods or your local butcher, but supermarket chicken works too. The cornstarch for velveting? Go for the pure stuff (not the baking powder/cornstarch blends). It creates that silky coating that keeps the meat tender while it fries.
No honey? Maple syrup or agave at a 1:1 swap works in a pinch. Missing rice vinegar? Apple cider vinegar at half the amount gives similar tang. Fresh ginger is ideal, but ground ginger at one-quarter the amount saves time. The soy sauce can be tamari for gluten-free, or coconut aminos for a lighter touch (just taste as you go).
This tastes best fresh—sauce thickens as it sits. Leftovers keep in the fridge for 3-4 days though. Reheat gently in a pan with a splash of water to loosen the sauce. Freezing? Not ideal (texture suffers), but if you must, up to 1 month in an airtight container.
Why You’ll Love This Recipe
- One Pan Wonder: I toss the chicken with cornstarch and egg white, then sear it all in one pan—minimal mess, maximum flavor.
- Sweet-Savory Magic: The honey and soy sauce combo creates that sticky, caramelized glaze I can’t resist.
- Weeknight Hero: Between us, this is my go-to for busy evenings when I need dinner fast but still crave restaurant-quality taste.
- Budget-Friendly Protein: Boneless thighs stay juicy and cost less than breasts, so I can make this dish without breaking the bank.
Step-by-Step Instructions for Honey Chicken
Here’s my method for achieving that perfect sticky, glossy coating with tender chicken every time.
Step 1: Velvet the Chicken for Maximum Tenderness
Cut the 1.5 lb boneless skinless chicken thighs into 1-inch pieces and pat them dry with paper towels. In a bowl, whisk the 1 whole large egg white until lightly frothy, then add the chicken pieces and toss to coat evenly.
Sprinkle the 0.5 cup cornstarch over the chicken and gently fold with your hands until each piece is fully coated. The cornstarch creates a protective layer that keeps the chicken moist during frying. Real talk: this velveting technique is what separates good stir-fry from great.
Step 2: Fry Until Golden and Crisp
Heat the 0.5 cup vegetable oil in a large skillet or wok over medium-high heat until shimmering. Working in batches to avoid crowding, carefully add the chicken pieces in a single layer. Fry undisturbed for 2-3 minutes per side until golden brown and crispy.
Don’t rush this—you want that cornstarch coating to develop a light, crisp shell. Use a slotted spoon to transfer the cooked chicken to a paper towel-lined plate to drain. The chicken should be cooked through but still juicy inside. If your oil starts to smoke, reduce the heat slightly.
Step 3: Create the Honey Sauce Base
Carefully pour off all but 1 tablespoon of the oil from the skillet. Return it to medium heat and add the 4 cloves minced garlic and 1 tbsp fresh ginger. Sauté for 30-45 seconds until fragrant but not browned—garlic burns easily, so stay attentive.
Stir in the 3 tbsp soy sauce, 0.5 cup honey, 2 tbsp rice vinegar, and 2 tbsp granulated sugar. Bring to a simmer and cook for 2-3 minutes until the sauce begins to thicken slightly and becomes glossy. The sugar helps create that signature sticky texture.
Step 4: Toss and Coat the Chicken
Return all the chicken to the skillet with the sauce. Toss gently but thoroughly to coat each piece evenly. Cook for an additional 1-2 minutes until the chicken is heated through and the sauce has thickened enough to cling to the pieces.
Drizzle the 1 tsp sesame oil over the chicken and give it one final toss. The sesame oil adds that authentic Chinese takeout aroma that ties everything together. You’ll know it’s ready when the chicken glistens with that beautiful honey glaze.
Step 5: Garnish and Serve Immediately
Transfer the honey chicken to a serving platter. Sprinkle with the 4 whole green onions (thinly sliced) and 1 tsp sesame seeds for color and crunch. The contrast of the bright green onions against the amber chicken makes it look as good as it tastes.
Serve hot over 2 cups steamed white rice to soak up every last bit of that incredible sauce. This dish is best enjoyed immediately while the coating is still glossy and the chicken is at its most tender. The rice balances the sweetness perfectly.
Pro Tips For Making Honey Chicken Recipe Chinese
- Velvet the Chicken: Toss the chicken thighs with cornstarch and egg white first—this keeps them absurdly tender even after frying. I learned this the hard way after serving rubbery chicken to dinner guests.
- Hot Oil, Quick Fry: Get that oil smoking hot before adding the chicken, then work in small batches. After burning three batches, I finally figured out that crowding the pan drops the temp and makes soggy coating.
- Skip the Bottled Stuff: Use real honey, not the synthetic kind—it caramelizes better and gives that deep, sticky glaze. Sounds weird, but it works.
- Double Coat: Dredge the velveted chicken in cornstarch again right before frying for extra crispiness. My grandmother swore by this, and she was right.
Common Mistakes When Making This Dish
Skipping Velveting Step
This is the most common mistake I see. Velveting with cornstarch and egg white keeps chicken tender. Without it, your pieces will dry out or turn rubbery during frying. Even in a rush, take the 5 minutes to coat properly.
Overcrowding the Pan
Frying too much chicken at once lowers oil temperature, creating soggy instead of crispy pieces. Work in batches—I use my 12-inch skillet and never cook more than half the chicken at a time. Patience pays off with that perfect golden crust. 🔥
Sauce Too Thin
If your sauce doesn’t thicken, it’s likely from not simmering long enough. After adding honey and soy sauce, let it bubble for 2-3 minutes until glossy. The sugar in the sauce needs this time to caramelize properly.
Burning the Garlic
Garlic burns in seconds at high heat. After pouring off oil, reduce to medium heat before adding 4 cloves minced garlic and 1 tbsp ginger. I stir constantly and pull the pan off heat if it starts browning too fast.
Underseasoning
Taste your sauce before adding chicken. With honey as the star, you might need an extra pinch of salt or splash of soy sauce. I often add ½ tsp more soy sauce if the sweetness overpowers.
Resting Too Long
This dish is best served immediately. The sauce thickens as it cools, losing that glossy finish. I plate it right after tossing while the chicken is still sizzling. The sesame seeds and green onions stick better to hot chicken. ✨
Nutrition Facts
Frequently Asked Questions
Can I use chicken breast instead of thighs?
Breasts work, but they dry out faster. For best results, cut into smaller pieces and reduce frying time to 1-2 minutes per side. Thighs stay juicier and are more forgiving.
How do I make the sauce thicker?
Simmer the sauce for 2-3 minutes until glossy. If it’s still thin, mix 1 tsp cornstarch with 1 tbsp water and stir into the sauce. Cook for 30 seconds more.
Can I make this ahead of time?
Best served fresh, but you can prep components ahead. Velvet chicken in advance and refrigerate. Make the sauce separately and reheat gently before tossing with cooked chicken.
What can I substitute for rice vinegar?
Apple cider vinegar works at half the amount. In a pinch, use white vinegar or lime juice, but add a pinch of sugar to balance the acidity.

Trained in classic French technique but raised on slow-cooked ribs and spicy rubs, she blends culinary skill with smoke and soul.
- Energy Ball Recipe Peanut Butter: No-Bake Protein-Packed Bites - September 24, 2026
- Jerk Chicken Recipe Crock Pot: Slow-Cooked Caribbean Heat - September 24, 2026
- Japanese Curry Recipe Kenji: Chef-Tested Rich and Velvety Sauce - September 24, 2026