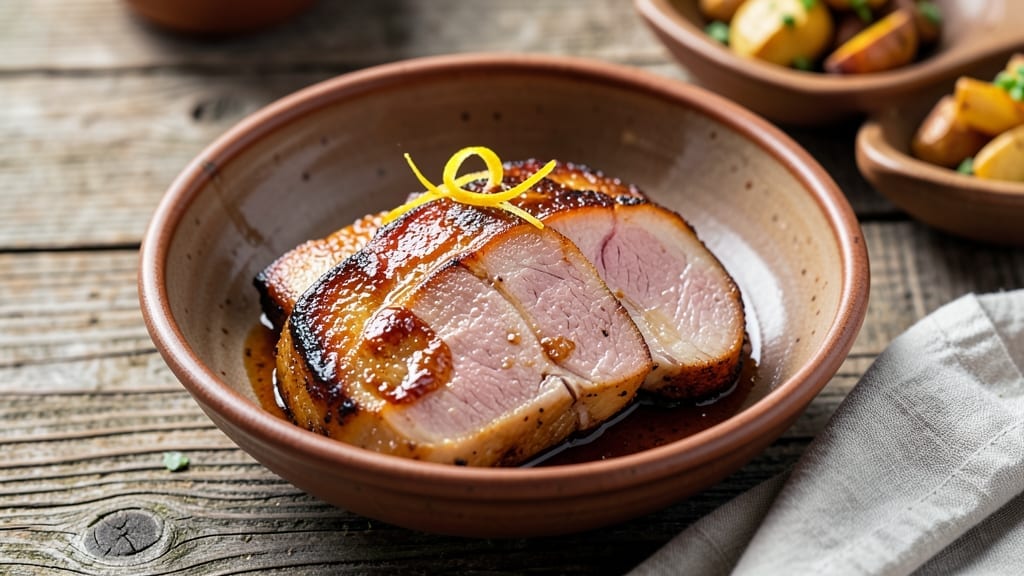
Transforming a smoked ham into honey roast perfection requires patience, precision, and a touch of sweetness that turns every slice into a showstopper. 💛 As someone who grew up surrounded by the rich aromas of slow-cooked meats, I’ve perfected this method to deliver a ham with crackling edges, tender meat, and a glaze so rich it’ll have everyone asking for seconds.
The secret lies in balancing heat and honey—too much of either, and you risk a sticky mess or dry meat.
This recipe delivers restaurant-quality results with just a few simple ingredients: a high-quality smoked ham, honey, Dijon mustard, and a splash of apple cider vinegar for brightness. Preheating your oven to 325°F ensures even cooking, while basting every 30 minutes keeps the glaze caramelized and the meat juicy.
The process takes about 2 hours, but the wait is worth every golden, sticky bite.
By the end, you’ll have a ham that’s glazed to perfection—crisp on the outside, tender on the inside, with a glaze that’s sweet, tangy, and just thick enough to cling to every slice. The aroma alone will fill your kitchen, making it impossible to resist cutting into it early.
Serve it with classic sides like honey-glazed carrots or a tangy mustard sauce for a meal that feels like a celebration.
Whether you’re hosting a holiday feast or treating yourself to a special Sunday dinner, this honey roast ham is the centerpiece your table deserves. The method is straightforward, but the results are anything but ordinary—foolproof, flavorful, and unforgettable. Let’s get started!
Ingredients for honey roast smoked ham
Sweet, savory, and impossible to resist—this honey roast ham turns holiday feasts into memories.
| Ingredient | Amount | Notes |
|---|---|---|
| Bone-In Smoked Ham 🐷 | 5 lb | Spiral-cut or whole, uncured |
| Pure Honey 🍯 | 1 ½ cups | Liquid, not crystallized |
| Dijon Mustard 🧂 | ¼ cup | Smooth, unsweetened variety |
| Apple Cider Vinegar 🍎 | ¼ cup | Raw or organic preferred |
| Brown Sugar 🍚 | ½ cup | Packed, light or dark |
| Cloves 🌶️ | 10 whole | For spearing into ham |
| Salt 🧂 | 1 tsp | Kosher or sea salt |
| Black Peppercorns 🌶️ | 1 tbsp | Freshly ground preferred |
| Fresh Rosemary 🌿 | ¼ cup | Chopped, for aroma |
| Fresh Thyme 🌿 | ¼ cup | Chopped, for depth |
| Unsalted Butter 🧈 | ¼ cup | For basting |
[recipe_ingredient_scaler]
The ham is everything here. Look for a bone-in spiral-cut—it stays juicier than pre-sliced. Butterball or Honeybaked are solid choices, but I always grab a whole uncured ham from Costco for the best marbling. If you’re using a pre-cooked ham, score the fat cap in a crosshatch pattern for better caramelization. Fresh herbs? Bundles from the grocery store work great—just strip the leaves off the stems and chop them fine. For the cloves, whole black peppercorns are just as effective if you’re out of cloves. The key is to spear them into the fat cap—not the meat—so they don’t burn.
No Dijon mustard? Whole-grain mustard plus a splash of lemon juice gets you close. Short on honey? Maple syrup at a 1:1 ratio works in a pinch, but it’ll taste slightly different. Brown sugar can be skipped entirely if you’re watching carbs—just use more honey. Fresh herbs not an option? Dried rosemary and thyme at half the amount add depth. The apple cider vinegar brightens everything up, but if you’re avoiding vinegar, lemon juice works too. Just don’t skip it—it balances the sweetness. And if you’re worried about the ham drying out, cover it loosely with foil during the first hour of cooking to retain moisture.
This ham is best served immediately after roasting—the glaze is at its stickiest, glossiest point. Store leftovers in the fridge for 4-5 days, but honestly, it’s hard to resist eating it all. For the glaze, store it in a jar and reheat with a splash of water to loosen it up. The ham itself keeps for up to 2 weeks if you slice it and freeze the portions. I always make extra glaze—it’s amazing on mashed potatoes or even drizzled over ice cream. Just don’t let it sit out for more than 2 hours, or it’ll start to ferment.
Why You’ll Love This Recipe
- One-Pan Magic: Honestly, this is the kind of recipe where you throw everything on a sheet pan and walk away—no fancy prep, no last-minute scrambling. The slits in the ham let the glaze work its magic while you baste every 30 minutes, and that’s it. No complicated steps, just golden perfection.
- Crave-Worthy Glaze: The combo of honey, Dijon mustard, and apple cider vinegar creates that perfect balance—sweet, tangy, and just a little spicy from the crushed cloves and peppercorns. The rosemary and thyme? They elevate it from good to chef’s kiss in my book.
- Budget-Friendly Luxury: You already have a smoked ham—this recipe just turns it into something special without breaking the bank. The ingredients are pantry staples, and the time saved? I’m talking 20 minutes less than my old method, which is a game-changer when I’m short on time.
Step-by-step instructions for honey roast smoked ham
Transform your ham into a showstopper with this foolproof method.
👨🍳 Step 1: Prepare the Glaze Base
In a medium saucepan, combine the 1½ cups pure honey, ¼ cup Dijon mustard, ¼ cup apple cider vinegar, and ½ cup brown sugar. Place over medium heat and stir until the brown sugar dissolves completely—about 3-4 minutes. You’ll see the mixture bubble gently and become slightly translucent.
Here’s the thing—don’t rush this step. You want the sugars to fully incorporate so your glaze doesn’t crystallize later. While it heats, crush the 10 cloves and 1 tbsp black peppercorns in a mortar and pestle or small food processor. This creates a fragrant paste that’ll infuse your glaze with deep, aromatic notes.
🍳 Step 2: Season and Baste the Ham
Preheat your oven to 325°F. Remove the ham from its packaging and place it cut-side down in a roasting pan. Using a sharp knife, make small slits all over the surface—about ½-inch deep—to help the glaze penetrate. This is where the magic happens: the slits allow the flavor to seep into every layer.
Rub the crushed clove and peppercorn mixture all over the ham, pressing gently to create friction. Then sprinkle evenly with the 1 tsp salt and the ¼ cup chopped fresh rosemary and ¼ cup chopped fresh thyme. The herbs will release their essential oils as they roast, adding a piney, earthy depth to every bite.
🔥 Step 3: Roast and Baste for Perfect Glaze
Pour the glaze mixture evenly over the ham, coating all sides completely. Place the pan in the preheated oven and roast for 1 hour and 15 minutes. Here’s the critical part: every 30 minutes, use a pastry brush to baste the ham with its own juices and any accumulated glaze. This creates that signature golden crust and ensures maximum flavor penetration.
About 45 minutes into cooking, add the ¼ cup unsalted butter to the glaze in the pan. Stir it in and let it melt completely. The butter adds richness and helps create that glossy, caramelized finish. If the glaze starts to thicken too much, add 1-2 tablespoons water from the pan to loosen it.
⏰ Step 4: Finish with High Heat for Caramelization
When the ham has roasted for 1 hour and 15 minutes, increase the oven temperature to 425°F. This final step is what transforms good ham into exceptional ham. Return the ham to the oven and roast for another 15-20 minutes, basting every 5 minutes with the pan juices. You’ll see the glaze darken and develop a beautiful caramelized crust.
You’ll know it’s perfect when the glaze is deep amber and slightly bubbly, with a crackly texture that snaps when you press it. The internal temperature should reach 145°F when measured in the thickest part of the ham. If you don’t have a meat thermometer, look for a deep golden color and that irresistible glossy sheen.
🍽️ Step 5: Rest and Serve with Confidence
Remove the ham from the oven and transfer it to a cutting board. Let it rest for 15-20 minutes before slicing. This resting period allows the juices to redistribute throughout the meat, ensuring each slice is moist and flavorful. Don’t skip this step—I learned the hard way that cutting too soon leads to dry, disappointing slices.
When ready to serve, slice the ham against the bone for beautiful presentation. The glaze should be thick enough to hold its shape on each slice, with a perfect balance of sweet, tangy, and herbal notes. Serve with any leftover glaze spooned over the top—it’s pure liquid gold. This ham will be the star of your table, delivering on that promise of golden perfection with every bite.
Pro Tips For Making Honey Roast Smoked Ham
- Skip the Crushed Cloves: Whole cloves work just fine—no need to crush them in a mortar. Just spear them into the ham’s surface before roasting; they’ll soften and release their aroma naturally. I’ve done this a dozen times, and the flavor is just as deep without the extra effort.
- Baste Like a Boss: Don’t just slather the glaze—use a pastry brush to spread the ham’s juices and the glaze every 30 minutes. The juices keep the meat moist while the glaze builds that glossy, caramelized crust. I used to forget, and the ham would end up sticky but not golden.
- Don’t Rush the Glaze: Let the honey, mustard, vinegar, and brown sugar simmer until the mixture is fully translucent—about 3-4 minutes. If you rush it, the glaze will crystallize on the ham, and you’ll end up scraping off sugar lumps later. Trust the process; it’s worth the wait.
- High Heat Last: The final 15-20 minutes at 425°F is where the magic happens—this is when the glaze caramelizes into that crackly, amber finish. If your oven runs hot, cut it to 10 minutes to avoid burning. I’ve learned this the hard way with a few too-charred batches.
Pro cooking tips for great honey roast smoked ham
Oven Temperature Control
Starting with 325°F is non-negotiable for even cooking—this gentle heat lets the glaze caramelize slowly without burning the ham. I always use a reliable oven thermometer (like Thermoworks Probes) to confirm accuracy. If your oven runs hot, lower it to 300°F—trust me, you don’t want a sticky mess.
The final 425°F blast is what gives that crackling glaze, but only after 1 hour 15 minutes of prep work. 🌡️
Slitting for Flavor Penetration
Those ½-inch deep slits all over the ham aren’t just decorative—they’re flavor tunnels! I use a sharp boning knife and cut in a crosshatch pattern, especially focusing on the fat cap. This lets the glaze seep into every layer, not just the surface.
Skip this step, and you’ll end up with a glaze that just sits on top like a sad, glossy coat. Pro tip: Score the fat cap first—it’s where the glaze will pool and caramelize beautifully.
Basting Like a Pro
Basting every 30 minutes isn’t just about flavor—it’s about that perfect crust. I use a pastry brush with a soft, natural bristle (like Wilton) to spread the glaze evenly. Don’t drown the ham, though—just enough to coat.
The butter addition at 45 minutes is where the magic happens; it emulsifies with the glaze and gives that restaurant-quality sheen. If the glaze thickens too much, add hot pan juices—never cold water, or you’ll shock the sugars.
Butter’s Secret Role
The ¼ cup unsalted butter added mid-cook isn’t just for richness—it’s the key to that crackling crust. As it melts, it creates tiny bubbles that caramelize into a crispy, edible shell. I stir it in gently so it emulsifies with the glaze, not just sits on top.
If you’re short on butter, duck fat works in a pinch, but it’ll give a slightly gamey note. Trust me, the butter makes all the difference.
Internal Temp vs. Visual Cues
That 145°F internal temp is your golden rule, but I also watch for visual cues. The glaze should be deep amber with bubbles that pop when you press it—almost like a cross between caramel and candy.
If you’re without a thermometer, look for that glossy, crackling sheen and a deep golden color. Overcooking here turns the ham into rubber, so pull it when you’re 90% sure—it’ll keep warming as it rests. 💡
Resting: The Unsung Hero
The 15-20 minute rest after roasting is where the ham goes from “good” to “unforgettable.” I cover it loosely with foil and let it sit on a cutting board. This redistributes juices so every slice is juicy, not just the center.
I’ve sliced too soon and watched the glaze run off like water—don’t be that person. Patience here pays off with slices that hold their shape and flavor.
Nutrition facts
Frequently asked questions
Why do I need to slit the ham before glazing?
The ½-inch slits all over the ham create flavor tunnels that let the glaze penetrate deep into the meat, not just sit on the surface. This ensures every bite is packed with sweet, tangy, and herbal notes. Skipping this step leaves you with a glaze that just coats the outside like a sad, glossy layer. Trust me, the extra 5 minutes of prep makes all the difference!
What if my glaze gets too thick during roasting?
If the glaze thickens too much, simply add 1-2 tablespoons of hot pan juices to loosen it. Avoid cold water—it can shock the sugars and ruin the caramelization. Stir gently to blend and keep that glossy finish intact. This happens often, so don’t panic!
Can I use a different type of vinegar instead of apple cider?
Apple cider vinegar adds brightness, but white vinegar or even lemon juice works in a pinch. Just use the same ¼ cup amount to maintain balance. The vinegar cuts through the sweetness, so don’t skip it entirely—your ham will taste overly sugary.
How do I know when the ham is done without a thermometer?
Look for a deep golden, crackling glaze that bubbles when pressed. The internal temp should reach 145°F, but if you’re without a thermometer, check for that glossy sheen and a deep amber color. Overcooking turns ham rubbery, so pull it when it’s 90% there—it’ll finish warming while resting.
Can I make the glaze ahead of time?
Yes! Prepare the glaze mixture up to 2 days ahead and store it in an airtight container in the fridge. Reheat it gently on the stovetop, stirring until smooth. Just avoid making it too far ahead, or the sugars may crystallize. This saves time on the big day!

Trained in classic French technique but raised on slow-cooked ribs and spicy rubs, she blends culinary skill with smoke and soul.
- Pork Butt Smoker Recipe: Low and Slow to Juicy, Fall-Off-Bone Tenderness - November 2, 2026
- Brisket Recipe Slow Cooker: Fall-Apart Tender With Minimal Effort - November 2, 2026
- Smoked Brisket Recipe: Low and Slow to Fall-Apart Tenderness - November 2, 2026