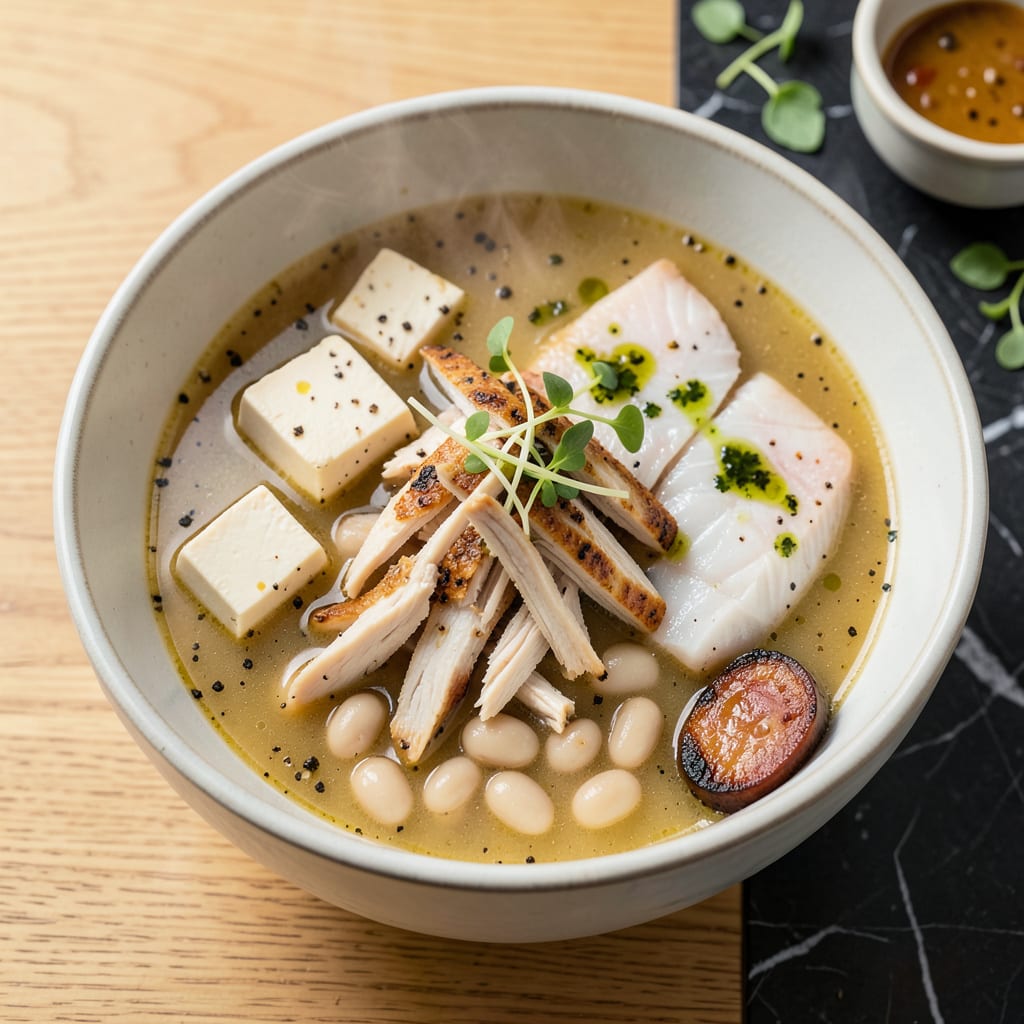
I’ll be real with you: a bowl of soup without protein is like a campfire without smoke—it’s missing that something extra that makes it satisfying. After years of tinkering with everything from slow-cooked meats to plant-based powerhouses, I’ve cracked the code for turning any broth into a hearty, protein-packed meal that actually keeps you full.
Here’s the thing—it’s not just about dumping ingredients in. Timing matters. Add delicate proteins like shrimp too early and you get rubber. Toss in uncooked lentils too late and they stay crunchy. I’ve burned through my fair share of failed batches (and nearly ruined a perfectly good pot of chili) to figure out the exact when and how for each protein type.
Whether you’re working with leftover rotisserie chicken, a block of tofu, or a can of beans, I’ll show you how to transform them into soup superstars. We’re talking 1 cup of chickpeas per 4 servings for vegan options, or shredded chicken added in the last 10 minutes to keep it tender. No complicated prep—just smart techniques that work every time.
Fair warning: once you start boosting your soups this way, you’ll never go back to watery broths. The difference is that obvious. Let’s get your soup game where it should be—filling, flavorful, and packed with exactly what your body needs.
📚 In This Guide
- What You’ll Need
- Instructions
- Tips and Common Mistakes
What Youll Need
- ● Base ingredients: 1–2 cups of pre-cooked soup (homemade or store-bought)
- ● 2–4 cups of low-sodium broth (vegetable, chicken, or bone broth)
- ● Protein boosters (pick 1–3): ½–1 cup cooked beans/lentils (cannellini, black, or chickpeas)
- ● ½ cup tofu or tempeh (cubed or crumbled)
- ● ½–1 cup shredded cooked chicken, turkey, or beef
- ● ¼–½ cup Greek yogurt or silken tofu (for creamy soups)
- ● 1–2 hard-boiled eggs (sliced or chopped)
- ● ¼ cup quinoa or farro (uncooked, for grain-based protein)
- ● Tools: Medium pot or Dutch oven
- ● Sharp knife & cutting board (for prep)
- ● Wooden spoon or ladle
- ○ Optional: Immersion blender (for creamy textures)
- ● Extras (flavor & texture): 1 tbsp olive oil or butter (for sautéing)
- ● Herbs/spices: garlic, bay leaf, thyme, or smoked paprika
- ● ¼ cup grated Parmesan or nutritional yeast (for garnish)
Step-by-Step Instructions for Adding Protein to Soup
Here’s the simplest way to transform any soup into a protein-packed meal—no fancy techniques required.
Choose Your Protein Source
Start by selecting a protein that complements your soup’s flavor profile. For clear broths, I recommend shredded rotisserie chicken, diced tofu, or poached white fish—they absorb flavors without overpowering. Hearty soups like chili or stew can handle ground turkey, chopped sausage, or canned beans for extra texture.
Consider cook time: pre-cooked proteins (chicken, tofu, canned beans) add instantly, while raw proteins (meat, seafood) need simmering. For creamy soups, soft proteins like silken tofu or shredded pork blend beautifully. The key is matching protein density to your soup’s base—light proteins for delicate broths, heartier options for robust flavors.
Prep Your Protein for Maximum Flavor
For raw proteins, season them before adding to the soup. I always pat chicken breasts or fish fillets dry, then lightly salt and pepper them. For ground meats, brown them separately in a skillet first—this develops deep flavor through the Maillard reaction. Drain excess fat before adding to your soup.
Pre-cooked proteins need a flavor boost. Toss shredded chicken or chopped ham with a splash of the soup broth before adding it back. For plant-based options, sauté tofu cubes in a bit of oil until golden, or rinse canned beans thoroughly to remove any metallic taste. This extra step ensures your protein enhances rather than dilutes the soup’s flavor.
Add Protein at the Right Time
Timing is everything. Delicate proteins like shrimp or white fish only need 5-7 minutes of simmering—they’re done when opaque and firm to the touch. Heartier proteins like chicken thighs or beef chunks can simmer for 20-30 minutes until fork-tender.
For pre-cooked proteins, add them during the last 5 minutes of cooking just to heat through. Beans and lentils can go in earlier—they benefit from 15-20 minutes of simmering to absorb flavors. Stir gently to avoid breaking up soft proteins like tofu or flaked fish. Watch for visual cues: shrimp curl into a C-shape when done, chicken reaches 165°F internally.
Adjust Seasoning and Liquid Balance
After adding protein, taste and adjust seasoning. Proteins often absorb salt, so you may need an extra pinch. For creamy soups, stir in a splash of broth or milk if the protein makes it too thick. Acidic soups might need balancing—try a squeeze of lemon juice or pinch of sugar.
Let the soup rest for 5-10 minutes off heat. This allows proteins to reabsorb any released juices and flavors to meld. Skim any foam that rises to the surface during this time. The final texture should be cohesive—proteins distributed evenly throughout, not sinking to the bottom or floating in clumps.
Garnish for Freshness and Texture
Finish with bright, fresh garnishes that complement your protein. A sprinkle of chopped parsley or cilantro adds color and cuts through richness. For Asian-inspired soups, top with thinly sliced scallions and sesame seeds. Creamy soups benefit from crumbled cheese or toasted nuts for crunch.
Serve immediately while hot. The protein should be the star of each spoonful—visible but not overwhelming, perfectly cooked, and harmonious with the broth. For meal prep, store protein separately and add when reheating to prevent overcooking. Remember that proteins continue to absorb flavors as the soup sits, so leftovers often taste even better the next day.
Tips and Common Mistakes
Adding protein to soup is simpler than you might think, but these key insights will ensure perfect results every time.
Timing Secret: The 5-7 minutes for delicate proteins like shrimp or white fish is critical—watch for the moment they turn opaque and firm. Overcooking even by a minute can make them rubbery. For heartier proteins like chicken thighs or beef chunks, the 20-30 minutes simmering window is ideal for achieving fork-tender results without drying out. I always set a timer to avoid distractions.
Flavor Boost: When prepping raw proteins in Step 2, don’t skip the browning step for ground meats. This Maillard reaction creates depth of flavor that directly simmering in broth can’t achieve. For pre-cooked proteins, tossing them with a splash of broth before adding (as mentioned in Step 2) makes a surprising difference—they’ll taste like they’ve been simmering all along.
Texture Tip: The 5-10 minutes resting time in Step 4 isn’t just for flavor—it’s when proteins reabsorb juices. Skipping this can leave your soup watery at the bottom. I’ve found that creamy soups especially benefit from the full 10 minutes, while broth-based soups are fine at 5. Stir once halfway through resting to distribute proteins evenly.
Protein Selection: In Step 1, consider how your protein will hold up to leftovers. Delicate proteins like fish or shrimp are best added fresh, while heartier options like beans or chicken thighs actually improve after a day in the fridge. For meal prep, I recommend cooking proteins separately and adding them when reheating to maintain perfect texture.
Pro Tips for Add Protein To Soup
- Adding protein to soup is simpler than you might think, but these key insights will ensure perfect results every time.
- Timing Secret: The 5-7 minutes for delicate proteins like shrimp or white fish is critical—watch for the moment they …
- Flavor Boost: When prepping raw proteins in Step 2, don’t skip the browning step for ground meats. This Maillard reac…
Frequently Asked Questions
Can I add raw meat directly to boiling soup?
Nope! For food safety, always brown or cook raw meat (like chicken, beef, or pork) separately first. This kills bacteria and locks in flavor. Add pre-cooked meat to soup in the last 10–15 minutes to warm through without overcooking. Ground meat? Cook it fully before stirring in!
What’s the best plant-based protein for soup without changing the flavor?
Try white beans, lentils, or silken tofu—they’re mild and blend right in! For a meaty texture, swap in tempeh (crumbled) or chopped mushrooms. Pro tip: Rinse canned beans well to avoid a tinny taste.
When’s the best time to add protein to soup so it doesn’t get rubbery?
Timing matters! Delicate proteins like shrimp, tofu, or pre-cooked chicken need just 5–10 minutes at the end. Hearty beans or lentils? Add them 20–30 minutes before serving. Overcooking = tough texture, so keep an eye on it!
How can I add protein to soup without extra prep (like cooking meat)?
Shortcut alert! Stir in:
- Canned beans (drained/rinsed)
- Pre-cooked rotisserie chicken (shredded)
- Frozen peas or edamame (thaw first)
- Greek yogurt or cottage cheese (swirl in at the end for creaminess + protein)
Why does my soup get cloudy after adding protein like eggs or dairy?
Cloudiness happens when proteins curdle from high heat. To fix it:
- Temper dairy (mix a little hot soup into it first).
- Add eggs slowly while stirring (like egg drop soup).
- Keep heat at a gentle simmer, never a rolling boil.
Boosting your soup’s protein doesn’t have to be complicated! With simple swaps like beans, lean meats, or dairy, you can turn any bowl into a nutrient-packed powerhouse—without sacrificing flavor. Whether you’re meal prepping or whipping up a quick dinner, these easy tips ensure your soups keep you full and fueled. 💪
Ready to upgrade your next batch? Pick one new protein booster from this guide and experiment—your taste buds (and muscles!) will thank you. Happy simmering!

Trained in classic French technique but raised on slow-cooked ribs and spicy rubs, she blends culinary skill with smoke and soul.
- Recipe for Boneless Pork Chops in Cast Iron Skillet: Sear and Baste to Juicy Perfection - October 3, 2026
- Recipe for Boneless Cross Rib Roast: Slow-Roasted Beef with Herb Crust - October 3, 2026
- Hamburgers in Sauce Recipe Crock Pot: Slow-Cooked Savory Delight - October 3, 2026