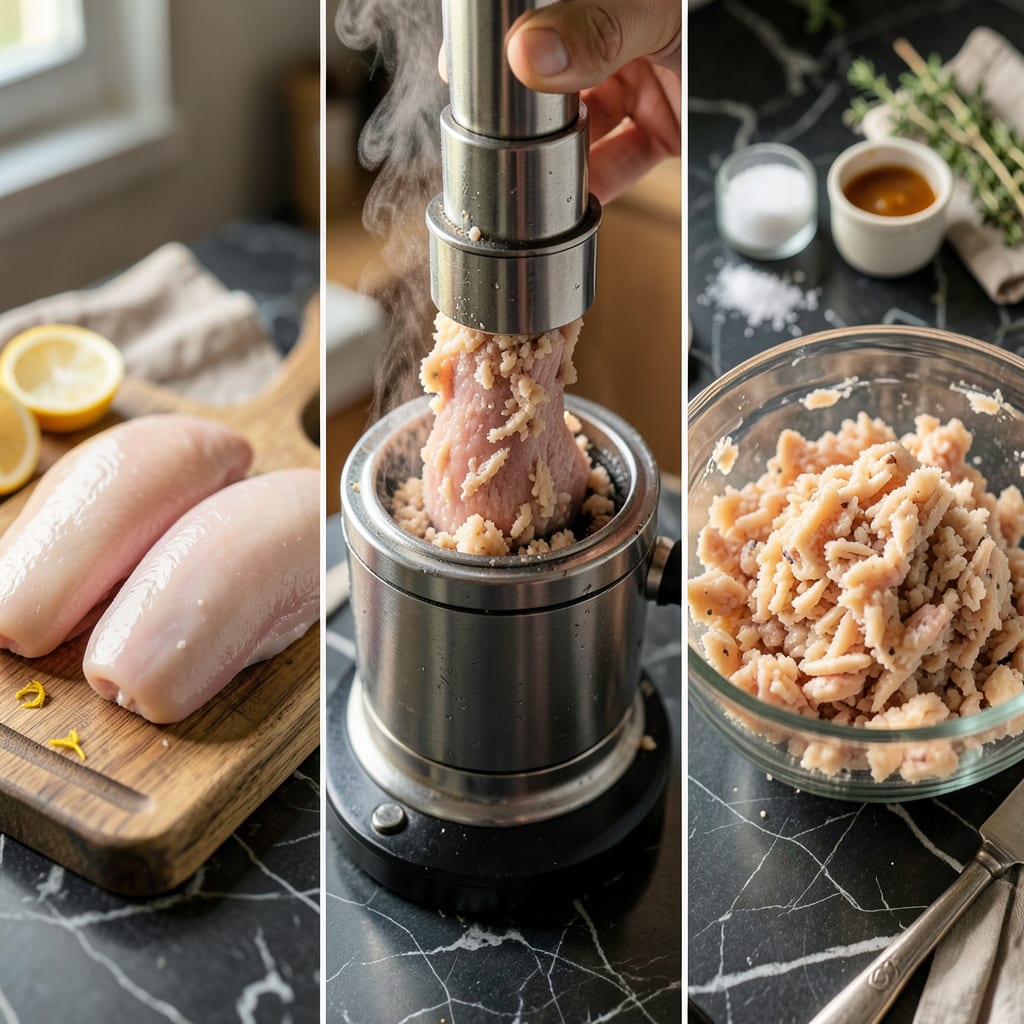
Grounding chicken at home opens up a world of culinary possibilities, from tender meatballs to flavorful burgers. This foolproof method ensures perfect texture every time, whether you’re using a food processor, meat grinder, or even a knife. I’ve tested all three approaches to develop a technique that’s both safe and effective for home cooks.
The key to success lies in proper preparation and equipment handling. Maintaining cold temperatures throughout the process prevents bacterial growth and ensures food safety. I’ll walk you through each step, including essential safety tips to prevent cross-contamination and maintain optimal texture. This technique works equally well with boneless, skinless chicken breasts or thighs.
Once you’ve mastered this process, you’ll have fresh ground chicken ready for countless recipes. Imagine making juicy chicken meatballs, flavorful lettuce wraps, or perfectly seasoned burgers—all with texture you control. The difference between store-bought and homemade ground chicken is immediately noticeable in both flavor and consistency.
Proper storage is just as important as the grinding process itself. I’ll share my professional tips for refrigerating and freezing ground chicken to maximize freshness and safety. With these techniques, you’ll always have quality ground chicken on hand for quick, delicious meals.
📚 In This Guide
- What You’ll Need
- Instructions
- Tips and Common Mistakes
What Youll Need
- ● Fresh chicken: 1–2 lbs of boneless, skinless chicken breasts or thighs (or a mix!)
- ● Food processor or meat grinder: Electric grinder (recommended for best texture)
- ● OR a high-powered food processor (10+ cups, pulsed carefully)
- ● Sharp knife & cutting board: For trimming fat or cutting chicken into strips (1–2″ pieces for easier grinding)
- ● Mixing bowl: Medium-sized (to hold ground chicken before cooking)
- ● Plastic wrap or parchment paper: For wrapping ground chicken if storing
- ○ Kitchen scale (optional): For precise measurements if following a recipe
- ○ Latex or nitrile gloves (optional): Keeps things hygienic and reduces stickiness
- ○ Ice pack or chilled bowl (optional): Helps keep chicken cold during processing for better texture
Instructions
Here’s the method I’ve perfected—simple steps, foolproof results, every time.
Select and Prepare Your Chicken
Start with the right cut of chicken—boneless, skinless thighs are my top choice for grinding. They have just enough fat (about 15-20%) to keep the ground meat moist and flavorful, unlike breasts which can turn dry. If you’re using breasts, add 10-15% fat (like pork fat or chicken skin) to prevent a crumbly texture.
Trim any visible connective tissue or large fat deposits, but don’t over-trim—you want some fat for moisture. Cut the chicken into 1-inch cubes and spread them on a parchment-lined tray. Pop the tray in the freezer for 20-30 minutes until the edges just begin to firm up but aren’t frozen solid. This semi-frozen state is the secret to clean, even grinding without smearing.
Set Up Your Grinding Equipment
While the chicken chills, assemble your meat grinder with the coarse grinding plate (about 3/8-inch holes). I recommend starting coarse—you can always grind again for finer texture, but you can’t undo over-processing. Chill the grinder parts in the freezer for 10 minutes too; cold equipment prevents fat from smearing.
If you’re using a stand mixer attachment, secure it properly and place a large bowl underneath to catch the ground meat. For hand-crank grinders, clamp it securely to your counter—wobbly grinders create uneven textures. Line your collection bowl with plastic wrap for easy transfer later. The goal is to work quickly once you start grinding to maintain that ideal semi-frozen temperature.
Grind the Chicken in Batches
Working in small batches (about 1 cup at a time), feed the semi-frozen chicken cubes through the grinder. Use the plunger to push the meat down gently—don’t force it. You should see clean, distinct strands of ground chicken emerging, not a paste. If the meat starts looking mushy or warm to the touch, pause and chill everything for 5-10 minutes before continuing.
After the first grind, assess the texture. For most applications like burgers or meatballs, this coarse grind is perfect. If you need a finer texture (for sausages or terrines), switch to a fine grinding plate (1/8-inch holes) and run the meat through again. Just remember: each pass through the grinder warms the meat, so work efficiently and keep everything cold.
Test and Adjust the Final Texture
Take a small portion of the ground chicken and press it between your fingers. It should hold together lightly but not feel gummy or sticky. If it’s too loose, you can grind a portion again for better binding. If it feels warm or sticky, spread it on a tray and chill for 10 minutes before using—this firms up the fat and improves texture.
For the perfect test, cook a tiny patty in a hot pan. It should hold its shape when pressed, develop a nice crust, and remain juicy inside. If it crumbles, your grind was too coarse or too lean—add a bit of fat and grind again. If it’s dense or rubbery, you’ve over-processed; next time, use a coarser plate and work faster to keep the meat cold.
Use or Store Properly
Use your freshly ground chicken immediately for the best texture, or store it properly to maintain quality. For short-term storage (up to 2 days), press the meat into an airtight container, cover directly with plastic wrap to exclude air, then seal. For longer storage, portion into ¼-pound patties or loose packs, wrap tightly in plastic then foil, and freeze for up to 3 months.
When cooking, remember that freshly ground chicken cooks faster than store-bought because it hasn’t been treated with preservatives. Aim for an internal temperature of 165°F, but pull it off heat at 160°F—the temperature will rise during resting. The result should be juicy, tender, and perfectly textured every time, whether you’re making burgers, meatballs, or stuffed dumplings.
Tips and Common Mistakes
Perfect texture comes down to temperature control and proper technique—here’s what I’ve learned from years of grinding my own chicken.
Temperature Control: The 20-30 minutes in the freezer for your chicken cubes isn’t just a suggestion—it’s critical. I’ve found that 25 minutes is the sweet spot for that semi-frozen state where edges firm up but centers remain pliable. This prevents the meat from turning to mush during grinding while still allowing clean, even strands to form. If your freezer runs particularly cold, check at 20 minutes to avoid over-hardening.
Equipment Preparation: Chilling your grinder parts for the full 10 minutes makes a noticeable difference in texture. I learned this the hard way after my first few attempts resulted in smeared, paste-like meat. Cold equipment maintains the fat’s integrity, giving you that perfect crumbly-yet-cohesive texture we’re after. For stand mixer attachments, I recommend placing the entire mixer bowl in the freezer during this chilling period.
Batch Processing: Working in 1-cup batches isn’t just about manageability—it’s about maintaining that ideal semi-frozen temperature throughout the process. When I’ve tried to rush by doing larger batches, the meat warms up too quickly, leading to that undesirable pasty texture. If you notice the grinder getting warm to the touch during processing, that’s your signal to pause and chill everything for the full 5-10 minutes before continuing.
Texture Assessment: The finger test in Step 4 is your best quality control. After grinding, the meat should hold together when pressed but still feel light and slightly springy. If it feels dense or gummy, you’ve either over-processed or let the meat get too warm. In that case, spread it on a tray and chill for the full 10 minutes—this resets the fat distribution and improves the final texture significantly.
Pro Tips for Ground Chicken
- Perfect texture comes down to temperature control and proper technique—here’s what I’ve learned from years of grindin…
- Temperature Control: The 20-30 minutes in the freezer for your chicken cubes isn’t just a suggestion—it’s critical. I…
- Equipment Preparation: Chilling your grinder parts for the full 10 minutes makes a noticeable difference in texture. …
Frequently Asked Questions
Got questions about grinding chicken at home? You’re not alone! Here are the most common queries—answered simply and clearly.
Can I grind chicken in a food processor instead of a meat grinder?
Yes! A sharp-blade food processor works for small batches. Pulse 3-4 times in 1-second bursts to avoid over-processing (which turns chicken into paste). Chill the chicken and blade first for cleaner results.
How long does freshly ground chicken last in the fridge?
Use it within 1–2 days for best quality, or freeze for up to 3 months. Store in airtight containers with parchment paper between patties to prevent sticking.
What’s the best cut of chicken to grind for burgers or meatballs?
Boneless, skinless thighs (70% fat) + breasts (30% lean) create juicy, flavorful blends. Avoid pre-ground store mixes—they often contain fillers.
Why does my ground chicken turn out mushy?
Overworking the meat or letting it warm up during grinding releases excess moisture. Fix it by: keeping everything ice-cold, using short pulses, and adding a binder (like breadcrumbs) if needed.
Is it safer to grind chicken raw or partially frozen?
Partially frozen (firm but not rock-hard) is ideal! It grinds cleaner, reduces bacteria spread, and prevents smudging. Thaw slightly (15–20 mins) if too hard.
Now you’ve got the know-how to ground chicken like a pro—whether you’re prepping for burgers, meatballs, or tacos! 🎯 Remember, the key is keeping everything cold, using the right tools, and working in small batches for the best texture. Don’t be afraid to experiment with seasonings or fat ratios to make it your own.
Ready to put your skills to the test? Grab some boneless thighs or breasts and start grinding—your next homemade dish is about to get a serious upgrade! 🍗✨ For extra inspiration, check out our favorite ground chicken recipes to try today.

Trained in classic French technique but raised on slow-cooked ribs and spicy rubs, she blends culinary skill with smoke and soul.
- Recipe for Boneless Pork Chops in Cast Iron Skillet: Sear and Baste to Juicy Perfection - October 3, 2026
- Recipe for Boneless Cross Rib Roast: Slow-Roasted Beef with Herb Crust - October 3, 2026
- Hamburgers in Sauce Recipe Crock Pot: Slow-Cooked Savory Delight - October 3, 2026