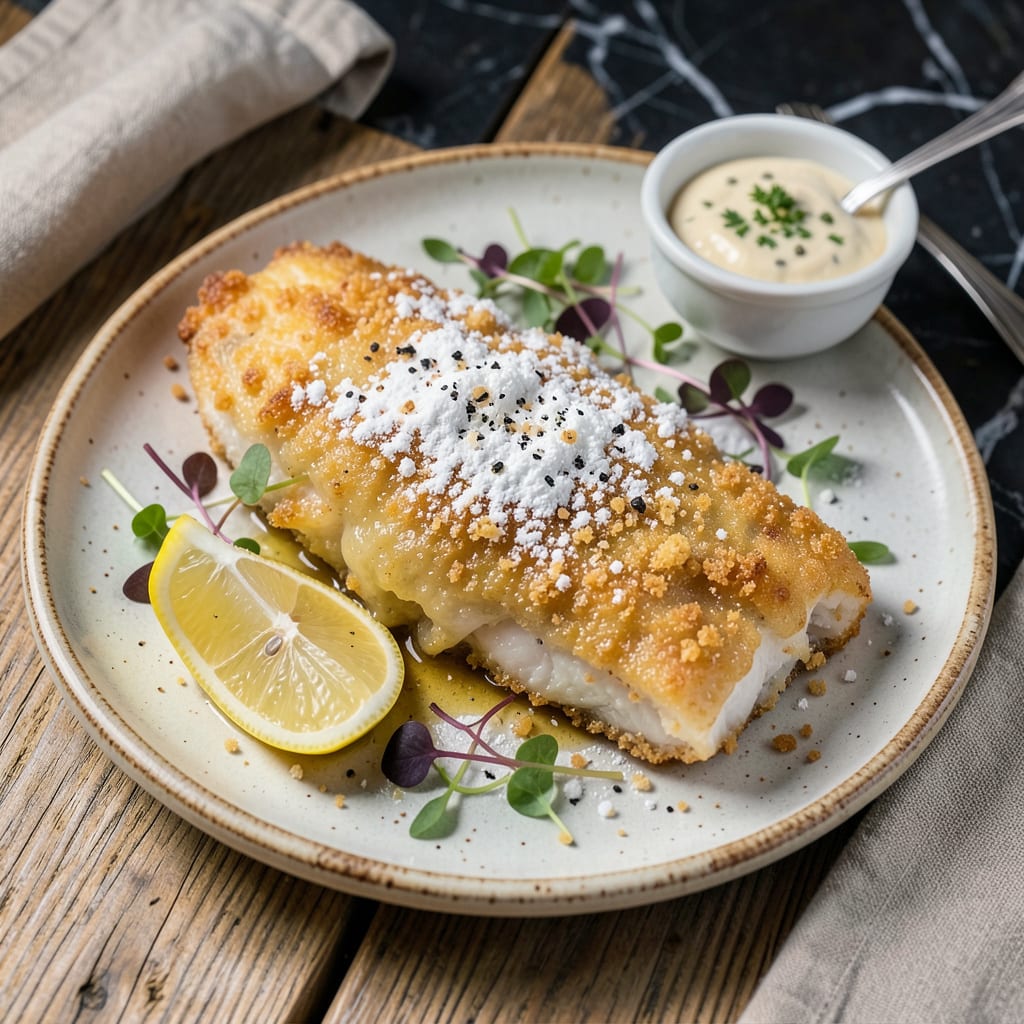
Let me tell you, there’s nothing quite like biting into perfectly fried fish with that crispy, golden crust that shatters before giving way to tender, flaky flesh inside. I’ve burned through more batches than I care to admit trying to get this right—turns out the secret isn’t just in the coating, but in how you layer it and handle the fish before it hits that hot oil.
What changed everything for me was realizing that the classic flour-egg-breadcrumb trio needs specific ratios and techniques to actually stick. We’re talking about seasoning each layer separately, using the right consistency of egg wash, and pressing those breadcrumbs on just hard enough. And here’s the thing—your oil temperature matters more than you think. Too cool and you’ll end up with greasy fish; too hot and that beautiful crust burns before the inside cooks through.
The payoff is worth every minute of prep. When you pull that fish from the oil and see it glistening golden brown, hear that satisfying crunch when you cut into it, and taste how the crispy exterior gives way to perfectly cooked fish—well, that’s when you know you’ve nailed it. I serve mine with a squeeze of lemon and some tartar sauce, but honestly, this fish is so good it hardly needs anything else.
Fair warning though: once you master this technique, you’ll never want store-bought frozen fish sticks again. The difference is like comparing a campfire-cooked steak to something microwaved. Let’s get that oil heating and make some magic happen.
📚 In This Guide
- What You’ll Need
- Instructions
- Tips and Common Mistakes
What Youll Need
- ● Fish fillets – 4 to 6 (6–8 oz each), fresh or thawed (cod, tilapia, or haddock work great! 🐟)
- ● All-purpose flour – 1 cup (for dredging, plus extra for dusting)
- ○ Cornstarch – ¼ cup (optional, for extra crispiness)
- ● Eggs – 2 large, beaten (or ½ cup buttermilk for a lighter coat)
- ● Breadcrumbs – 1½ cups (panko for crunch or fine for classic texture)
- ● Seasonings – 1 tsp each salt, black pepper, paprika, garlic powder (adjust to taste)
- ● Oil for frying – 2–3 cups (vegetable, canola, or peanut oil; 350–375°F heat)
- ● Shallow bowls/dishes – 3 (for flour, egg, and breadcrumb stations)
- ● Tongs or fork – for dipping fish without mess
- ● Deep skillet or Dutch oven – heavy-bottomed for even frying
- ● Paper towels – for draining excess oil
- ○ Wire rack – optional, keeps fish crispy post-fry
- ○ Thermometer – optional but handy for oil temp accuracy 🌡️
Instructions
Here’s my foolproof method for achieving that perfect crispy coating that stays put during frying.
Prepare the Fish Fillets
Start by patting your fish fillets completely dry with paper towels. This is the most important step—any moisture will prevent the coating from adhering properly. I like to press down firmly on each fillet to absorb as much liquid as possible.
Once dry, season both sides generously with salt and pepper. I recommend using about ½ teaspoon salt per pound of fish for balanced flavor. Let the seasoned fillets sit at room temperature for 10 minutes while you set up your coating station.
This brief rest allows the salt to penetrate the surface slightly, enhancing flavor throughout the fillet rather than just on the surface. It also gives you time to prepare your coating ingredients without rushing.
Set Up the Three-Step Coating Station
Arrange three shallow dishes in a row. In the first dish, place all-purpose flour. In the second, beat eggs with a fork until well combined. In the third, mix breadcrumbs with your preferred seasonings—I like adding garlic powder, paprika, and a pinch of cayenne for extra flavor.
The key to success is keeping one hand for dry ingredients and one for wet. I always use my left hand for the flour and breadcrumbs, and my right hand for the egg wash to prevent clumping. This system keeps your hands from getting overly messy and ensures even coating.
Make sure your breadcrumb mixture is fine and evenly distributed. If you’re using panko for extra crispiness, you might want to pulse it briefly in a food processor to create smaller crumbs that adhere better to the fish.
Apply the Coating in Layers
Working with one fillet at a time, dredge it in the flour, shaking off any excess. The flour creates a dry surface for the egg to cling to. Dip the floured fillet into the egg wash, letting any excess drip off. Then press it firmly into the breadcrumb mixture, coating both sides completely.
Here’s the secret to extra crispiness: after coating, place the fillet on a wire rack set over a baking sheet. This allows air to circulate around the fish, preventing the coating from getting soggy before frying. Let the coated fillets rest for 5-10 minutes before frying.
For even better adhesion, I like to double-coat my fish. After the first coating has set for a few minutes, repeat the egg wash and breadcrumb steps. This creates a thicker, crunchier crust that holds up beautifully during frying.
Fry to Golden Perfection
Heat about 1 inch of oil in a heavy skillet over medium-high heat until it reaches 350-375°F. You can test the oil by dropping in a few breadcrumbs—they should sizzle immediately and turn golden within 30 seconds.
Carefully place the coated fillets in the hot oil, working in batches to avoid crowding the pan. Cook for 2-3 minutes per side until the coating is deep golden brown and crispy. The fish should flake easily when tested with a fork.
Use a slotted spatula to transfer the fried fish to a paper towel-lined plate to drain. The coating should be uniformly crispy with no soft spots. If you notice any areas that aren’t fully crisp, you can return the fish to the oil for an additional 30 seconds to finish cooking those spots.
Tips and Common Mistakes
Mastering the crispy coating takes practice, but these key insights will help you avoid the pitfalls I’ve seen even experienced cooks make.
The Drying Secret: In Step 1, don’t just pat the fish dry—press firmly with paper towels until no moisture remains visible. I’ve found that applying pressure for a full 10 seconds per side makes the difference between a coating that sticks and one that slides off during frying. The salt needs that dry surface to properly adhere during the 10-minute rest before coating.
Temperature Control: When frying at 350-375°F in Step 4, use a thermometer to monitor the oil. Here’s what nobody tells you—the oil temperature drops when you add cold fish. Let it recover to 360°F between batches. If the oil isn’t hot enough, your 2-3 minutes per side becomes meaningless, and you’ll end up with greasy rather than crispy results.
Double-Coating Technique: For that restaurant-quality crunch mentioned in Step 3, the 5-10 minute rest between coats is non-negotiable. I learned this the hard way after ruining three batches. The first coating needs time to set before applying the second layer, otherwise both layers will peel off during frying. Place coated fillets on a wire rack—not a plate—to prevent steam from softening the crust.
Frying Strategy: Work in small batches even if it takes longer. Crowding the pan lowers the oil temperature, and your 2-3 minutes per side timing won’t produce that deep golden brown color we’re after. I use a slotted spoon to gently stir the oil between batches, which helps maintain an even 375°F temperature throughout the cooking process.
Pro Tips for Coat Fish For Frying
- Mastering the crispy coating takes practice, but these key insights will help you avoid the pitfalls I’ve seen even e…
- The Drying Secret: In Step 1, don’t just pat the fish dry—press firmly with paper towels until no moisture remains vi…
- Temperature Control: When frying at 350-375°F in Step 4, use a thermometer to monitor the oil. Here’s what nobody tel…
Frequently Asked Questions
Can I use flour alone for coating fish, or do I need a multi-step process?
While flour alone works, a three-step breading (flour → egg wash → breadcrumbs/cornmeal) creates a crispier, longer-lasting crust. For a quick fix, mix flour with cornstarch (1:1 ratio) for extra crunch!
How long should I let the coated fish rest before frying?
Rest the fish for 5–10 minutes after coating. This helps the breading adhere better and prevents it from falling off during frying. Skip this step if you’re in a hurry, but expect slightly less crispiness.
What’s the best oil and temperature for frying coated fish?
Use oils with a high smoke point like peanut, vegetable, or canola oil. Heat to 350–375°F (175–190°C). Too cool = greasy fish; too hot = burnt coating. A candy thermometer helps nail the temp!
Why does my coating fall off when frying? How can I fix it?
Common culprits: wet fish (pat it very dry), skipping the egg wash, or overcrowding the pan. For extra insurance, chill the coated fish for 15 minutes before frying.
Are there healthier alternatives to deep-frying coated fish?
Try air-frying (400°F for 8–10 mins, flip halfway) or pan-frying with just 1–2 tbsp oil. For a lighter crust, swap breadcrumbs for panko + crushed cornflakes or almond flour.
Now you’ve got the secrets to perfectly crispy fried fish every time! 🎉 Whether you prefer a light flour dusting, a crunchy panko crust, or a classic cornmeal coating, the key is in the technique—patience, proper prep, and the right heat. Don’t be afraid to experiment with seasonings or dipping sauces to make it your own.
Ready to put your skills to the test? Grab your favorite fish fillets and get frying—your taste buds (and dinner guests) will thank you! For extra inspiration, check out our related recipes for sides that pair perfectly with your crispy creation. Happy frying! 🍽️

Trained in classic French technique but raised on slow-cooked ribs and spicy rubs, she blends culinary skill with smoke and soul.
- Recipe for Boneless Pork Chops in Cast Iron Skillet: Sear and Baste to Juicy Perfection - October 3, 2026
- Recipe for Boneless Cross Rib Roast: Slow-Roasted Beef with Herb Crust - October 3, 2026
- Hamburgers in Sauce Recipe Crock Pot: Slow-Cooked Savory Delight - October 3, 2026