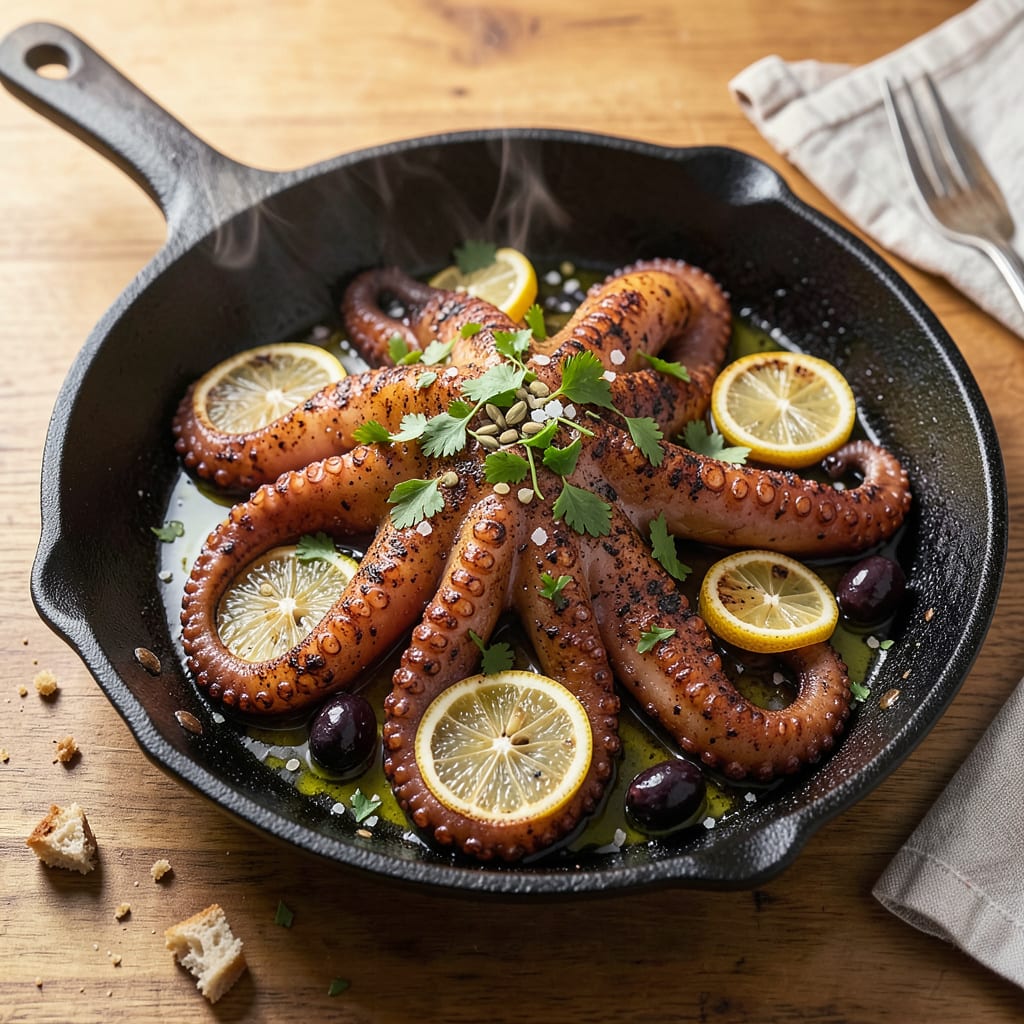
Here’s the thing—cooking baby octopus in a frying pan is way easier than most people think. I used to be intimidated by these little sea creatures until I discovered the secret to getting them crispy outside and tender inside in just 10 minutes. No fancy equipment, no complicated techniques—just a hot pan and a few simple tricks.
The key is starting with clean octopus (ask your fishmonger to prep them if you’re unsure) and patting them completely dry. This ensures they sear properly instead of steaming in the pan. I like to give them a quick toss in olive oil, salt, and smoked paprika before they hit the pan—it adds depth without overpowering the natural seafood flavor.
When they’re done right, these little guys transform into something magical: golden and crispy on the outside with meat that’s tender enough to cut with a fork. The tentacles get this amazing crunch while the bodies stay juicy. I’ve served them as tapas with lemon wedges, tossed them in garlic butter for pasta, and even piled them onto crusty bread for sandwiches.
This pescatarian dish is rich in protein and low in saturated fat. Once you try pan-frying octopus this way, you’ll wonder why you ever hesitated. The whole process takes less time than ordering takeout, and the results taste like something from a seaside restaurant.
📚 In This Guide
- What You’ll Need
- Instructions
- Tips and Common Mistakes
What Youll Need
- ● 1 lb (450g) fresh or frozen baby octopus – Thawed if frozen, cleaned (remove beak if needed). Look for small, tender ones (3–5 inches long).
- ○ 2 tbsp olive oil – Extra virgin for best flavor. Optional: Add 1 tsp chili oil for heat! 🌶️
- ● 3 garlic cloves – Minced or thinly sliced for aromatic depth.
- ○ 1 lemon – Zested + juiced (2 tbsp juice). Optional: Extra wedges for serving.
- ● 1 tsp smoked paprika – Or sub with sweet paprika for milder taste.
- ● ½ tsp red pepper flakes – Adjust to spice preference.
- ○ 2 tbsp fresh parsley – Chopped, for garnish. Optional: Swap with cilantro or basil.
- ● Salt & black pepper – To taste (start with ½ tsp salt).
- ● 10–12″ non-stick or cast-iron skillet – Heavy-bottomed for even heat.
- ● Tongs or wooden spoon – For flipping octopus safely.
- ● Paper towels – To pat octopus very dry (key for crispiness!).
- ● Sharp knife & cutting board – If trimming tentacles or beaks.
- ○ Meat thermometer (optional) – To check doneness (160°F internal temp).
- ● Serving platter – Warm it slightly for better presentation.
Instructions
Here’s how to transform baby octopus into crispy, tender perfection in minutes—no fancy techniques required.
Prep the Octopus for Even Cooking
Start by rinsing the baby octopus under cold water to remove any residual salt or debris. Pat them completely dry with paper towels—this is crucial for achieving that crispy exterior. I like to use a clean kitchen towel for the final pat-down to ensure they’re bone-dry.
If your octopus are particularly large (over 3 inches), you can cut them in half lengthwise to create more surface area for crisping. Leave the tentacles intact for visual appeal. Arrange them on a plate and let them sit at room temperature for 10 minutes before cooking—this ensures even cooking throughout.
Sear on High Heat for Maximum Crispiness
Heat a heavy-bottomed frying pan (cast iron works best) over medium-high heat until it’s screaming hot. Add enough neutral oil to coat the bottom of the pan—about 2 tablespoons. You’ll know it’s ready when the oil shimmers and a drop of water sizzles violently.
Add the octopus in a single layer, making sure not to overcrowd the pan. They should sizzle immediately upon contact. Cook undisturbed for 2-3 minutes until the undersides turn deep golden brown. You’ll see the edges start to curl—that’s your signal they’re developing that perfect crispy texture.
Flip and Finish with Aromatics
Carefully flip each piece using tongs—don’t pierce them with a fork or you’ll lose precious juices. Cook for another 2-3 minutes until the second side is equally crispy. The octopus should now be firm to the touch but still slightly springy, not rubbery.
At this point, add minced garlic and red pepper flakes to the pan. Toss everything together and cook for 30 seconds until the garlic becomes fragrant but not browned. Be vigilant here—garlic burns easily and will turn bitter. Remove the pan from heat immediately once you smell that wonderful aroma.
Rest Briefly and Serve Hot
Transfer the octopus to a paper towel-lined plate to drain any excess oil. Let them rest for 1-2 minutes—this brief pause allows the interior to finish cooking gently while maintaining that crispy exterior. The tentacles should curl beautifully, and the bodies should be plump and glossy.
Serve immediately while hot and crispy. I love squeezing fresh lemon wedges over the top just before serving—the acidity cuts through the richness and brightens all the flavors. The contrast between the crispy exterior and tender interior is what makes this dish so special.
Tips and Common Mistakes
Cooking baby octopus perfectly is all about mastering a few key details—here’s what I’ve learned from countless batches.
Drying is Everything: In Step 1, don’t rush the patting-dry process. I use paper towels first, then a clean kitchen towel to get every last drop of moisture off. Wet octopus steams instead of sears, and you’ll lose that crispy texture we’re after. The 10 minutes at room temperature helps too—it takes the chill off so they cook evenly from edge to center.
Heat Control: When you’re searing in Step 2, medium-high heat should make the oil shimmer but not smoke. If your oil starts smoking before you add the octopus, it’s too hot. I test by flicking a drop of water in—it should sizzle violently but not burn instantly. That 2-3 minute sear time is perfect for developing color without overcooking the delicate interior.
Garlic Timing: The 30 seconds with garlic in Step 3 is non-negotiable. I learned this the hard way after burning three batches—garlic goes from fragrant to bitter in seconds. Keep everything moving in the pan, and pull it off heat the moment you smell that wonderful aroma. The residual heat will finish cooking the garlic perfectly while you transfer the octopus.
Resting Matters: That 1-2 minute rest in Step 4 isn’t just for show. It lets the interior finish cooking gently while the exterior stays crisp. I place mine on a paper towel-lined plate to absorb any excess oil, then serve immediately. The tentacles will curl beautifully during this brief pause, giving you that restaurant-worthy presentation.
Pro Tips for Cook Baby Octopus In Frying Pan
- Cooking baby octopus perfectly is all about mastering a few key details—here’s what I’ve learned from countless batches.
- Drying is Everything: In Step 1, don’t rush the patting-dry process. I use paper towels first, then a clean kitchen t…
- Heat Control: When you’re searing in Step 2, medium-high heat should make the oil shimmer but not smoke. If your oil …
Frequently Asked Questions
How long should I cook baby octopus in a frying pan for perfect tenderness?
Cook baby octopus for 8-10 minutes on medium-high heat. Start with 2-3 minutes per side to sear, then reduce heat and cover for 3-4 minutes to ensure tenderness. Overcooking makes them rubbery—watch for a golden crust and opaque flesh!
Do I need to clean baby octopus before cooking? If so, how?
Yes! Rinse under cold water and remove the beak (hard center) and eyes with scissors or a knife. Pat dry thoroughly—excess moisture causes splattering. Some brands sell pre-cleaned octopus; check the label!
Can I use frozen baby octopus, and do I need to thaw it first?
Thaw frozen octopus overnight in the fridge or under cold running water for 30 minutes. Avoid microwaving—it can make the texture mushy. Pat very dry before cooking for crispier results.
What’s the best oil for frying baby octopus to avoid sticking?
Use oils with a high smoke point like avocado, grapeseed, or refined olive oil. Heat the pan until the oil shimmers (but doesn’t smoke) before adding octopus. A non-stick pan helps too!
Why did my baby octopus turn out rubbery? How can I fix it?
Rubberiness happens from overcooking or undercooking. Aim for 8-10 minutes total—sear fast, then simmer briefly. If already rubbery, try braising in broth for 15-20 minutes to salvage it. Pro tip: Marinate in lemon or vinegar first to tenderize!
Cooking baby octopus in a frying pan is quicker—and tastier—than you might think! With just 10 minutes and a few simple steps, you can turn these tender seafood bites into a crispy, flavor-packed dish that’ll impress anyone at the table. 🍽️ Whether you’re serving them as tapas, tossing them in pasta, or enjoying them straight from the pan, the key is high heat, quick cooking, and bold seasoning.
Ready to take it further? Try experimenting with different marinades (think lemon-garlic or spicy harissa!) or pairing your octopus with a refreshing side salad for a full meal. Happy cooking—your next seafood adventure starts now! 🌊

Trained in classic French technique but raised on slow-cooked ribs and spicy rubs, she blends culinary skill with smoke and soul.
- Recipe for Boneless Pork Chops in Cast Iron Skillet: Sear and Baste to Juicy Perfection - October 3, 2026
- Recipe for Boneless Cross Rib Roast: Slow-Roasted Beef with Herb Crust - October 3, 2026
- Hamburgers in Sauce Recipe Crock Pot: Slow-Cooked Savory Delight - October 3, 2026