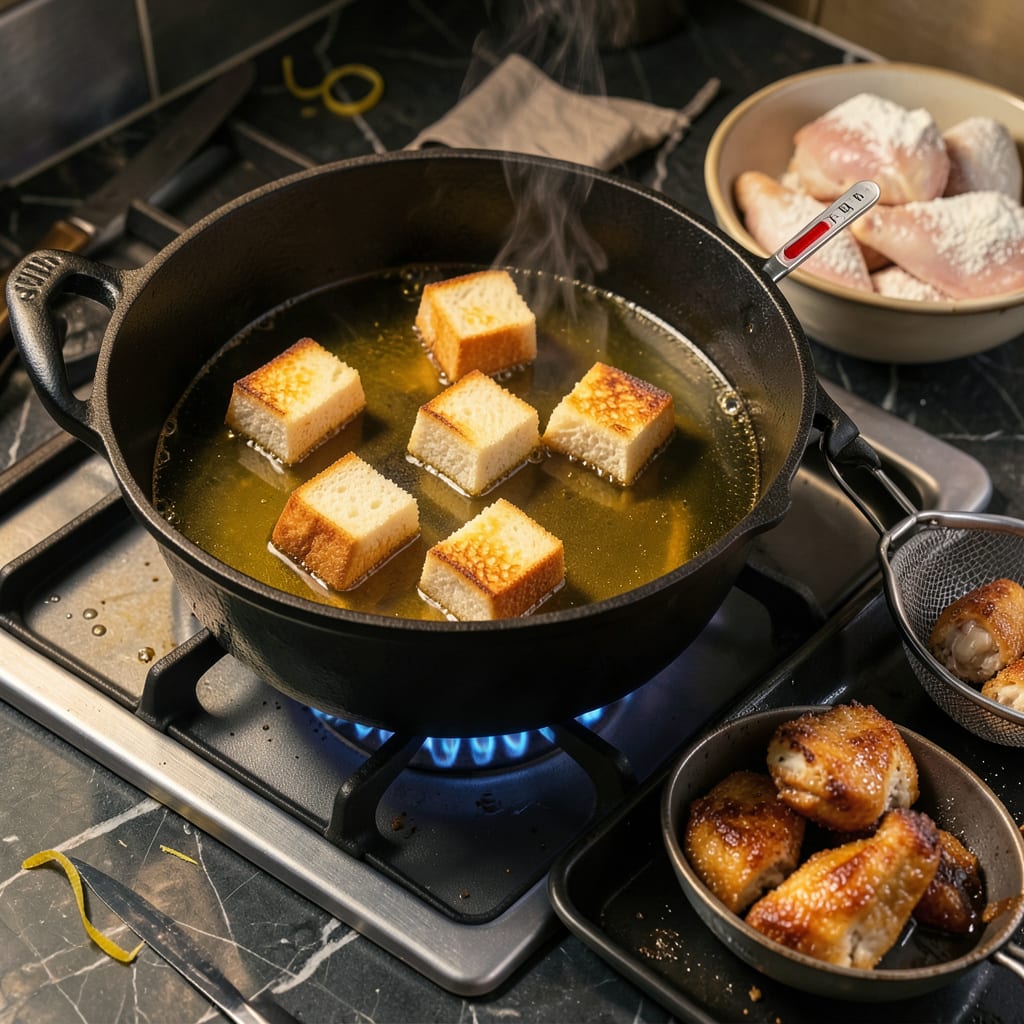
Nothing ruins a good fry job faster than oil that isn’t ready—soggy food instead of crispy, greasy instead of golden. I’ve burned through my share of disappointing batches before learning the foolproof ways to test oil temperature. The difference between perfect and ruined often comes down to just a few degrees.
You don’t need fancy equipment to get this right. While a thermometer gives precise readings, I rely on simple visual cues and kitchen hacks that work every time. A wooden chopstick, a pinch of flour, or even just watching the oil’s surface can tell you more than you’d think. These methods save me from overcooked exteriors and underdone centers.
The right temperature means food cooks evenly, develops that satisfying crunch, and absorbs minimal oil. Too cool, and you’ll end up with sad, greasy results. Too hot, and you’re risking burnt outsides with raw insides. After years of trial and error (and a few smoke alarms), I’ve nailed down the sweet spot for different foods.
Whether you’re making fried chicken, doughnuts, or tempura, mastering this one skill changes everything. Here’s exactly how to test your oil like a pro—no guesswork, no wasted ingredients, just perfectly fried results every time.
📚 In This Guide
- What You’ll Need
- Instructions
- Tips and Common Mistakes
What Youll Need
- ● Cooking oil – 1–2 cups (use vegetable, canola, peanut, or sunflower oil; avoid olive oil for high-heat frying).
- ● Deep fryer, heavy pot, or cast-iron skillet – At least 3–4 quarts capacity for safe frying.
- ○ Candy/deep-fry thermometer – Optional but highly recommended for precision (350°F–375°F range).
- ● Wooden chopstick or skewer – For the “bubble test” (no plastic—it melts!).
- ● Tongs or slotted spoon – To safely lower/remove food.
- ● Paper towels – For draining excess oil post-fry.
- ○ Kitchen timer – Optional, but helpful for tracking preheat time (~5–10 mins).
- ○ Splatter screen – Optional but lifesaving for messy cooks! 🛡️
- ● Fire extinguisher (Class B) – Critical safety backup (keep nearby, just in case).
Step-by-Step Instructions for Testing Frying Oil Temperature
Perfect frying starts with knowing exactly when your oil is ready—here’s how to get it right every time.
Choose the Right Oil and Equipment
Select an oil with a high smoke point like vegetable, canola, or peanut oil. I prefer peanut oil for its neutral flavor and ability to maintain consistent heat. Pour enough oil into your deep fryer or heavy-bottomed pot to submerge your food completely, typically about 2-3 inches deep.
Use a heavy pot with high sides to prevent splattering and maintain even heat distribution. A candy or deep-fry thermometer is ideal, but I’ll show you foolproof visual tests if you don’t have one. Place your pot on a stable burner and set it to medium-high heat—this gives you better control than starting at maximum temperature.
Use the Thermometer Method for Precision
If you have a thermometer, clip it to the side of your pot so the tip sits about 1 inch below the oil’s surface. Different foods require different temperatures: 325-350°F for delicate items like fish, 350-375°F for most frying, and 375-400°F for crispy coatings.
Watch for steady temperature readings—the oil is ready when it maintains your target temperature for at least 30 seconds. If the temperature drops when you add food, wait for it to recover before adding more. This prevents greasy, undercooked results. I always double-check by testing one piece of food first—if it sizzles immediately and floats within 10 seconds, the oil is perfect.
Master the Wooden Spoon Test (No Thermometer Needed)
For a simple visual test, place the handle of a wooden spoon into the oil. When tiny bubbles form around the wood and rise steadily to the surface, your oil is approaching the right temperature. At 350°F, you’ll see a constant stream of small bubbles—this is your sweet spot for most frying tasks.
If the bubbles are large and aggressive, the oil is too hot and you should reduce the heat slightly. No bubbles at all means the oil isn’t hot enough yet. I like this method because it works with any wooden utensil—chopsticks or even a popsicle stick will do in a pinch. Just make sure the wood is completely dry before testing.
Try the Flour or Bread Test for Extra Confirmation
Sprinkle a pinch of flour or drop a small piece of bread into the oil. At the right temperature, flour will sizzle immediately and turn golden within 30 seconds, while bread will brown evenly and float to the surface. If the flour burns instantly or the bread darkens too quickly, your oil is overheating.
This test mimics how your actual food will behave in the oil. I particularly like using a 1-inch bread cube—it should take about 60 seconds to turn golden brown at 350°F. If it takes longer, increase the heat slightly; if it browns faster, reduce the heat. This gives you a reliable visual cue that matches your specific stove and pot.
Maintain Consistent Temperature Throughout Frying
Once your oil reaches the perfect temperature, adjust the heat to maintain it. Most foods will cause the temperature to drop initially—this is normal. I recommend frying in small batches to prevent dramatic temperature fluctuations. Between batches, give the oil 2-3 minutes to recover its temperature.
Watch for visual changes in the oil’s movement—it should maintain a gentle shimmer throughout frying. If the bubbling becomes too vigorous, reduce the heat slightly. If the oil stops shimmering, increase the heat. Always remove food when it’s golden brown—the color will continue to develop slightly after removal from the oil. Use a slotted spoon to drain excess oil and transfer to paper towels immediately.
Tips and Common Mistakes
Perfect frying starts with precision, and these practical insights will help you master the oil temperature every time.
Temperature Precision: When using the thermometer method in Step 2, remember that the 30-second steady reading is crucial. I’ve found that oils like peanut oil maintain temperature more consistently than vegetable oil, which can fluctuate more with added food. At 350°F, you’re in the ideal range for most frying tasks, but don’t be afraid to adjust slightly based on what you’re cooking—delicate fish needs that lower 325-350°F range, while crispy coatings thrive at 375-400°F.
Visual Cues Matter: The wooden spoon test in Step 3 is my go-to when I don’t have a thermometer. Those tiny bubbles forming steadily around the wood at 350°F are your visual confirmation. Here’s what nobody tells you—if you’re using a darker pot, the bubbles might be harder to see, so angle the pot slightly toward a light source. This simple trick has saved me from underheated oil more times than I can count.
Batch Control: Step 5 mentions giving the oil 2-3 minutes to recover between batches, and this is where most home cooks go wrong. I learned the hard way that adding cold food to hot oil causes a significant temperature drop. For perfect results every time, I use a slotted spoon to remove food and immediately place it on paper towels, then give the oil that full 2-3 minutes to return to temperature before adding the next batch. This patience prevents greasy, unevenly cooked results.
Equipment Wisdom: While Step 1 recommends medium-high heat, I’ve noticed that electric stoves often need to be set slightly higher than gas to maintain the same oil temperature. If you’re using an electric stove, you might need to set it between medium-high and high to hit that 350°F sweet spot. Always watch the oil’s movement—a gentle shimmer means you’re in the right zone, while aggressive bubbling means it’s too hot.
Pro Tips for Tell When Oil Is Hot Enough To Fry
- Perfect frying starts with precision, and these practical insights will help you master the oil temperature every time.
- Temperature Precision: When using the thermometer method in Step 2, remember that the 30-second steady reading is cru…
- Visual Cues Matter: The wooden spoon test in Step 3 is my go-to when I don’t have a thermometer. Those tiny bubbles f…
Frequently Asked Questions
How long does it usually take for oil to reach frying temperature?
Most oils take 5–10 minutes to heat to 350–375°F (175–190°C) on medium-high heat. Use a thermometer for accuracy—thinner oils (like vegetable or peanut) heat faster than thicker ones (like olive oil). Patience prevents soggy food!
Can I fry without a thermometer? What’s the easiest test?
Try the wooden chopstick test: Dip a dry chopstick into the oil. If bubbles form steadily around it, the oil is ready (≈350°F). No bubbles? Too cold. Smoking? Too hot! Or toss in a small piece of bread
What happens if the oil isn’t hot enough before frying?
Too-cool oil = greasy, soggy food. Your food absorbs excess oil instead of sealing quickly, leading to a heavy texture. Ideal frying creates a crispy crust instantly—so wait for that active sizzle!
How do I fix oil that’s smoking or too hot?
Remove the pot from heat immediately and let it cool for 5–10 minutes. Smoking means the oil is past its smoke point (≈400°F+), which ruins flavor and creates harmful compounds. Discard it if it smells burnt.
Is there a safer alternative to deep-frying with hot oil?
Yes! Try air frying (uses 1–2 tbsp oil) or oven-frying (toss food in oil, bake at 425°F). For crispy results without the splatter, a cast-iron skillet with shallow oil (½ inch) also works great.
Now you’ve got the know-how to nail the perfect fry every time—no guesswork, no soggy results! 🎯 Whether you’re testing with a wooden stick, watching for that telltale shimmer, or using a thermometer for precision, confidence in the kitchen starts with the right oil temp. Ready to put it into action? Grab your favorite recipe (think crispy chicken, golden fries, or even donuts) and get frying—your taste buds will thank you!

Trained in classic French technique but raised on slow-cooked ribs and spicy rubs, she blends culinary skill with smoke and soul.
- Recipe for Boneless Pork Chops in Cast Iron Skillet: Sear and Baste to Juicy Perfection - October 3, 2026
- Recipe for Boneless Cross Rib Roast: Slow-Roasted Beef with Herb Crust - October 3, 2026
- Hamburgers in Sauce Recipe Crock Pot: Slow-Cooked Savory Delight - October 3, 2026