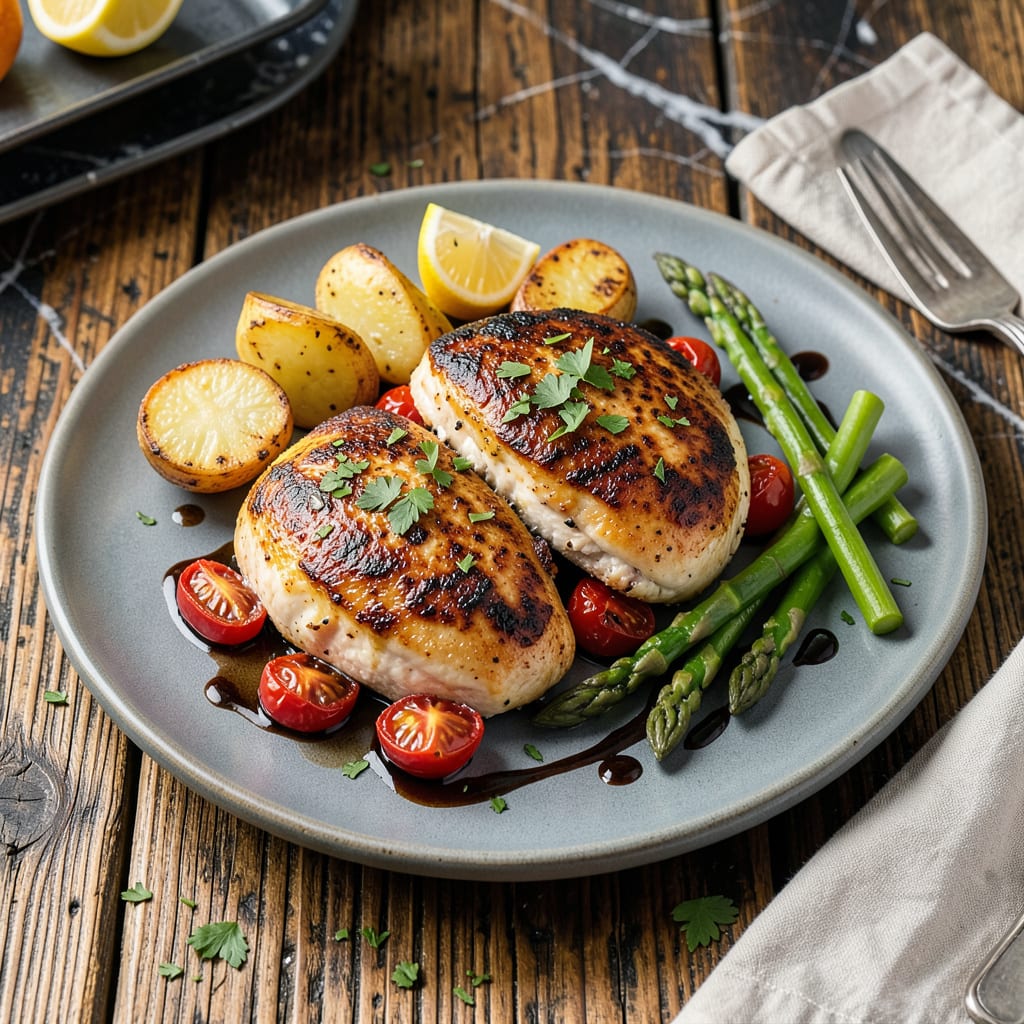
I’ll be real with you—cooking juicy chicken breast in a toaster oven is easier than you think, and it’s become my go-to method when I don’t want to heat up the whole kitchen. After burning through more dry, rubbery chicken than I’d like to admit, I finally cracked the code for perfect results every time. No fancy equipment, no complicated techniques—just simple steps that deliver tender, flavorful chicken.
The secret starts with proper prep. I always brine my chicken for at least 30 minutes (salt water works wonders) and pat it bone-dry before seasoning. This keeps the meat moist while helping it develop that golden-brown crust we all love. Your toaster oven’s small space actually works to your advantage here—it circulates heat efficiently for even cooking.
What you’ll end up with is chicken breast that’s juicy inside with a lightly crisped exterior, cooked perfectly in under 25 minutes. The best part? Cleanup is minimal since everything happens on one tray. I’ve made this for weeknight dinners and last-minute meal prep, and it never lets me down.
Serve it sliced over salads, paired with roasted veggies, or shredded for tacos. This method is so reliable, I’ve even used it for meal prepping—just cook a batch on Sunday and you’re set for the week. Let’s get that toaster oven working for you!
📚 In This Guide
- What You’ll Need
- Instructions
- Tips and Common Mistakes
What Youll Need
- ● Ingredients: 1–2 boneless, skinless chicken breasts (6–8 oz each)
- ● 1 tbsp olive oil or melted butter (for coating)
- ● ½ tsp salt (adjust to taste)
- ● ¼ tsp black pepper (freshly ground preferred)
- ○ Optional: 1 tsp garlic powder, paprika, or your favorite dry rub
- ● Tools & Equipment: Toaster oven (with bake/broil functions and temperature control)
- ● Small baking sheet or toaster oven-safe pan (check max size for your model!)
- ● Aluminum foil or parchment paper (for easy cleanup)
- ● Meat thermometer (for perfect doneness—highly recommended!)
- ○ Optional: Tongs or fork for flipping
- ● Prerequisites: Preheat toaster oven to 375°F (190°C) (or adjust per recipe)
- ● Pat chicken breasts dry with paper towels for crispier results
Instructions
Here’s the simple method I use to get perfectly juicy chicken breast every time—no fancy equipment needed.
Prep the Chicken for Even Cooking
Start by patting your chicken breasts completely dry with paper towels. This is crucial because moisture on the surface will steam the chicken instead of letting it brown properly. I like to place them between two sheets of plastic wrap and gently pound them to an even ¾-inch thickness using a meat mallet or rolling pin.
This even thickness ensures the chicken cooks uniformly, preventing dry edges while waiting for the center to finish. Season both sides generously with salt and pepper, and if you like, add a light drizzle of olive oil to help the seasoning stick and promote browning. Let the seasoned chicken rest at room temperature for 10 minutes before cooking.
Preheat and Set Up Your Toaster Oven
Position the oven rack in the middle of your toaster oven and preheat it to 375°F. I’ve found this temperature gives you the perfect balance of crispy exterior and juicy interior without drying out the meat. Line the toaster oven tray with aluminum foil for easy cleanup, then place a wire rack on top.
The wire rack is essential—it allows hot air to circulate around the entire chicken breast, cooking it evenly on all sides. If your toaster oven has a convection setting, turn it on for even better results. Let the oven fully preheat for at least 5 minutes before adding the chicken to ensure consistent cooking.
Cook the Chicken to Juicy Perfection
Place the prepared chicken breasts on the wire rack, leaving at least 1 inch of space between them so they cook evenly. Slide the tray into the preheated toaster oven and cook for 18-22 minutes, depending on thickness. The chicken is done when it reaches an internal temperature of 165°F in the thickest part.
Here’s the thing—I always check the temperature at the 15-minute mark because toaster ovens can vary. You’ll know it’s ready when the juices run clear if you pierce the thickest part with a knife, and the chicken feels firm but still slightly springy to the touch. Don’t cut into it to check—this lets all the juices escape!
Rest and Serve for Maximum Juiciness
Transfer the cooked chicken to a clean plate or cutting board and tent loosely with foil. Let it rest for 5-10 minutes before slicing or serving. I know it’s tempting to dig in right away, but this resting period allows the juices to redistribute throughout the meat instead of running out onto your plate when you cut into it.
When you’re ready to serve, slice against the grain for the most tender texture. The chicken should be moist and juicy throughout, with a lightly golden exterior. If you’ve followed these steps, you’ll have perfectly cooked chicken breast that’s anything but dry or rubbery—promise!
Tips and Common Mistakes
Here’s what I’ve learned from perfecting this method—small details that make a big difference in texture and flavor.
Even Thickness is Key: In Step 1, pounding the chicken to that exact ¾-inch thickness isn’t just about even cooking—it’s about preventing the dreaded dry edges. I use a rolling pin if I don’t have a mallet, and I always check with a ruler. This one step guarantees you won’t have half the breast overcooked while waiting for the thicker part to finish. Trust me, it’s worth the extra minute.
Temperature Check Timing: When you hit that 15-minute mark in Step 3, don’t just glance at the chicken—actually insert your thermometer. Toaster ovens have hot spots, and I’ve found that even in the same model, one side often cooks faster. At 15 minutes, you’ll know if you’re on track for the full 18-22 minutes or if you need to adjust your positioning.
The Wire Rack Secret: That wire rack in Step 2 isn’t optional—it’s what prevents soggy bottoms. I tried skipping it once (in a hurry) and ended up with steamed chicken instead of nicely browned. The rack allows air to circulate completely around each breast, giving you that perfect texture at 375°F. If your toaster oven doesn’t have a rack, prop the chicken on crumpled foil to elevate it.
Resting Makes Perfect: Those 5-10 minutes of resting in Step 4 might feel like torture when you’re hungry, but they’re non-negotiable. I learned this the hard way—cutting into chicken straight from the oven releases all the juices onto your plate instead of keeping them in the meat. Tent it loosely with foil to keep it warm while the fibers relax and reabsorb the moisture.
Pro Tips for Cook Chicken Breast In A Toaster Oven
- Here’s what I’ve learned from perfecting this method—small details that make a big difference in texture and flavor.
- Even Thickness is Key: In Step 1, pounding the chicken to that exact ¾-inch thickness isn’t just about even cooking—i…
- Temperature Check Timing: When you hit that 15-minute mark in Step 3, don’t just glance at the chicken—actually inser…
Frequently Asked Questions
Can I cook frozen chicken breast in a toaster oven?
Yes, but it’ll take 50–70% longer than thawed chicken. Cook at 375°F (190°C) for 25–35 minutes, flipping halfway. For safety, use a meat thermometer to confirm it reaches 165°F (74°C) internally. Thawing first yields juicier results!
How do I keep chicken breast from drying out in a toaster oven?
Brining (soak in saltwater for 30 mins) or marinating helps! Also, don’t overcook—pull it out at 160°F (71°C) and let it rest (temp rises to 165°F). Basting with olive oil or broth mid-cook adds moisture too.
What’s the best temperature and time for crispy chicken breast?
For crispy edges, preheat to 400°F (200°C) and cook for 18–22 minutes (flipping once). Lightly coat the chicken with oil and seasoning before cooking. Broil for the last 2–3 minutes for extra crunch!
Can I use aluminum foil or parchment paper in the toaster oven?
Yes! Parchment paper is safest (pre-cut to fit). If using aluminum foil, avoid direct contact with heating elements and poke holes for airflow. Never let foil touch the sides—fire risk!
What can I use instead of a toaster oven if I don’t have one?
Try an air fryer (375°F for 12–15 mins), skillet (medium heat, 6–8 mins per side), or microwave (for quick cooking, but texture suffers). Grilling works too—just watch for flare-ups!
Cooking chicken breast in a toaster oven is quicker, easier, and just as delicious as using a full-size oven! With the right prep, seasoning, and timing, you’ll get juicy, flavorful results every time—no fancy equipment needed. Whether you’re meal prepping or whipping up a fast dinner, this method saves time without sacrificing taste.
Ready to try it? Grab your favorite seasonings, fire up that toaster oven, and experiment with different flavors—like lemon-herb or spicy Cajun! For more easy recipes, check out our guide on toaster oven meal ideas next. Happy cooking! 🍗✨

Trained in classic French technique but raised on slow-cooked ribs and spicy rubs, she blends culinary skill with smoke and soul.
- Recipe For Fried Chicken In A Pressure Cooker: Crispy Golden Bites in Half the Time - October 3, 2026
- Recipe For Leftover Fried Fish: Crunchy Leftovers Transformed - October 3, 2026
- Recipe for Crock Pot Swiss Steak: Slow-Cooked Beef With Mushroom Gravy - October 3, 2026