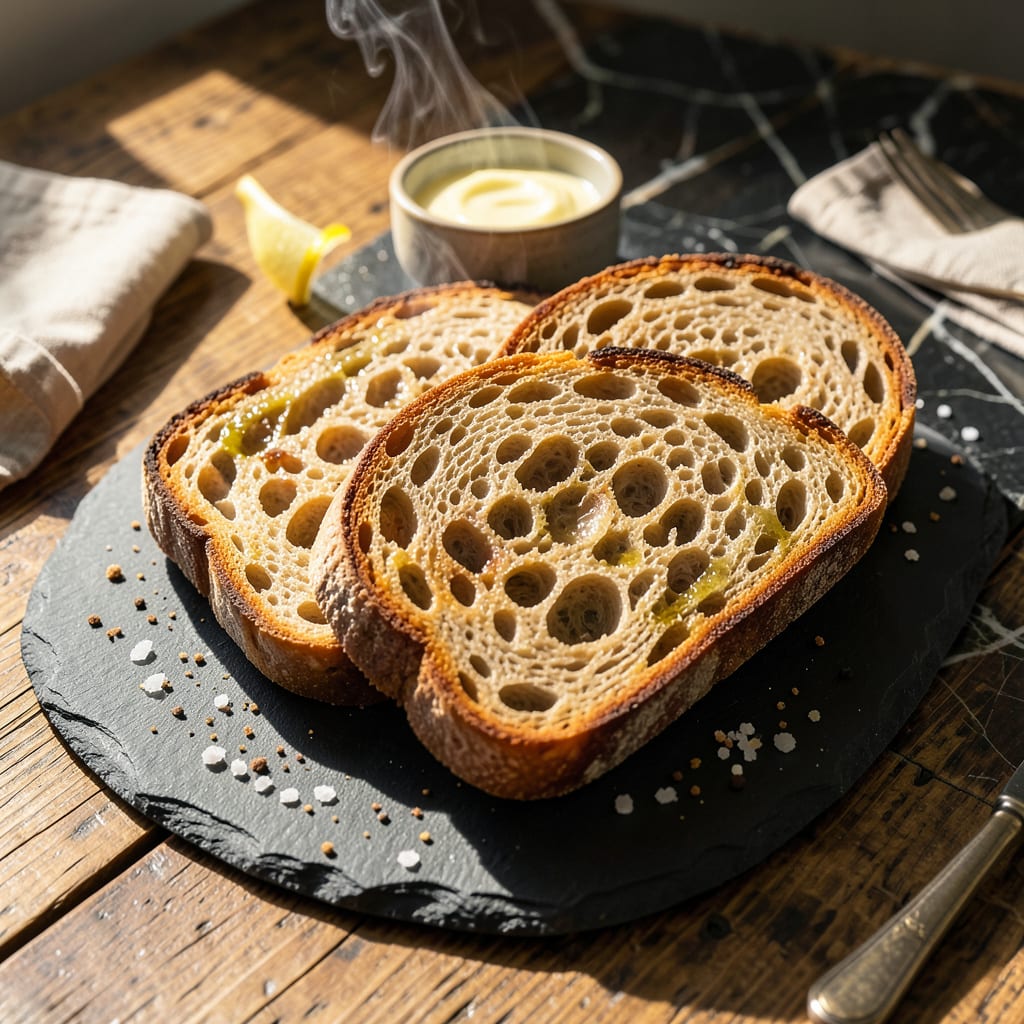
There’s nothing like perfectly toasted sourdough—crispy edges giving way to warm, chewy centers that practically melt in your mouth. I’ve burned more slices than I’d like to admit before nailing the timing and heat balance that makes all the difference. Whether you’re working with a toaster, oven, or stovetop, the right technique transforms good bread into something extraordinary.
What most people don’t realize is that sourdough’s thick crust and open crumb structure demand different treatment than regular bread. Too hot and you’ll char the outside before the inside warms; too cool and you’ll end up with sad, soggy slices. I’ve tested every method—from the classic toaster approach to the air fryer hack—and found the sweet spots that deliver consistent results every time.
The payoff is worth it: toast that stays crispy long enough to enjoy without turning into a cracker, with just the right amount of resistance when you bite in. And here’s the thing—once you master the basic technique, you can take it further with garlic butter, chili oil, or just a sprinkle of flaky salt for extra flavor dimension.
No fancy equipment required, just a few minutes and attention to detail. Let’s get that bread golden and delicious—the right way.
📚 In This Guide
- What You’ll Need
- Instructions
- Tips and Common Mistakes
What Youll Need
- ● 1-2 slices of sourdough bread (fresh or day-old, ½–1 inch thick for best texture)
- ● Toaster (2- or 4-slice, with adjustable browning settings) or
- ● Toaster oven (for even crispiness) or
- ● Skillet or cast-iron pan (10–12 inches, for stovetop toasting)
- ○ Butter or oil (1–2 tsp per slice, optional but highly recommended for extra flavor)
- ● Tongs or spatula (for flipping pan-toasted slices)
- ● Knife (serrated, if slicing a fresh loaf)
- ○ Cooling rack (optional, to keep toast crispy after toasting)
- ● Toppings (avocado, jam, nut butter, or eggs—your call!)
Instructions for Perfectly Toasted Sourdough Bread
Here’s exactly how I achieve that ideal balance between crispy crust and warm, chewy interior every time.
Choose the Right Bread and Prep Your Slices
Start with a quality sourdough loaf that has a good crust structure. I look for bread with visible air pockets and a slightly chewy texture – these characteristics will give you the best toasting results. Cut slices about ½-inch thick using a serrated bread knife.
Thinner slices will toast faster but risk burning before the center warms through. Thicker slices take longer but create that perfect contrast between crispy exterior and soft interior. For best results, use bread that’s at least a day old – fresh sourdough can be too moist and won’t crisp up as nicely.
Select Your Toasting Method and Preheat
You have two excellent options: toaster or oven. For the toaster method, set it to medium-high heat. If using an oven, preheat to 375°F and position the rack in the middle. I prefer the oven method for more even toasting, especially when making multiple slices.
For oven toasting, place slices directly on the oven rack or on a wire cooling rack set over a baking sheet. The wire rack allows air to circulate around both sides, creating even crispiness. If using a toaster, make sure it’s clean – old crumbs can burn and create smoke.
Toast to Golden Perfection
For toaster method, toast for 2-3 cycles until you achieve your desired level of browning. Watch closely during the final cycle – sourdough can go from perfectly toasted to burnt quickly due to its sugar content. For oven toasting, bake for 5-7 minutes per side.
You’ll know it’s done when the edges are deep golden brown and the surface has developed a crisp texture. The bread should feel firm when pressed gently. For extra crispiness, I sometimes add an extra 1-2 minutes once I see the edges start to darken – this creates that satisfying crunch.
Add Finishing Touches (Optional but Recommended)
Immediately after toasting, rub the warm bread with a garlic clove cut in half for subtle flavor, or brush lightly with olive oil for extra richness. The heat helps these flavors absorb beautifully. For a restaurant-style finish, sprinkle with flaky sea salt while still warm.
Let the toasted bread cool for just 1-2 minutes before serving. This brief rest allows the interior to finish setting while maintaining that perfect crispy exterior. Serve warm for the best texture contrast – the center should still have that wonderful chewy quality that makes sourdough so special.
Tips and Common Mistakes
Perfectly toasted sourdough is all about timing and technique—here’s how to nail it every time.
Bread Selection Matters: For Step 1, choose a sourdough loaf with visible air pockets and a sturdy crust. I learned the hard way that fresh sourdough doesn’t toast as well—day-old bread gives you that ideal crispy exterior while keeping the center soft. The ½-inch thickness mentioned in the instructions is perfect for achieving both crunch and chewiness without burning.
Oven Positioning Tip: In Step 2, when using the oven method at 375°F, place your rack in the exact center position. This ensures even heat distribution so both sides crisp uniformly. I’ve found that placing slices directly on the oven rack (rather than a sheet pan) gives the best airflow for that perfect golden-brown color.
Timing Secret: During Step 3, those 5-7 minutes per side at 375°F are critical. Watch for the edges to turn deep golden brown—this is your visual cue that the sugars are caramelizing properly. If you’re using the toaster method, the 2-3 cycles should produce similar results, but check after each cycle since toasters vary in heat intensity.
Resting is Key: Don’t skip the 1-2 minute rest in Step 4. This brief pause lets the interior finish setting while the exterior stays crisp. I always set a timer—it’s tempting to dig in immediately, but that extra minute makes all the difference in texture.
Pro Tips for Toast Sourdough Bread
- Perfectly toasted sourdough is all about timing and technique—here’s how to nail it every time.
- Bread Selection Matters: For Step 1, choose a sourdough loaf with visible air pockets and a sturdy crust. I learned t…
- Oven Positioning Tip: In Step 2, when using the oven method at 375°F, place your rack in the exact center position. T…
Frequently Asked Questions
Got questions about toasting sourdough? You’re not alone! Here are the most common queries—and quick answers—to help you nail that perfect golden slice every time.
How long should I toast sourdough bread in a toaster?
Toast sourdough for 2-3 minutes on medium-high heat (or until golden brown). Thicker slices may need an extra 30-60 seconds. Watch closely—sourdough’s crust can burn faster than soft bread! For extra crispiness, toast twice on a lower setting.
Can I toast sourdough without a toaster?
Use a skillet (medium heat, 2-3 mins per side with butter), oven (375°F for 5-7 mins), or air fryer (350°F for 3-4 mins). Pro tip: Spritz water on the crust before oven-toasting for extra crunch!
Why does my sourdough toast taste bitter or burnt?
Bitterness usually means over-toasting or using a heat setting that’s too high. Sourdough’s natural acidity also intensifies when charred. Try toasting at a lower temperature for longer, or remove the crust if it’s too dark before toasting.
Is it better to toast sourdough fresh or stale?
Stale sourdough toasts even better! The dried-out texture crisps up perfectly, while fresh sourdough can turn gummy. If your loaf is fresh, toast slices on a wire rack for 10-15 mins first to dry them slightly.
What’s the best butter for toasted sourdough?
Use unsalted European-style butter (higher fat = richer flavor) or cultured butter for tangy depth. For a twist, try brown butter or a sprinkle of flaky sea salt. Vegan? Coconut oil or olive oil adds delicious crunch!
Now you’ve got the secret to perfectly toasted sourdough—crispy on the outside, soft on the inside, and packed with that tangy flavor we all love! 🍞✨ Whether you prefer a quick stovetop sear, a slow oven bake, or a toaster trick, the key is patience and heat control. Next time you’re craving a cozy breakfast or a gourmet sandwich, put your new skills to the test with a slice of fresh sourdough. Hungry for more? Try experimenting with garlic butter, avocado, or a drizzle of honey to take your toast to the next level!

Trained in classic French technique but raised on slow-cooked ribs and spicy rubs, she blends culinary skill with smoke and soul.
- Meat Loaf Recipe With Beef And Pork: Homestyle Blend With Rich Gravy - October 3, 2026
- Hamburger Patty Recipe No Egg: Juicy Bind With Breadcrumbs and Milk - October 3, 2026
- Recipe for Oven Baked Halibut: Buttery White Fish with Zesty Lemon Topping - October 3, 2026