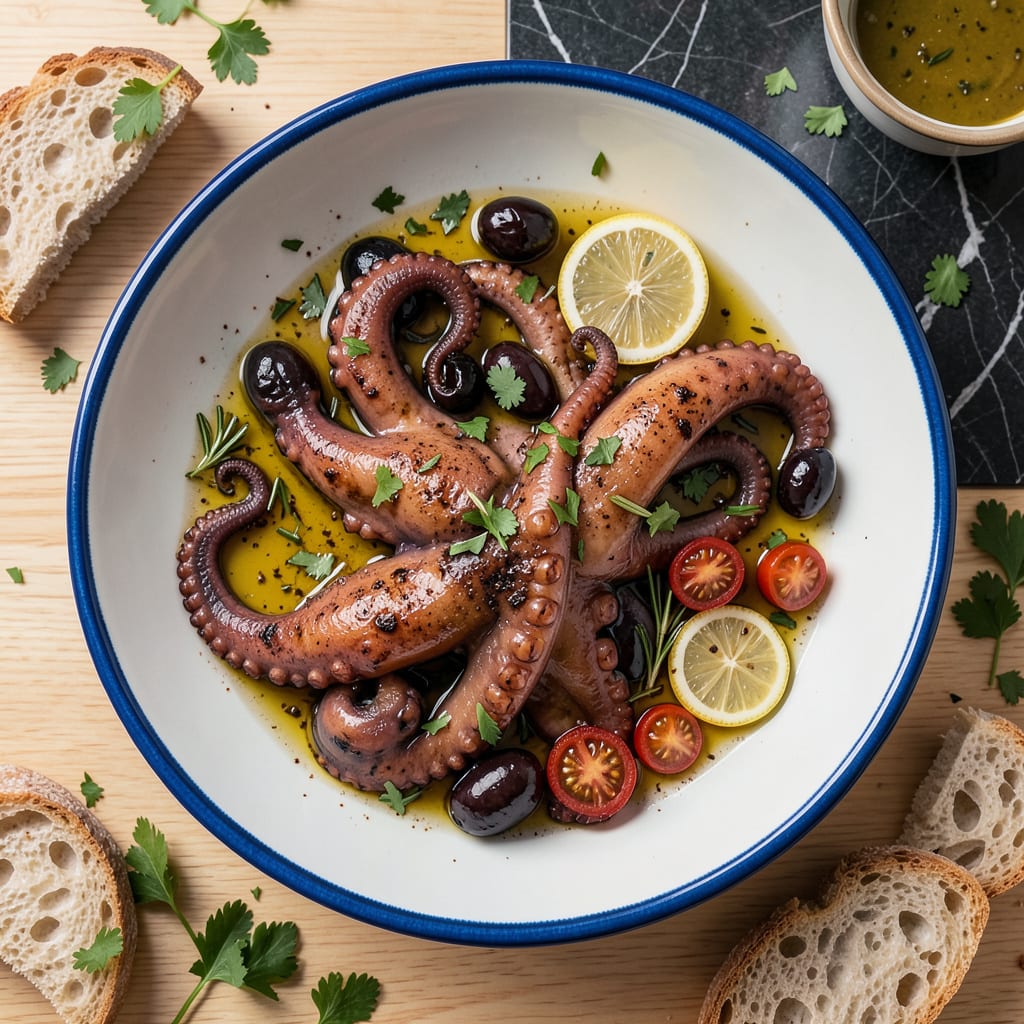
I’ll be real with you—cooking frozen octopus used to intimidate me until I discovered the secret to transforming that rubbery block into something tender and succulent. The key isn’t fancy techniques, but understanding how to work with the octopus’s natural texture. After ruining my first batch by rushing the thawing process, I learned that patience and proper preparation make all the difference.
Here’s the thing—octopus is naturally tough, but that changes completely when you handle it right. I use a simple freezing-thawing cycle that breaks down the fibers before cooking, then finish with either a quick grill or slow braise. The result is meat so tender it practically melts, with that perfect slightly chewy bite that makes octopus special. No special equipment needed, just some planning.
What you’ll end up with is octopus that’s worlds away from the rubbery version most people fear. Whether you’re grilling for charred edges or braising in a rich tomato sauce, the meat becomes buttery and flavorful. I love serving it with a bright lemon-olive oil dressing and crusty bread to soak up all the juices—simple but impressive enough for company.
Fair warning: this isn’t a 30-minute meal, but the hands-off time lets you prep other dishes. The payoff is worth it when you take that first bite of perfectly cooked octopus that actually lives up to its reputation. Let’s get that frozen octopus cooking right.
📚 In This Guide
- What You’ll Need
- Instructions
- Tips and Common Mistakes
What Youll Need
- ● Frozen octopus: 1–2 lbs (450–900g) per serving, thawed overnight in the fridge or using the quick-thaw method.
- ● Large pot: 5–6 quart capacity with a tight-fitting lid (stainless steel or enamel works best).
- ● Water: Enough to fully submerge the octopus (about 3–4 quarts for 1 lb).
- ● Salt: 2 tbsp coarse sea salt or kosher salt per gallon of water (adjust to taste).
- ○ Aromatics (optional but recommended): 1 halved lemon 🍋
- ● 2 bay leaves
- ● 4 garlic cloves, smashed
- ● 1 small onion, quartered
- ● 1 tsp black peppercorns
- ● Tongs or slotted spoon: For safely handling the octopus during cooking.
- ● Sharp knife or kitchen shears: To trim the beak or tentacles post-cooking.
- ○ Meat tenderizer (optional): A mallet or rolling pin for extra-tender results.
- ● Olive oil (for finishing): 2–3 tbsp extra-virgin for drizzling before serving.
- ● Serving platter: With a grooved design to hold juices (or a deep dish).
Instructions
Here’s the foolproof method I use to transform frozen octopus into something incredibly tender and flavorful.
Thaw the Octopus Properly
Begin by transferring your frozen octopus from the freezer to the refrigerator. This slow thawing process is crucial—it can take 12-24 hours depending on the size, but it preserves the texture better than quick methods. I always place it on a plate or in a bowl to catch any liquid that might escape as it thaws.
Never thaw octopus at room temperature or in warm water. These methods create uneven thawing that can lead to rubbery spots. You’ll know it’s ready when the octopus feels pliable throughout and any ice crystals have completely disappeared. If you’re in a hurry, you can use the cold water method: seal the octopus in a leak-proof bag and submerge it in cold water, changing the water every 30 minutes until thawed.
Tenderize Through Simmering
Fill a large pot with enough water to completely submerge the octopus, then bring it to a gentle simmer over medium heat. The key here is maintaining a temperature where small bubbles just break the surface—this should be around 180-190°F. I like to add a few aromatics like bay leaves or peppercorns to the water for subtle flavor.
Submerge the octopus completely and let it simmer uncovered for 45-60 minutes. You’ll notice the octopus will curl up dramatically at first—that’s normal. The simmering process breaks down the tough collagen in the meat, transforming it from rubbery to tender. You’ll know it’s ready when a knife pierces the thickest part of the tentacle with little resistance, almost like piercing a ripe banana.
Create Flavor Through Finishing
Once tender, remove the octopus from the simmering liquid and let it cool slightly. This is where you can get creative with flavors. I often brush it with a simple mixture of olive oil, lemon juice, and minced garlic, then let it marinate for 15-20 minutes while I prepare the rest of my meal. The acidity from the lemon helps balance the richness of the octopus.
For a more robust flavor, you can quickly sear the octopus in a hot pan for 1-2 minutes per side until the edges become slightly charred. This adds a delightful textural contrast to the tender meat. Alternatively, you can finish it on a hot grill for that smoky, charred flavor that pairs so well with octopus. Watch it carefully—it only needs a brief time over high heat to develop those beautiful grill marks.
Rest and Serve for Best Texture
After cooking, let the octopus rest for 5-10 minutes before serving. This brief rest allows the juices to redistribute throughout the meat, ensuring every bite is moist and flavorful. I find this step especially important if you’ve seared or grilled the octopus, as it prevents the juices from escaping when you cut into it.
When serving, cut the tentacles into bite-sized pieces and the body into thin slices. The texture should be tender yet slightly firm—never mushy. I love serving octopus with a simple squeeze of lemon, a drizzle of good olive oil, and perhaps some chopped fresh parsley or oregano. The contrast of the tender octopus with bright, fresh flavors is what makes this dish so special.
Tips and Common Mistakes
Cooking octopus can feel intimidating, but these key insights will help you achieve perfect tenderness every time.
The Thawing Difference: That 12-24 hour refrigerator thaw in Step 1 isn’t just about safety—it’s about texture. Rushing this with warm water creates uneven thawing that leads to rubbery spots. I learned this the hard way after ruining my first batch. The slow thaw preserves the delicate cell structure, which is why the octopus stays tender during cooking.
Temperature Control: In Step 2, maintaining that 180-190°F simmer is crucial. Too hot and the octopus will toughen; too cool and it won’t tenderize properly. I use a thermometer to check the water temperature—small bubbles should just break the surface. This gentle heat slowly transforms the collagen into gelatin, which is what makes the meat so succulent.
Doneness Test: During that 45-60 minute simmer, don’t rely on time alone. The octopus is ready when a knife slides into the thickest part of a tentacle with almost no resistance—like piercing a ripe banana. I check multiple spots because the tentacles and body cook at slightly different rates. If it’s still firm, give it another 10 minutes and test again.
Resting Matters: That 5-10 minute rest in Step 4 isn’t optional. I used to skip this until I noticed how much juicier the octopus was when I let it rest. The fibers relax and reabsorb moisture, so when you cut into it, the juices stay in the meat rather than running out onto your plate.
Pro Tips for Cook Frozen Octopus
- Cooking octopus can feel intimidating, but these key insights will help you achieve perfect tenderness every time.
- The Thawing Difference: That 12-24 hour refrigerator thaw in Step 1 isn’t just about safety—it’s about texture. Rushi…
- Temperature Control: In Step 2, maintaining that 180-190°F simmer is crucial. Too hot and the octopus will toughen; t…
Frequently Asked Questions
How long does it take to cook frozen octopus?
Cooking time depends on size and method! For boiling, expect 30–50 minutes (1 lb octopus). Grilling or roasting pre-cooked octopus takes 10–15 minutes. Always check tenderness with a fork—it should slide in easily when done.
Can I cook octopus without thawing it first?
Yes! Drop frozen octopus directly into boiling water (add vinegar or wine for tenderness). Avoid thawing in warm water—it can make the meat mushy. Cold-water thawing (12–24 hours) works too if you prefer.
Why is my cooked octopus rubbery?
Overcooking or undercooking is the usual culprit. Simmer low and slow—never boil aggressively. For extra tenderness, try a ice bath shock after boiling or pound the octopus lightly before cooking. Pro tip: Add a cork to the pot! (Yes, really—it’s a Mediterranean trick!)
What’s the best way to tenderize frozen octopus?
Freezing actually helps tenderize octopus! For extra softness:
- Boil with bay leaves, lemon, or wine.
- Simmer in a pressure cooker (20–25 mins).
- Marinate in olive oil and vinegar post-cooking.
Can I substitute fresh octopus for frozen in recipes?
Fresh octopus cooks ~20% faster. If using frozen, no need to adjust recipes—just ensure it’s fully thawed (unless boiling from frozen). Frozen is often pre-cleaned, saving you prep time.
Cooking frozen octopus doesn’t have to be intimidating—with the right techniques, you can turn it into a tender, flavorful masterpiece every time! 🎉 Whether you boil, grill, or braise it, the key is patience and proper prep. Now that you’ve got the know-how, why not pick a recipe and give it a try? Start with a simple boiled octopus salad or dive into a bold grilled octopus with lemon and herbs. Your next seafood adventure is just a thaw away! 🐙✨

Trained in classic French technique but raised on slow-cooked ribs and spicy rubs, she blends culinary skill with smoke and soul.
- Recipe for Boneless Pork Chops in Cast Iron Skillet: Sear and Baste to Juicy Perfection - October 3, 2026
- Recipe for Boneless Cross Rib Roast: Slow-Roasted Beef with Herb Crust - October 3, 2026
- Hamburgers in Sauce Recipe Crock Pot: Slow-Cooked Savory Delight - October 3, 2026