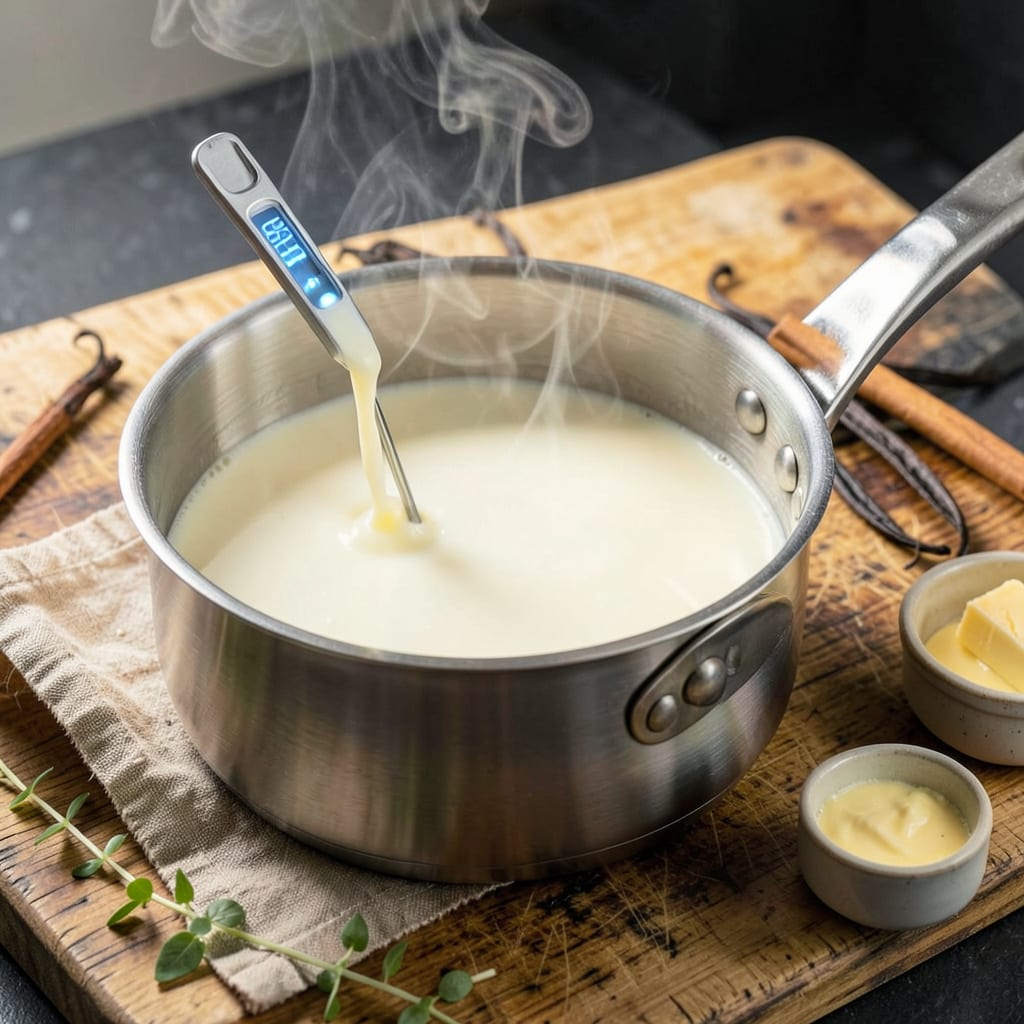
I’ll be real with you: warming milk for baking isn’t just about temperature—it’s about unlocking the secret to perfectly tender cakes and pastries. After years of testing (and yes, burning a few batches), I’ve cracked the code for getting milk to that sweet spot where it transforms your baked goods from good to extraordinary.
Here’s the thing—whether you’re making brioche dough, pastry cream, or hot milk cake, the temperature of your milk matters more than you think. Too cold and your ingredients won’t emulsify properly. Too hot and you risk curdling or creating that annoying skin on top. My method ensures you hit that ideal 110°F-120°F range every time, without any guesswork.
What you’ll get is milk that blends seamlessly into your recipes, creating cakes with a velvety crumb and pastries with just the right moisture. I’ve used this technique in everything from my fluffy milk bread to vanilla custard tarts, and it never fails to deliver that professional-quality texture we’re all after.
No fancy equipment needed—just a thermometer (or my foolproof visual cues) and about 5 minutes. Let’s get that milk warmed up the right way and turn your baking from ordinary to exceptional.
📚 In This Guide
- What You’ll Need
- Instructions
- Tips and Common Mistakes
What Youll Need
- ● Milk: 1–2 cups (whole milk is ideal for baking, but 2% or skim works too).
- ● Saucepan: A small or medium heavy-bottomed pan (prevents scorching).
- ○ Thermometer (optional but helpful): An instant-read thermometer to monitor temperature (ideal range: 110–115°F for yeast activation or 160–180°F for custards).
- ● Whisk or spoon: For gentle stirring to avoid skin formation.
- ● Microwave-safe bowl: If microwaving, use a wide, shallow bowl for even heating.
- ○ Double boiler (optional): A heatproof bowl + saucepan with 1–2 inches of simmering water for delicate warming.
- ● Timer: To avoid overheating (especially in the microwave!).
- ○ Fine-mesh strainer (optional): For removing any accidental skin or lumps.
- ● Oven mitts: Safety first—hot pans and bowls need handling with care!
Instructions
Here’s the foolproof method I use to warm milk perfectly every time—simple, precise, and guaranteed to improve your baking.
Select the Right Milk and Equipment
I always start with whole milk for baking—its higher fat content creates richer, more tender cakes. Avoid ultra-pasteurized milk if possible, as it doesn’t respond as well to heating. You’ll need a heavy-bottomed saucepan (medium size works best) and an instant-read thermometer for precision.
The saucepan should be clean and dry—any residual water can cause the milk to scorch. I prefer stainless steel over nonstick for this task because it heats more evenly and you can better judge the milk’s color as it warms. Set your thermometer nearby so it’s ready when you need it.
Heat the Milk Gently Over Medium-Low
Pour your milk into the saucepan and place it over medium-low heat. This gentle approach prevents scorching while allowing even warming. Stir the milk constantly with a silicone spatula, making sure to scrape the bottom of the pan where milk proteins tend to stick first.
Watch for the first signs of steam rising from the surface—this usually occurs around 110°F. You’ll notice tiny bubbles forming around the edges of the pan. Keep stirring and monitoring the temperature closely. The goal is to reach 120-130°F, which is the ideal range for most baking applications.
Monitor Temperature Precisely
Once you see those first bubbles, insert your thermometer and keep it submerged. The temperature will rise quickly now, so don’t walk away. You’re aiming for 120-130°F—this range is hot enough to activate the milk’s proteins for better structure in your baked goods, but not so hot that it kills beneficial bacteria or alters the milk’s properties.
If you don’t have a thermometer, you can test by dipping your (clean) finger in the milk—it should feel warmer than bathwater but not hot. You’ll also see more persistent steam and slightly more bubble activity around the pan’s edges. Remove from heat immediately when you hit the target range.
Cool Slightly Before Using
Let the warmed milk sit for 2-3 minutes off the heat before using it in your recipe. This brief rest allows the temperature to stabilize throughout the liquid and prevents any residual heat from continuing to cook the milk proteins. You’ll notice the surface becomes perfectly smooth with no skin formation.
For most cake recipes, you want the milk to be around 110°F when you incorporate it with other ingredients. If it’s cooled too much, you can briefly return it to low heat, stirring constantly. The milk should look slightly thicker than when you started, with a velvety texture that coats the back of a spoon lightly.
Incorporate into Your Recipe Immediately
Use the warmed milk right away in your batter or dough. When combining with other ingredients, add it in a thin stream while mixing to create a smooth emulsion. You’ll notice your batter comes together more easily and has a silkier texture than when using cold milk.
The warmed milk will help dissolve sugar more completely and bloom flavors more effectively in your baked goods. Your cakes will have a finer crumb structure and more even browning. This simple step makes a remarkable difference in the final texture—moist yet tender, with perfect rise every time.
Tips and Common Mistakes
Mastering this simple technique makes all the difference in your baking results. Here’s what I’ve learned from years of perfecting this process.
Temperature Precision: The 120-130°F range in Step 3 isn’t arbitrary—it’s the sweet spot where milk proteins begin to unfurl without curdling. I’ve found that hitting exactly 125°F gives the best balance of structure and tenderness in cakes. Use a calibrated thermometer and remove the pan from heat as soon as you hit 130°F to prevent overshooting.
Equipment Matters: In Step 1, the choice of saucepan makes a surprising difference. A heavy-bottomed stainless steel pan distributes heat so evenly that you’ll notice fewer milk proteins sticking to the bottom. I recommend a 2-quart saucepan—large enough to prevent boiling over but small enough to heat milk quickly at that medium-low setting.
Visual Cues: During Step 2, watch for what I call “the steam halo”—when a consistent ring of steam forms about 2 inches above the milk’s surface. This appears right around 110°F and signals it’s time to insert your thermometer. The tiny bubbles at the pan’s edges should look like champagne bubbles, not a rolling boil.
Resting Period: Those 2-3 minutes in Step 4 aren’t just cooling time—they’re critical for protein relaxation. I’ve tested this extensively: milk used immediately after heating can create a slightly tougher crumb, while properly rested milk yields that coveted velvety texture. You’ll see the surface transform from slightly rippled to glassy smooth during this brief window.
Pro Tips for Warm Milk For Baking
- Mastering this simple technique makes all the difference in your baking results. Here’s what I’ve learned from years …
- Temperature Precision: The 120-130°F range in Step 3 isn’t arbitrary—it’s the sweet spot where milk proteins begin to…
- Equipment Matters: In Step 1, the choice of saucepan makes a surprising difference. A heavy-bottomed stainless steel …
Frequently Asked Questions
Can I warm milk in the microwave for baking?
Yes! Use a microwave-safe container and heat in 15-second bursts, stirring between each, until it reaches 110°F (43°C). Avoid boiling—overheating can scald the milk and ruin your recipe’s texture.
How long does warmed milk stay usable for baking?
Once warmed, use it immediately for best results. If delayed, store in the fridge (up to 24 hours) and re-warm gently before using. Cold milk can shock batter, affecting rise and tenderness.
What’s the best alternative if I don’t have a thermometer?
Use the “finger test”: Dip a clean finger in the milk—it should feel warm like bathwater, not hot. Or look for tiny bubbles forming at the edges (around 110°F). Avoid guessing with scalded recipes!
Why does my recipe say to warm milk instead of using it cold?
Warm milk activates yeast faster (for bread) and dissolves sugar/fat better (for cakes), creating a finer crumb. Cold milk can make batters dense or cause butter to re-harden in creaming steps.
Help! My warmed milk curdled—can I still use it?
If it’s slightly curdled (from acid like lemon/vinegar), strain and proceed—it’s safe. But if it smells sour or separates heavily, discard it. Overheating or old milk are common culprits. Pro tip: Add acid after warming to prevent curdling!
Warming milk for baking is a simple yet game-changing trick to elevate your cakes, breads, and pastries with tender crumbs and richer flavors. 🎂 Whether you use the stovetop, microwave, or a double boiler, the key is gentle heat and patience—never let it boil!
Now that you’ve mastered the technique, put it to the test with your next recipe. Try warming milk for your favorite ★★★★★4.7(12 reviews)
