Ever burned your fingers trying to rush hot rice into fried rice? I’ve been there—steam rising, impatiently stirring, only to end up with mushy grains. Here’s the thing: cooling rice quickly isn’t just about speed, it’s about perfect texture and food safety. Whether you’re prepping for meal prep or whipping up last-minute fried rice, this method changes everything.
After years of trial (and plenty of error), I cracked the code. The secret lies in maximizing surface area and heat transfer—no fancy equipment needed. A simple baking sheet and some smart techniques can drop your rice temperature from steaming hot to ready-to-cook in under 20 minutes. This isn’t just faster; it’s foolproof.
What you’ll get is rice that’s dry, separate, and at the ideal temperature for frying—no clumps, no mush, just those perfect golden grains. I use this method every time I make fried rice, and it’s the difference between “meh” and “restaurant-quality” results. The best part? It works for any rice dish where texture matters.
From sushi rice to grain bowls, this technique becomes your kitchen superpower. No more waiting hours or risking food safety issues. Let’s get that rice cooled down the right way—quickly, safely, and with pro-level results.
📚 In This Guide
- What You’ll Need
- Instructions
- Tips and Common Mistakes
What Youll Need
- ● Cooked rice – 2–4 cups (freshly cooked or day-old, but hot if fresh)
- ● Large baking sheet or tray – Rimmed, non-insulated (18×13 inches or larger for even spreading)
- ○ Parchment paper or silicone mat – Optional (prevents sticking, makes cleanup easier)
- ● Rice paddle or spatula – Heat-resistant, for spreading rice evenly
- ○ Fan or airflow source – Optional (handheld fan, ceiling fan, or even an open window for faster cooling)
- ● Timer – To track cooling time (aim for 30–60 minutes max)
- ○ Clean kitchen towels or paper towels – Optional (to pat dry excess moisture if needed)
- ○ Ice water bath setup – Optional for emergency cooling (large bowl + ice + water + sealed rice container)
- ○ Food thermometer – Optional but recommended (to check rice reaches 70°F (21°C) or below)
Instructions
Here’s the foolproof method I use every time—fast, effective, and guaranteed to give you perfect results.
Spread the Rice in a Single Layer
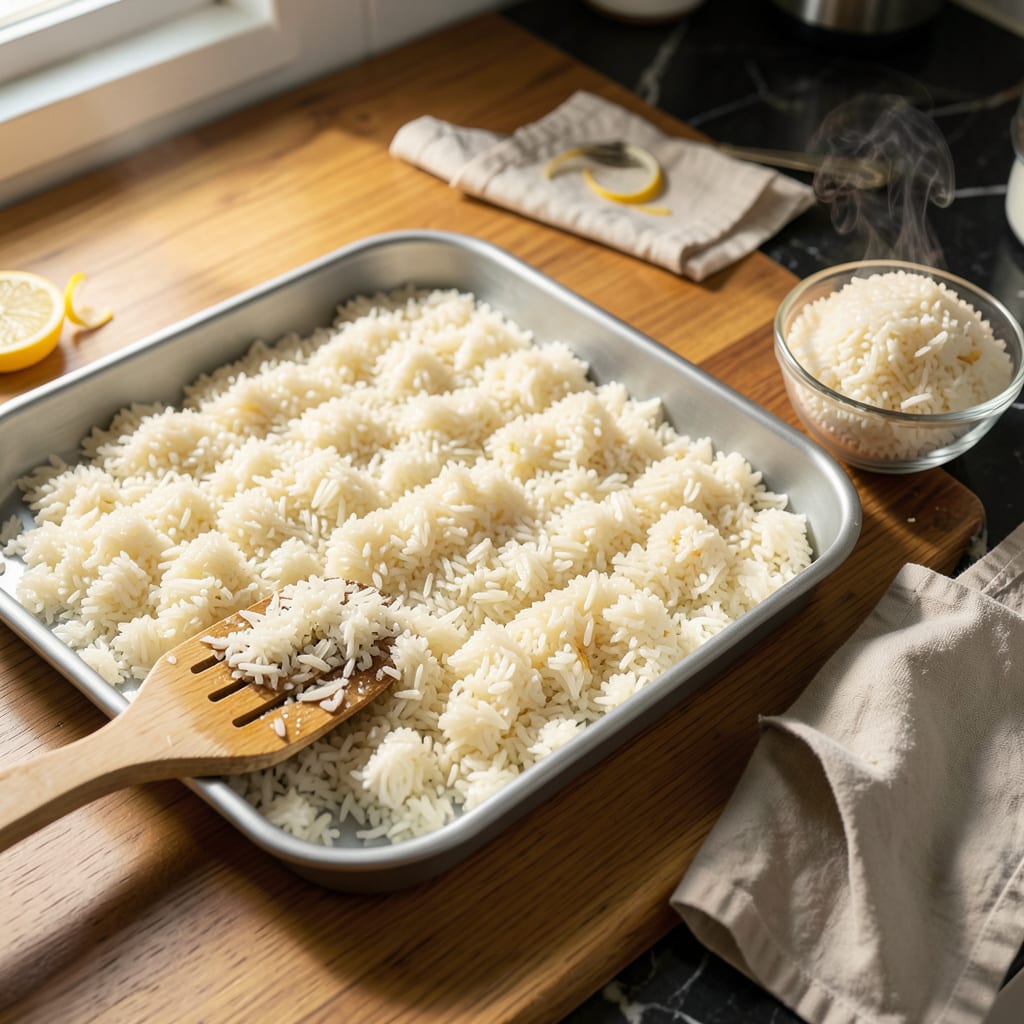
As soon as your rice finishes cooking, immediately transfer it to a large, clean baking sheet. I use a rimmed half-sheet pan for this because it provides maximum surface area. Spread the rice out in an even layer, breaking up any clumps with a fork or rice paddle.
The key here is maximizing exposure to air. When rice sits in a pot after cooking, it continues to steam and becomes mushy. By spreading it thinly, you create more surface area for heat to escape and moisture to evaporate. This step alone cuts cooling time by half compared to leaving it in the pot.
Use the Two-Pan Technique for Rapid Cooling
Here’s the chef’s secret: place the baking sheet with rice in your freezer for exactly 5 minutes. While it’s in there, fill another baking sheet with ice cubes and spread them evenly across the surface. After the 5 minutes, remove the rice and immediately place the ice-filled sheet on top.
This creates a dramatic temperature differential that pulls heat out of the rice from both above and below. The ice melts quickly, absorbing heat energy, while the cold air from the freezer continues working from underneath. You’ll see the difference immediately—the rice will go from steaming hot to just warm in under 10 minutes total.
Fluff and Aerate for Perfect Texture
After removing the ice sheet, use a fork to gently fluff the rice, turning it over and breaking up any remaining clumps. I like to run the fork through the rice in a lifting motion rather than stirring—this separates the grains without crushing them.
At this point, the rice should be cool to the touch and completely dry to the eye. If you’re preparing it for fried rice, you’ll notice the grains are firm and separate easily. This is exactly what you want! The texture should be slightly al dente, with each grain distinct and not sticky. If it’s still warm, let it sit at room temperature for another 5 minutes before using.
Test and Adjust for Your Recipe
Before using the cooled rice, do this quick test: take a small handful and squeeze it gently. Perfectly cooled rice will hold its shape briefly then fall apart into individual grains. If it sticks together, it needs more cooling time or wasn’t spread thinly enough initially.
For fried rice, you want the rice to be completely cool—ideally even slightly chilled. If you’re using it immediately, pop the baking sheet back in the freezer for another 2-3 minutes. The rice should make a slight rustling sound when you run your fingers through it, almost like dry sand. This is your signal that it’s ready for the wok or skillet!
Tips and Common Mistakes
This method is all about speed and precision—here’s how to make it work flawlessly every time.
Timing Secret: Those 5 minutes in the freezer during Step 2 are absolutely critical! Set a timer and don’t walk away—this exact duration creates the perfect temperature drop without freezing the rice solid. The moment the timer goes off, you need to be ready with your ice sheet to maximize the cooling effect. This precise timing is what makes the whole process work in under 10 minutes total.
Equipment Tip: Use a rimmed baking sheet exactly as mentioned in Step 1—it’s not just about size, it’s about the raised edges. They prevent rice from spilling when you’re moving it quickly between freezer and counter. I’ve tried regular cookie sheets and lost half my rice during the transfer! The rimmed sheet also helps contain the ice cubes in Step 2 for maximum contact with the rice.
Texture Check: When you’re fluffing the rice in Step 3, listen for that “rustling sound” mentioned in Step 4—it’s your audio cue for perfect doneness! The rice should sound like dry sand when you run your fingers through it. If it’s still making a damp, sticking sound, it needs more time. This simple sound test is more reliable than just looking at it.
Make-Ahead Move: You can actually cool the rice completely and store it in the fridge for up to 3 days before using. Spread it on the baking sheet, cool it fully using this method, then transfer to an airtight container. When ready to use, just fluff it with a fork—no need to reheat! The pre-cooled rice will give you even better fried rice results.
Pro Tips for Cool Rice Quickly
- This method is all about speed and precision—here’s how to make it work flawlessly every time.
- Timing Secret: Those 5 minutes in the freezer during Step 2 are absolutely critical! Set a timer and don’t walk away—…
- Equipment Tip: Use a rimmed baking sheet exactly as mentioned in Step 1—it’s not just about size, it’s about the rais…
Frequently Asked Questions
How long does it take to cool rice quickly using these methods?
Most methods (like spreading on a tray or using ice baths) cool rice in 10–20 minutes, depending on room temperature and rice quantity. For best results, stir occasionally to release heat faster.
Can I cool rice in the fridge instead of using these tricks?
Yes, but it takes 1–2 hours and may clump. For fried rice, rapid cooling (like tray spreading) prevents mushiness. If fridging, flatten rice in a thin layer on a plate first for quicker results.
What if my rice is still sticky after cooling?
Sticky rice often means excess moisture. Try patting it dry with a paper towel or spreading it thinner next time. For fried rice, a quick toss in a hot pan with oil can help separate grains.
Are there alternatives if I don’t have a baking sheet or fan?
Use a large plate, colander, or even a clean countertop (if sanitary). Stirring frequently with a fork speeds up cooling. A hairdryer on cool setting (held far away) works in a pinch!
Does cooling rice this way affect its texture for fried rice?
No—it actually improves it! Rapid cooling prevents overcooking and keeps grains firm. Just don’t let rice dry out completely; a slight moisture balance is key for perfect fried rice.
Cooling rice quickly doesn’t have to be a hassle—now you’ve got chef-approved tricks to nail it every time! 🎯 Whether you’re spreading it on a tray, using ice water, or popping it in the fridge, speed and safety are key. Next time you’re craving perfect fried rice or meal prep, put these methods to the test and say goodbye to soggy grains.
Ready to level up? Try your freshly cooled rice in a quick stir-fry or share your favorite cooling hack in the comments! ⬇️

Trained in classic French technique but raised on slow-cooked ribs and spicy rubs, she blends culinary skill with smoke and soul.
- Recipe for Fried Pork Chops With Flour: Crispy Crust and Juicy Centers - October 3, 2026
- Octopus Recipe Pan Fried: Crispy Edges With Tender Bites - October 3, 2026
- Recipe For Fried Pork Chops In An Iron Skillet: Crispy Crust With Juicy Centers - October 3, 2026