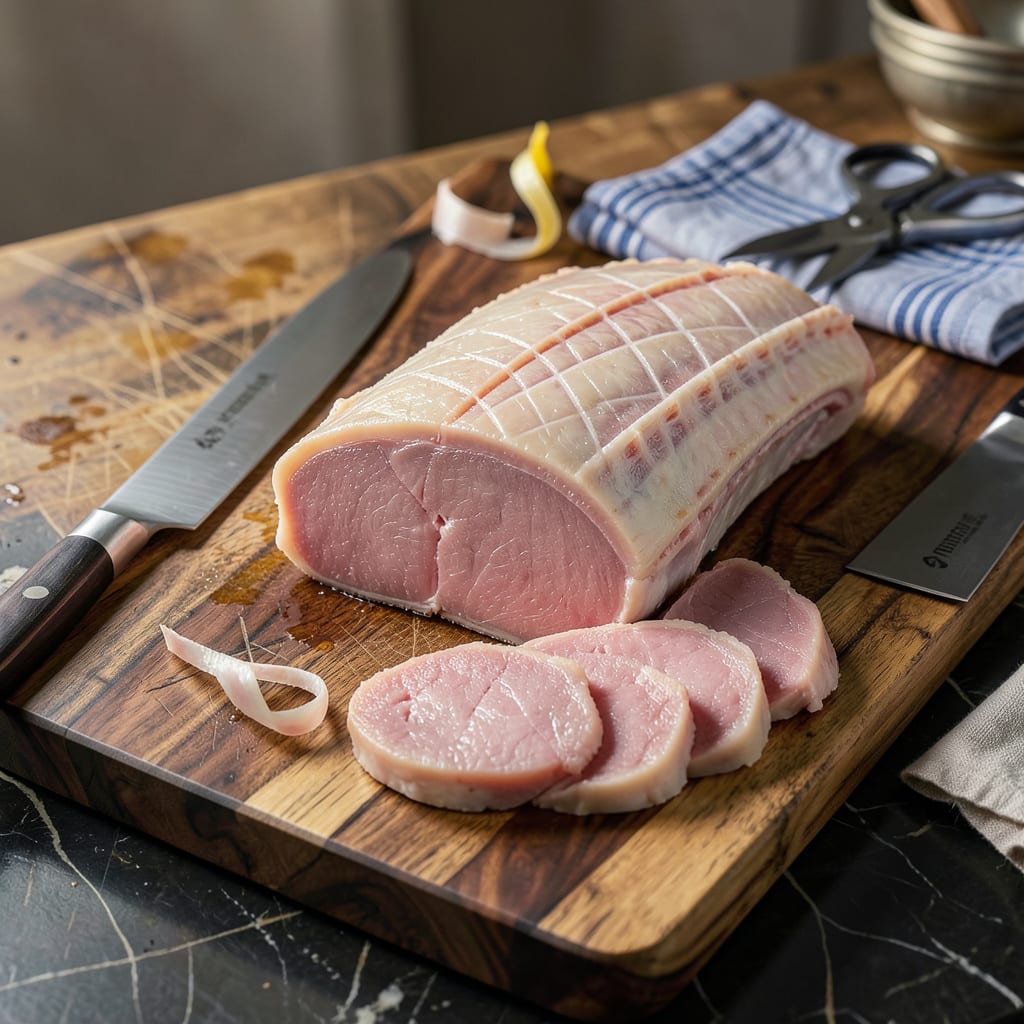
Cutting a pork loin properly changes everything—from tender chops to perfect roasts. I’ve butchered hundreds of these over open flames and in professional kitchens, and the right technique means no wasted meat, even cooking, and restaurant-quality results every time. Whether you’re working with bone-in or boneless, this method gives you complete control over thickness and portion size.
You don’t need fancy tools, just a sharp chef’s knife (8-10 inches works best) and a stable cutting board. I always recommend placing a damp towel underneath to prevent slipping—safety first when handling raw meat. The key is working with cold pork straight from the fridge; it firms up the meat for cleaner cuts and better portion control.
Master this skill and you’ll unlock endless possibilities: thick-cut chops for grilling, thin slices for stir-fry, or a perfectly trimmed center-cut roast. I use these cuts for everything from my competition-style smoked loin to quick weeknight pork schnitzel. The difference between store-bought pre-cut and doing it yourself? Night and day in both flavor and texture.
Here’s where it gets interesting—this isn’t just about cutting meat, it’s about understanding how different slices perform in various recipes. A 1-inch chop stays juicy on the grill, while paper-thin slices transform into crispy carnitas. Let’s break down the process step by step.
📚 In This Guide
- What You’ll Need
- Instructions
- Tips and Common Mistakes
What Youll Need
- ● Pork loin: 1 whole (typically 3–5 lbs, bone-in or boneless)
- ● Cutting board: Large (at least 12″x18″), preferably wood or thick plastic
- ● Knives: 1 sharp chef’s knife (8–10″ blade)
- ○ 1 boning knife (optional, for bone-in cuts)
- ● Kitchen shears (for trimming fat)
- ○ Meat thermometer (optional, to check doneness if cooking immediately)
- ● Paper towels (to pat the meat dry for better grip)
- ● Bowl or tray (to hold trimmed fat/scraps)
- ● Plastic wrap or butcher paper (for storing portions)
- ○ Gloves (optional, for hygiene or grip)
Instructions for Cutting a Pork Loin Like a Pro
Master this essential butchery skill and transform whole pork loin into restaurant-quality cuts with confidence.
Prepare Your Workspace and Tools
Start by setting up a stable cutting surface—I use a heavy wooden cutting board that won’t slip. Place a damp kitchen towel underneath to prevent movement during cutting. Gather your essential tools: a sharp boning knife (6-8 inches), a chef’s knife (8-10 inches), and kitchen shears for trimming.
I always keep a bowl of ice water nearby to periodically dip my knives in—this helps maintain a sharper edge during extended cutting sessions. Arrange your pork loin with the fat cap facing up and the spine side down. This orientation gives you better control and visibility as you work through each cut.
Remove the Fat Cap and Silver Skin
Begin by trimming the thick fat cap from the top of the loin. Use your boning knife to make a shallow cut along the length, then angle the blade slightly upward to remove the fat in one clean piece. I like to leave about 1/8-inch of fat for flavor and moisture retention during cooking.
Next, tackle the silver skin—the tough connective tissue on the underside. Slide your boning knife under the silver skin at a 30-degree angle and work it free in smooth, controlled strokes. This membrane doesn’t break down during cooking, so complete removal is crucial for tender results. Take your time here—rushing leads to uneven cuts and wasted meat.
Separate the Tenderloin from the Main Loin
Locate the tenderloin running along the underside of the loin—it’s the smaller, darker muscle that tapers at both ends. Make a shallow cut where the tenderloin meets the main loin, then use your boning knife to carefully separate them. I find it helpful to pull the tenderloin gently away from the main loin as I cut to expose the natural seam.
Once separated, you’ll have two distinct cuts: the tenderloin (perfect for quick cooking methods) and the main loin (ideal for roasting or cutting into chops). The tenderloin should come away cleanly with minimal meat loss—this is where a sharp knife truly pays off. Set both pieces aside on a clean tray.
Portion the Main Loin into Chops or Roasts
For perfect pork chops, position the main loin with the fat cap facing you. Using your chef’s knife, make clean, straight cuts perpendicular to the loin. I recommend 1-inch thick chops for optimal cooking—they’re thick enough to stay juicy but cook through evenly. For bone-in chops, cut between the ribs for natural portioning.
If preparing a roast, leave the loin whole or cut into 2-3 pound sections. For even cooking, I suggest tying the roast at 1-inch intervals with butcher’s twine to maintain shape. Remember to cut against the grain when portioning for serving—this ensures maximum tenderness in every bite.
Final Trimming and Storage
Inspect each cut for any remaining silver skin or excess fat. Use your boning knife to make precise trimming cuts—this final touch makes all the difference in presentation and eating quality. I like to trim the rib bones on chops to about 1-inch length for an elegant French-style presentation.
Package your cuts immediately for storage. Vacuum-sealing extends freshness significantly, but tight plastic wrap works well for short-term storage. Label each package with the cut type and date—I recommend using chops within 3 days or freezing for up to 6 months. The tenderloin is best used within 2 days for peak tenderness.
Tips and Common Mistakes for Perfect Pork Loin Portions
Let me share the professional secrets that transform good cuts into extraordinary ones—these are the details butchers know but rarely tell home cooks.
Knife Mastery: Your boning knife should feel like an extension of your hand. I maintain razor-sharp edges by honing before each session and dipping blades in ice water every 5-7 minutes during extended cutting. The 30-degree angle mentioned in Step 2 isn’t arbitrary—it’s the perfect balance between control and efficiency when removing silver skin. Practice this angle on less expensive cuts first to build muscle memory.
Fat Cap Precision: That 1/8-inch fat layer you leave in Step 2 makes all the difference between dry and succulent pork. Use your fingertips to measure—it should feel like the thickness of two stacked dimes. Any thicker and you risk chewiness; thinner and you lose moisture during cooking. I’ve found this exact measurement delivers perfect caramelization when searing while keeping the meat impossibly tender.
Seam Identification: The natural seam between tenderloin and main loin in Step 3 reveals itself if you flex the meat slightly. Run your fingers along the underside—you’ll feel a slight give where they separate. This is where your knife should glide through with almost no resistance. I’ve butchered hundreds of loins, and this tactile check never fails to identify the perfect cutting path.
Presentation Perfection: Those 1-inch rib bones you trim in Step 5 aren’t just for looks—they create the ideal meat-to-bone ratio for elegant presentation while ensuring each chop cooks evenly. Use your kitchen shears to make clean cuts through the cartilage between bones rather than sawing through bone. The result? Restaurant-quality chops that impress before the first bite.
Pro Tips for Cut A Pork Loin
- Let me share the professional secrets that transform good cuts into extraordinary ones—these are the details butchers…
- Knife Mastery: Your boning knife should feel like an extension of your hand. I maintain razor-sharp edges by honing b…
- Fat Cap Precision: That 1/8-inch fat layer you leave in Step 2 makes all the difference between dry and succulent por…
Frequently Asked Questions
How long does it take to cut a pork loin into chops?
For a beginner, expect 15–20 minutes for a 2–3 lb loin. With practice, you can trim and slice it in 10 minutes or less. Pro tip: Chill the pork for 30 minutes beforehand—firmer meat cuts cleaner!
Can I cut a pork loin without a boning knife?
A chef’s knife (8–10″) or long slicing knife works fine. Just use smooth, controlled strokes. Avoid serrated knives—they tear the meat. For trimming fat, a paring knife helps with precision.
What’s the best thickness for pork chops?
Aim for 1–1.5 inches thick for juicy, even cooking. Thinner chops (½–¾”) dry out faster but cook quickly—great for grilling! Use a ruler or your finger (1 inch ≈ width of your pinky).
How do I keep pork chops from drying out after cutting?
Pat them dry, then brine for 30 minutes (¼ cup salt + 4 cups water) or coat in olive oil before storing. Wrap tightly in plastic and refrigerate for up to 3 days. Freeze for longer storage (up to 6 months).
Can I use pork loin for pulled pork instead of chops?
Yes! Skip the slicing and slow-cook the whole loin (6–8 hours at 225°F) until it shreds easily. For best results, choose a bone-in loin and trim excess fat first.
Now that you’ve mastered how to cut a pork loin like a pro, you’re ready to turn that perfect cut into a mouthwatering meal! 🍽️ Whether you’re grilling chops, slow-cooking a roast, or searing tender medallions, precision makes all the difference. Grab your knife, pick a recipe, and let your new skills shine—your taste buds (and dinner guests) will thank you!
Next up: Try our favorite pork loin recipes to put your butchering prowess to delicious use!

Trained in classic French technique but raised on slow-cooked ribs and spicy rubs, she blends culinary skill with smoke and soul.
- Recipe for Boneless Pork Chops in Cast Iron Skillet: Sear and Baste to Juicy Perfection - October 3, 2026
- Recipe for Boneless Cross Rib Roast: Slow-Roasted Beef with Herb Crust - October 3, 2026
- Hamburgers in Sauce Recipe Crock Pot: Slow-Cooked Savory Delight - October 3, 2026